
Here are some articles regarding Kubernetes:
- Crash blog to start with Kubernetes - Installation and Configuration - Part1
- Crash blog to start with Kubernetes - Microservices, Docker and Kubernetes - Part2
- 30 basic commands to start with Docker Container
- Installing, Updating and Playing around with a Docker container
- Continuous Learning of Kubernetes - Part1
So part2 is going to focus on some fundamental commands, and diving into the Kubernetes Cluster.
I won't go into basic commands like
kubectl get nodes -o wide or kubectl get pods -o wide. These should be pretty straightforward. Otherwise most of the commands are already displayed at https://kubernetes.io/docs/reference/kubectl/quick-reference/. But I will go through some interesting commands and workarounds that I come across.
Using Several Network Interfaces
Back in 2020, when I published the first blog about installation and configuration of Kubernetes, I explained how to bootstrap the cluster. However, if you have several network interfaces and want to designate a specific one as management, then you would need to instruct kubeadm to bootstrap using the Control Plane IP address by parsing--node-ip=<IP of the Control Plane management Interface IP> on all of the nodes followed by a restart of the Kubelet.
Some Interesting Commands
To understand the node you can do akubectl describe node. The "Describe" function gives health information about the node and talks about network, memory, and disk in brief. It's the preliminary lookup.
As you can see the describe node has many fields. Let's look at some of them:
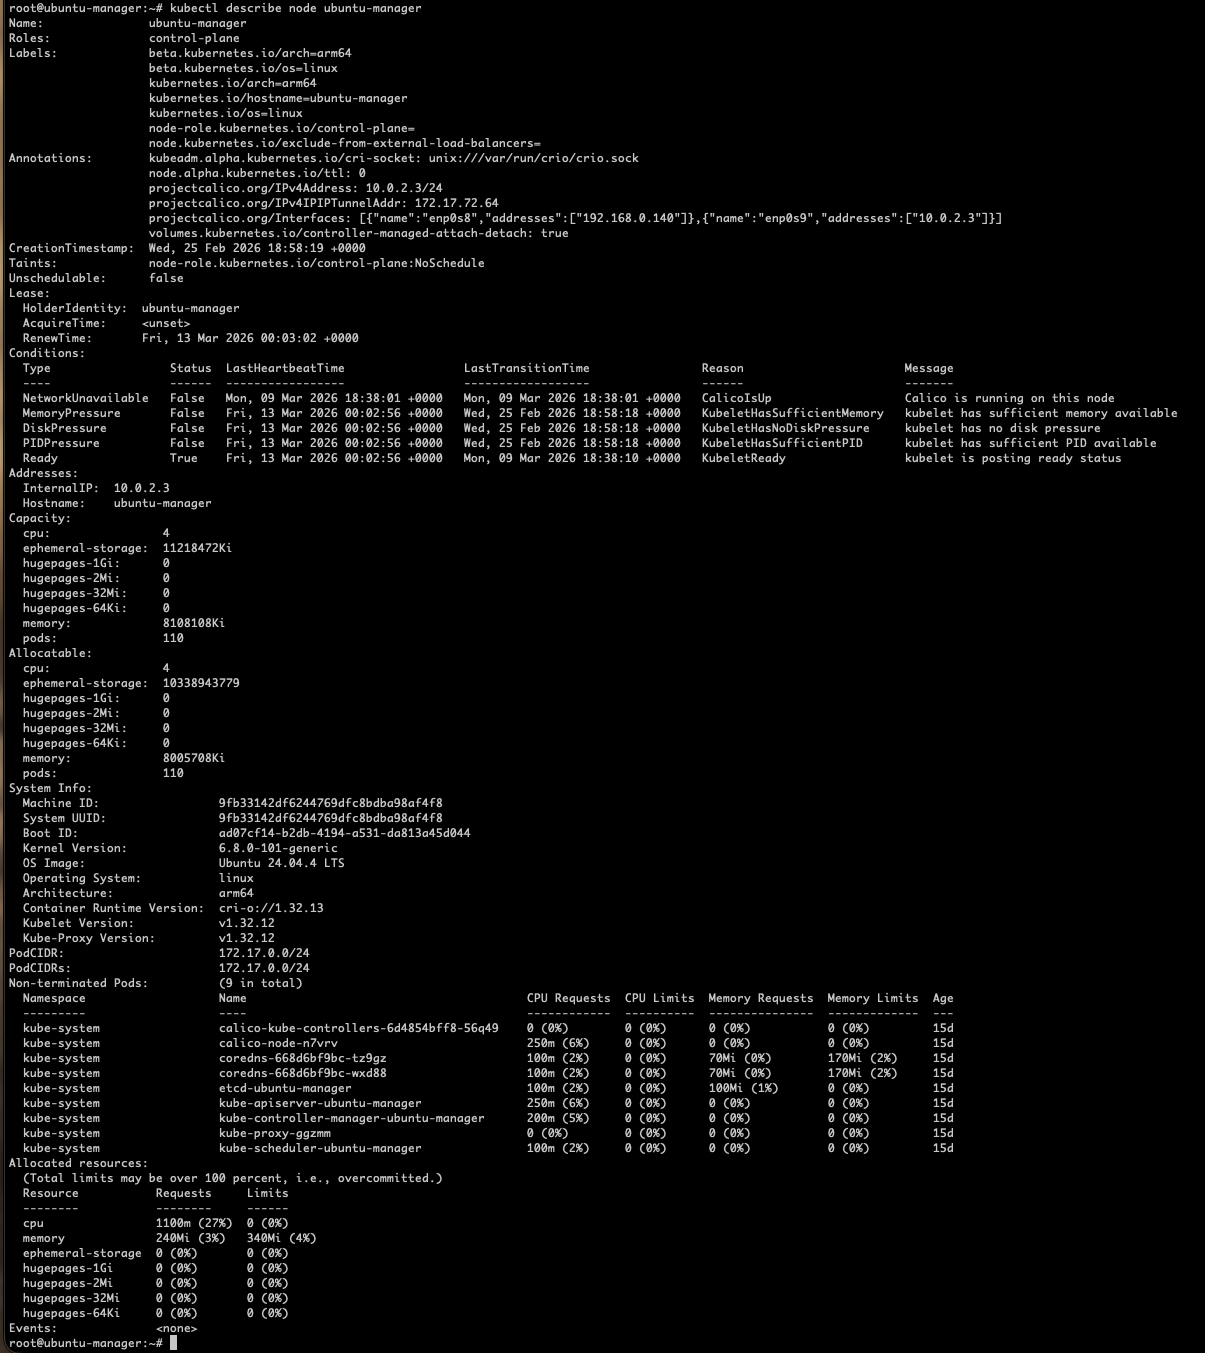
Labels — key-value pair data used by Kubernetes to help it know where workloads should run and allow administrators to group and select nodes. Labels are used by Kubernetes internals (scheduler, selectors, nodeAffinity).
Annotations — Another set of key-value pairs used for metadata/information only. Mostly used by the Administrator to categorize data about the cluster. It can also be used to store extra info like versions, configs, tool-specific data, etc.
Conditions — The health of the node.
| Condition | Meaning |
|---|---|
| Ready | Node is healthy and ready to accept pods |
| MemoryPressure | Node is running low on memory |
| DiskPressure | Node is running low on disk |
| PIDPressure | Too many processes running on node |
| NetworkUnavailable | Network not configured correctly |
Keep in mind that all this information comes from Kubelet, and Kubelet itself gets its data from CNI, CSI, CRI, etc.
Addresses — Internal IP of the server. Ideally it's the management network IP.
Capacity — Total compute available on the node.
Allocatable — Is what is taken from capacity to assign to the node. The key point is that the scheduler uses Allocatable, not Capacity, when deciding where to place pods. Capacity is just the physical total.
In the article Continuous Learning of Kubernetes - Part1, I mentioned that kubeadm is the tool that works at the cluster level. It is used to bootstrap the cluster, create certificates, handle authentication and control plane communication. By describing the kubeadm config, many other details of the cluster can be extracted such as network components.
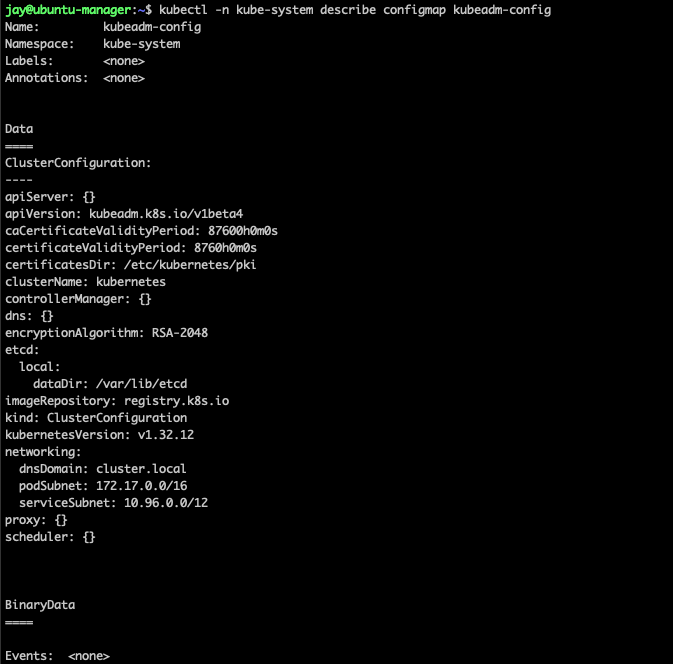
As you can see there is several information such as the etcd and networking.
Networking Section
dnsDomain: cluster.local is the default domain of the Kubernetes cluster. This is because every service in the cluster gets assigned with a DNS name. For example, a pod is 192-168-1-10.default.pod.cluster.local. A change to the DNS domain means rebuilding the cluster.
Another interesting section is
podSubnet — the IP address range assigned to pods across the entire cluster. Pod-to-pod communication happens over this network. To avoid confusion about which subnet does what, I use this diagram:
| Subnet | Example | Purpose |
|---|---|---|
| Management network | 10.0.0.0/24 | Node-to-node communication, SSH, kubeadm |
| Pod Network | 172.17.0.0/16 | Pod-to-pod communication (CNI managed) |
| Service Network | 192.168.0.0/16 | Kubernetes Services (ClusterIP, NodePort) |
Another interesting command is
kubectl api-resources — it shows all resources available. Resources that are not native Kubernetes and are installed through additions start with CRD (Custom Resource Definition). The command kubectl get crds can be used too.
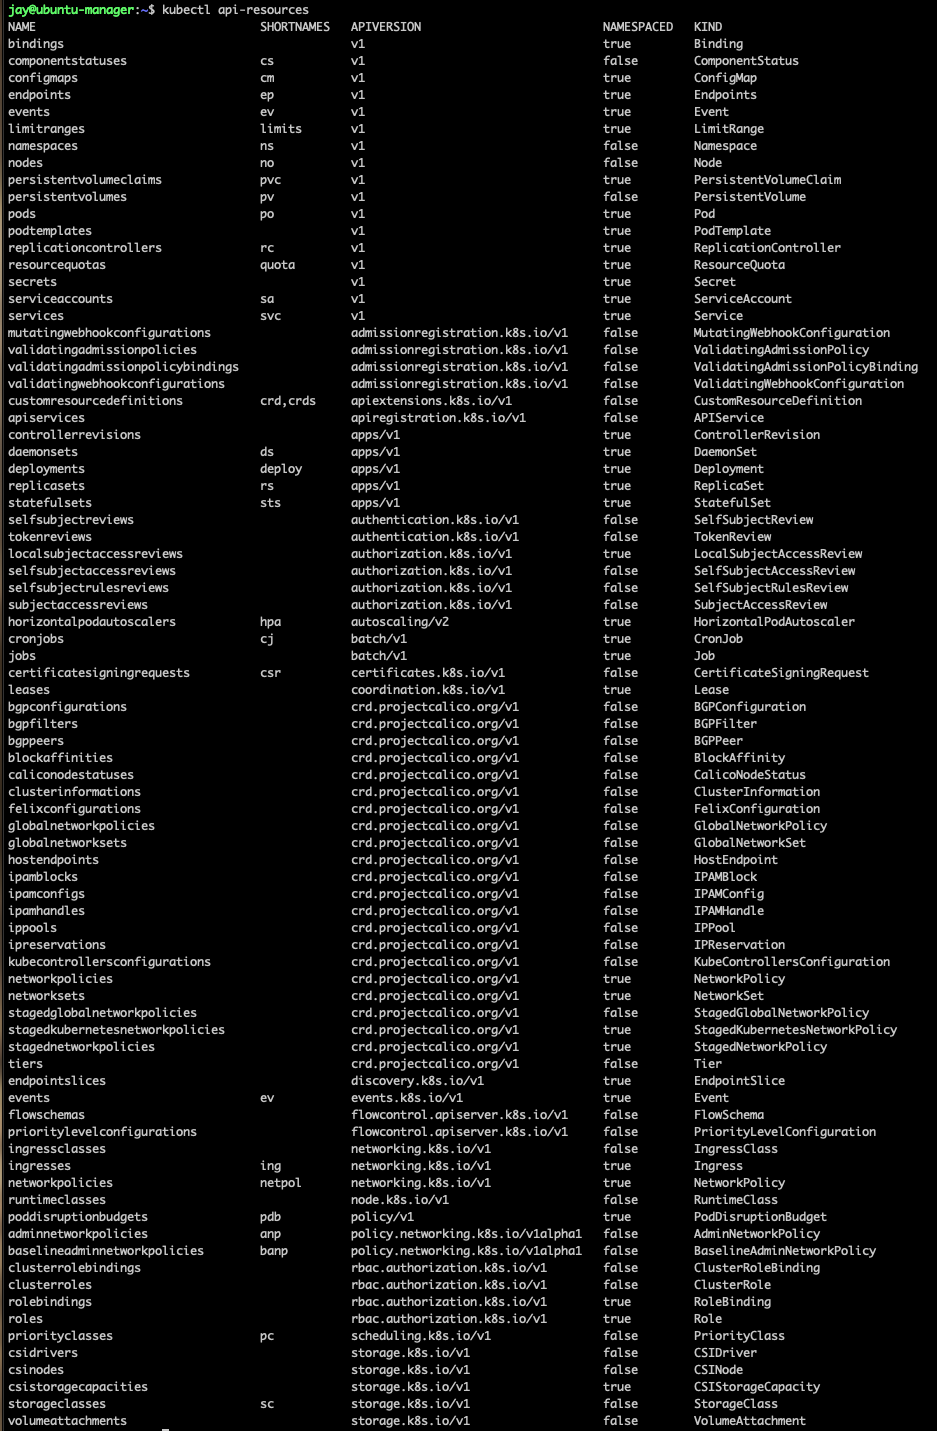
We can also describe a CRD to know how it was introduced in the cluster.
More interestingly, if you want to understand what a specific resource is, you can use
kubectl explain <name of resource>, or if you want to see everything for a resource you can use kubectl explain <name of resource> --recursive.

In the next article, I will focus more deeply on Kubernetes.