An Aficionado Journey in Opensource & Linux – And now It's a FinTech touch!
Basic NetSSH connection using Ruby
Linux & BSD systems, Applications and Security
Published: 2023-12-25 02:16:55
Some time back, I was playing with net::ssh, a Ruby implementation of SSH. So I got the idea to make a quick write-up for future reference. This article is a very basic one. If you want a more advanced method of calling complex functions from the Ruby Library, consider consulting the official Ruby documentation. Sometimes, people are more at ease reading someone's blog and can escape the hustle of complex articles re-purposed by ChatGPT... Net-SSH is still widely used by several companies and has been incorporated into many technologies. So, I will start from the basics. I have an OpenSSH server aside on a virtual machine Rocky Linux.
Prerequisites:
Since I'm building my gem, I have installed the following RPM package on the client side:
1. Here are some of the packages I installed on the Rocky 9 Minimal version:
[root@localhost net-ssh]# rake build
net-ssh 7.2.1 built to pkg/net-ssh-7.2.1.gem.
This should build the gem inside the pkg folder
4. You are ready to install the gem:
[root@localhost pkg]# gem install net-ssh-7.2.1.gem
Successfully installed net-ssh-7.2.1
Parsing documentation for net-ssh-7.2.1
Installing ri documentation for net-ssh-7.2.1
Done installing documentation for net-ssh after 0 seconds
1 gem installed
5. Once installed, If you want to view the gem, you can just do the following:
[root@localhost pkg]# gem list | grep -i net-ssh
net-ssh (7.2.1)
6. Before moving forward, if you want to remove the gem, do the following:
gem cleanup net-ssh
gem uninstall net-ssh
At this point, we have the gem installed, we can start writing the net-ssh client for connectivity:
Getting into the code
7. Loading external libraries -- external libraries are like the tools, say to build a house.
require'rubygems'require'net/ssh'
8. Now, we need a plan before building the house: It's called a class. That plan will define, how many rooms, kitchens it will have, etc.
class SSHClient
9. In each class (the plan for building), we need a constructor which is an initialize method in Ruby that serves as the class constructor. This is like the workers that are going to initialize the job.
This manual can help understand Ruby syntax faster. The instance variables: hostname, username, password, and command are like the house features.
10. So after defining what we need, we start building the house. Net:SSH here is like the boss giving the order to do the work based on what was planned.
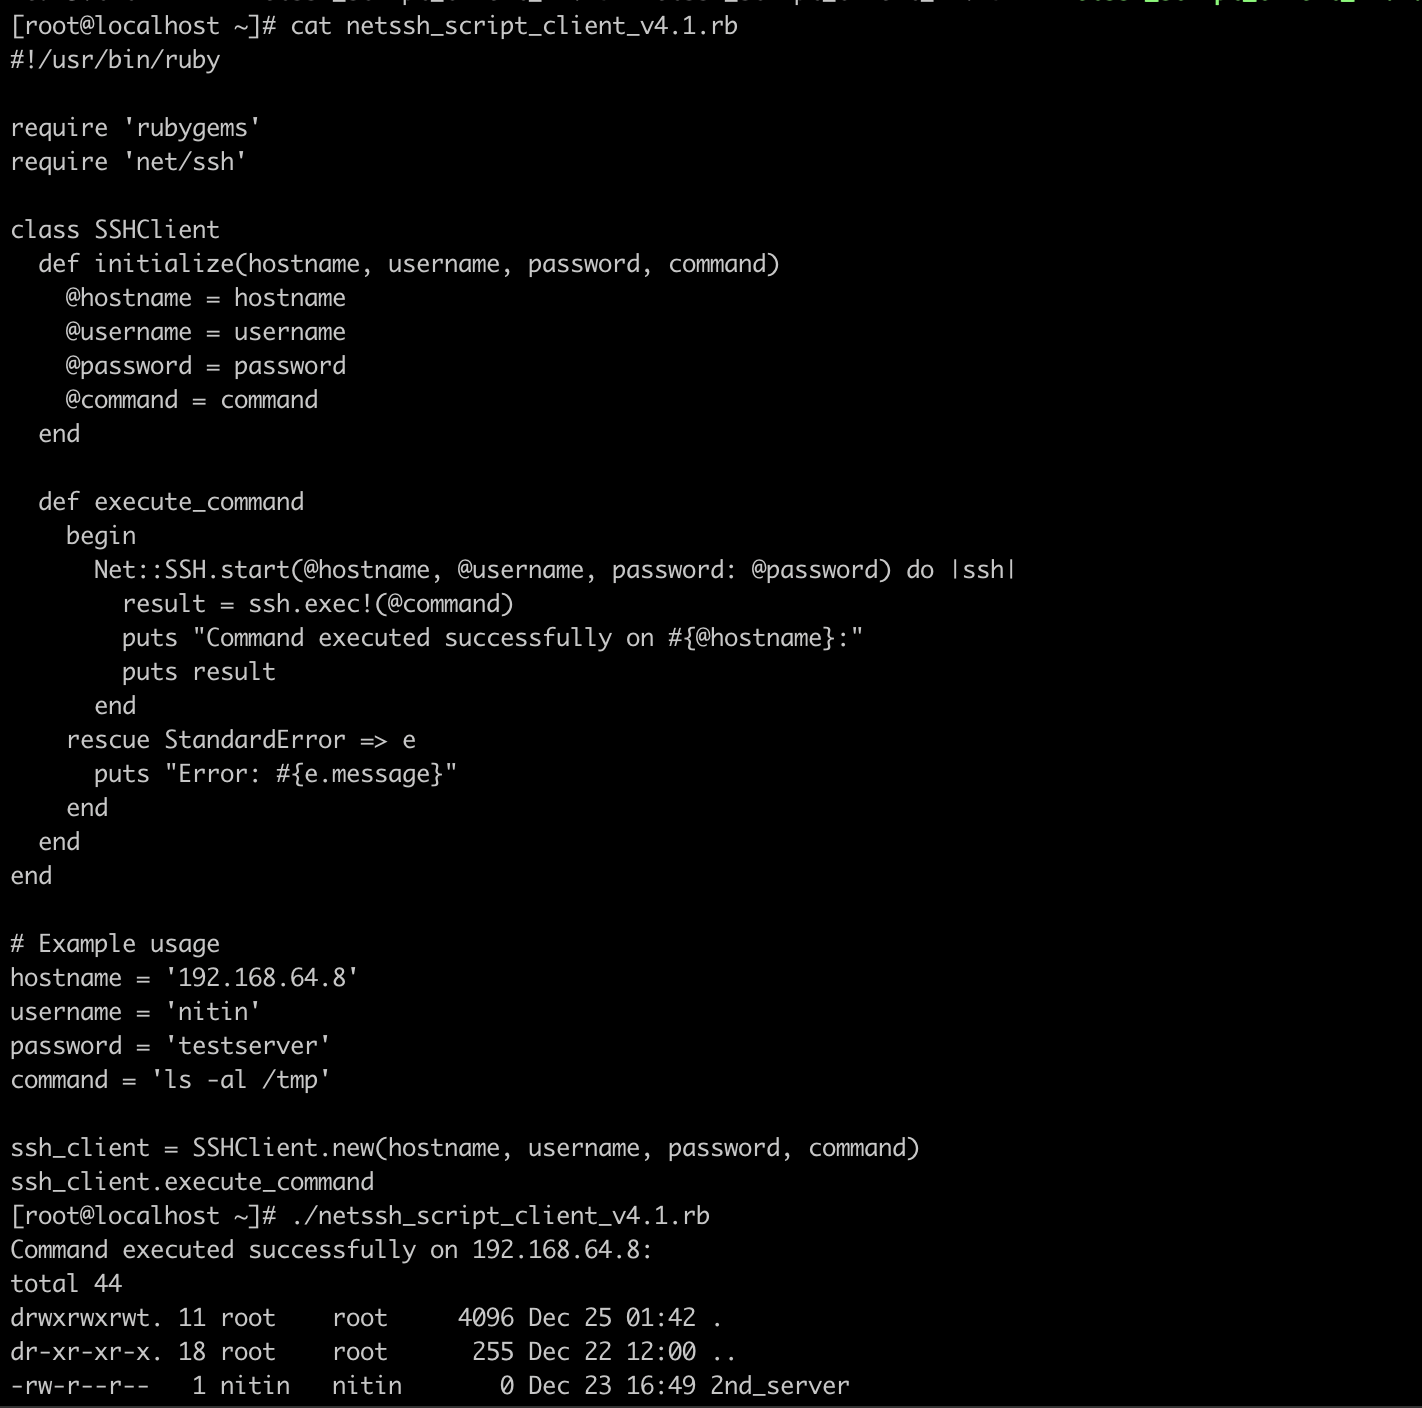
def execute_command
begin
Net::SSH.start(@hostname, @username, password: @password) do |ssh|
result = ssh.exec!(@command)
puts "Command executed successfully on #{@hostname}:"
puts result
end
11. We also want to output any error in case something goes wrong:
rescue StandardError => e
puts "Error: #{e.message}"
end
12. The array defined above needs to contain some value which I have defined as well