An Aficionado Journey in Opensource & Linux – And now It's a FinTech touch!
Exploring Solace Message VPNs
Linux & BSD systems, Applications and Security
Published: 2020-05-24 16:21:01
This is my third article on the Solace PubSub+ Standard. Let's say it is the continuation of the blog posts: Getting Started with Solace Broker and Solacectl version VS show version - Solace pubsub + standard upgrade. Recently, I have posted on the Solace Community one issue that I encountered when performing an upgrade. Solace replied to me about this new discovered bug and they are working on it. I made some strace and notice that there might be possibility of python packages missing. In this post, its going to be more about message-vpn (message virtual private network)
They are objects on the solace PubSub+ / Solace environment. They are event brokers that
Allowed segregation of topic space and clients.
They also group clients connecting to a network of event brokers such that messages published are visible to particular group's clients.
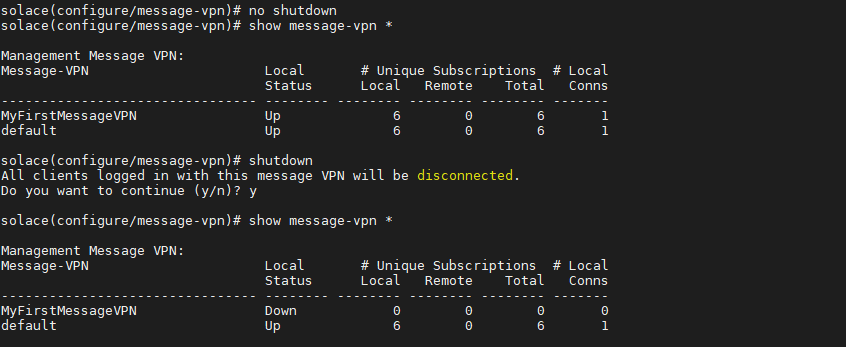
1. To create a message-vpn, use the following command, but firstly, you need to enable configuration mode. You can also see if it has been created by using the show command. Note that the status is down after creation:
2. Now turn the message-vpn on, simply do the following command. You can also shutdown the VPN and solace will prompt that all client will be disconnected. However, the default VPN remains up all time because when creating the message-vpn it brings you inside it.
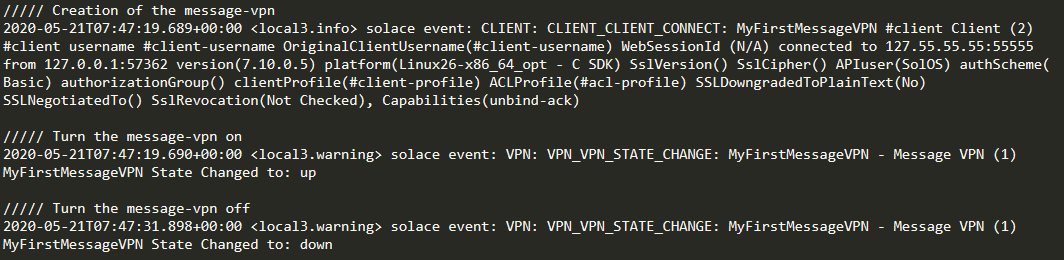
3. Notice that the log speaks everything when I create, turn on, and turn off the message-vpn. Also, the command log locate at /var/lib/docker/volumes/jail/_data/logs will register all commands executed on the CLI interface.
4. We can also create a delete a message-vpn. Prior before deleting, it should be shut down.
5. To see more details about the message-vpn created, you can do a show current-config message-vpn MyFirstMessageVPN
This is useful to generate the CLI commands to replicate the same configuration.
5 . Let's see the information:
These are commented lines that gives information when the message-vpn was created and the versioning etc. There are much more comments that give more details. I will not get into that, but instead focus on the actual configuration.
6. To get to the configuration mode, its simply firing these commands:
homeenableconfigure
7. Then, it does the actual message-vpn creation using the following command.
create message-vpn "MyFirstMessageVPN"
8. By default, it will point itself to the message-vpn and set up the default configuration. See line 26 - 130 at section 5. Let's see what does each block means:
authentication - This is the client authentication schema of the message-vpn. It follows several subsection which defines authentication configuration.
authorization - which also defines authentication for specific groups such as LDAP.
9. Next part of the block describes the many parameters of the message-vpn such as maximum connections and subscriptions, authentication, threshold etc.
10. We can also setup replication of the message vpn and authenticate over SSL
The interesting part is that, just by copying the output you can re run it over the appliance by creating same message VPN with the configurations. I found that pretty cool and there are many things to play around.