An Aficionado Journey in Opensource & Linux – And now It's a FinTech touch!
Looking around EC2 instances types and Spot Instance creation in AWS
AWS and Cloud Computing
Published: 2023-12-27 18:53:06
Understanding EC2 instance type is one of the core AWS services. So this is one thing that I realized is a must-know when dealing with AWS products. Every EC2 instance type that Amazon provides caters to the specific needs that one requires. So these are the EC2 instance launch types: On-demand instances, Reserved instances, Spot instances, Dedicated Host, and Dedicated Instances. Let's see what each of them means:
Instance TypesOn-demand instances - This is like you are staying in a hotel and leaving whenever you want.
- On-demand instances
- pay for computer capacity - no long-term commitment
- anytime launch, stop, hibernate, start, reboot or terminate
- short-term, irregular workload
Reserved instances - This is where you plan to stay a long time and get discounts.
- 72 % discount
- 1 or 3 years
- All upfront, partial, no upfront types of payment
- Standard RI - cannot change the instance type
- Convertible RI - can convert size. example t2 micro to t2 small
- Scheduled RI - scheduled launch or termination: for example: everyday 5 o'clock or weekends to terminate for 1-3 years
Spot instances - This is where you stay for the night at a low price but can be thrown out when someone pays more.
- Enable to request unused ec2 instances at a steep discount - 90%
- Launch instance a low precise.. if someone pays more, the instance can be lost
- uninterrupted workload
- use cases: batch job, image processing.. interruption friendly
- spot block/max spot price
Dedicated Host- This is like booking an entire floor in the hotel.
- dedicated server and rack fully dedicated.
- strong compliance ..
- license per socket per core etc.
Dedicated Instances- This can be compared to booking a set of rooms isolated to only yourself.
- same as dedicated host, but cannot control the underlying hardware
Spot requests
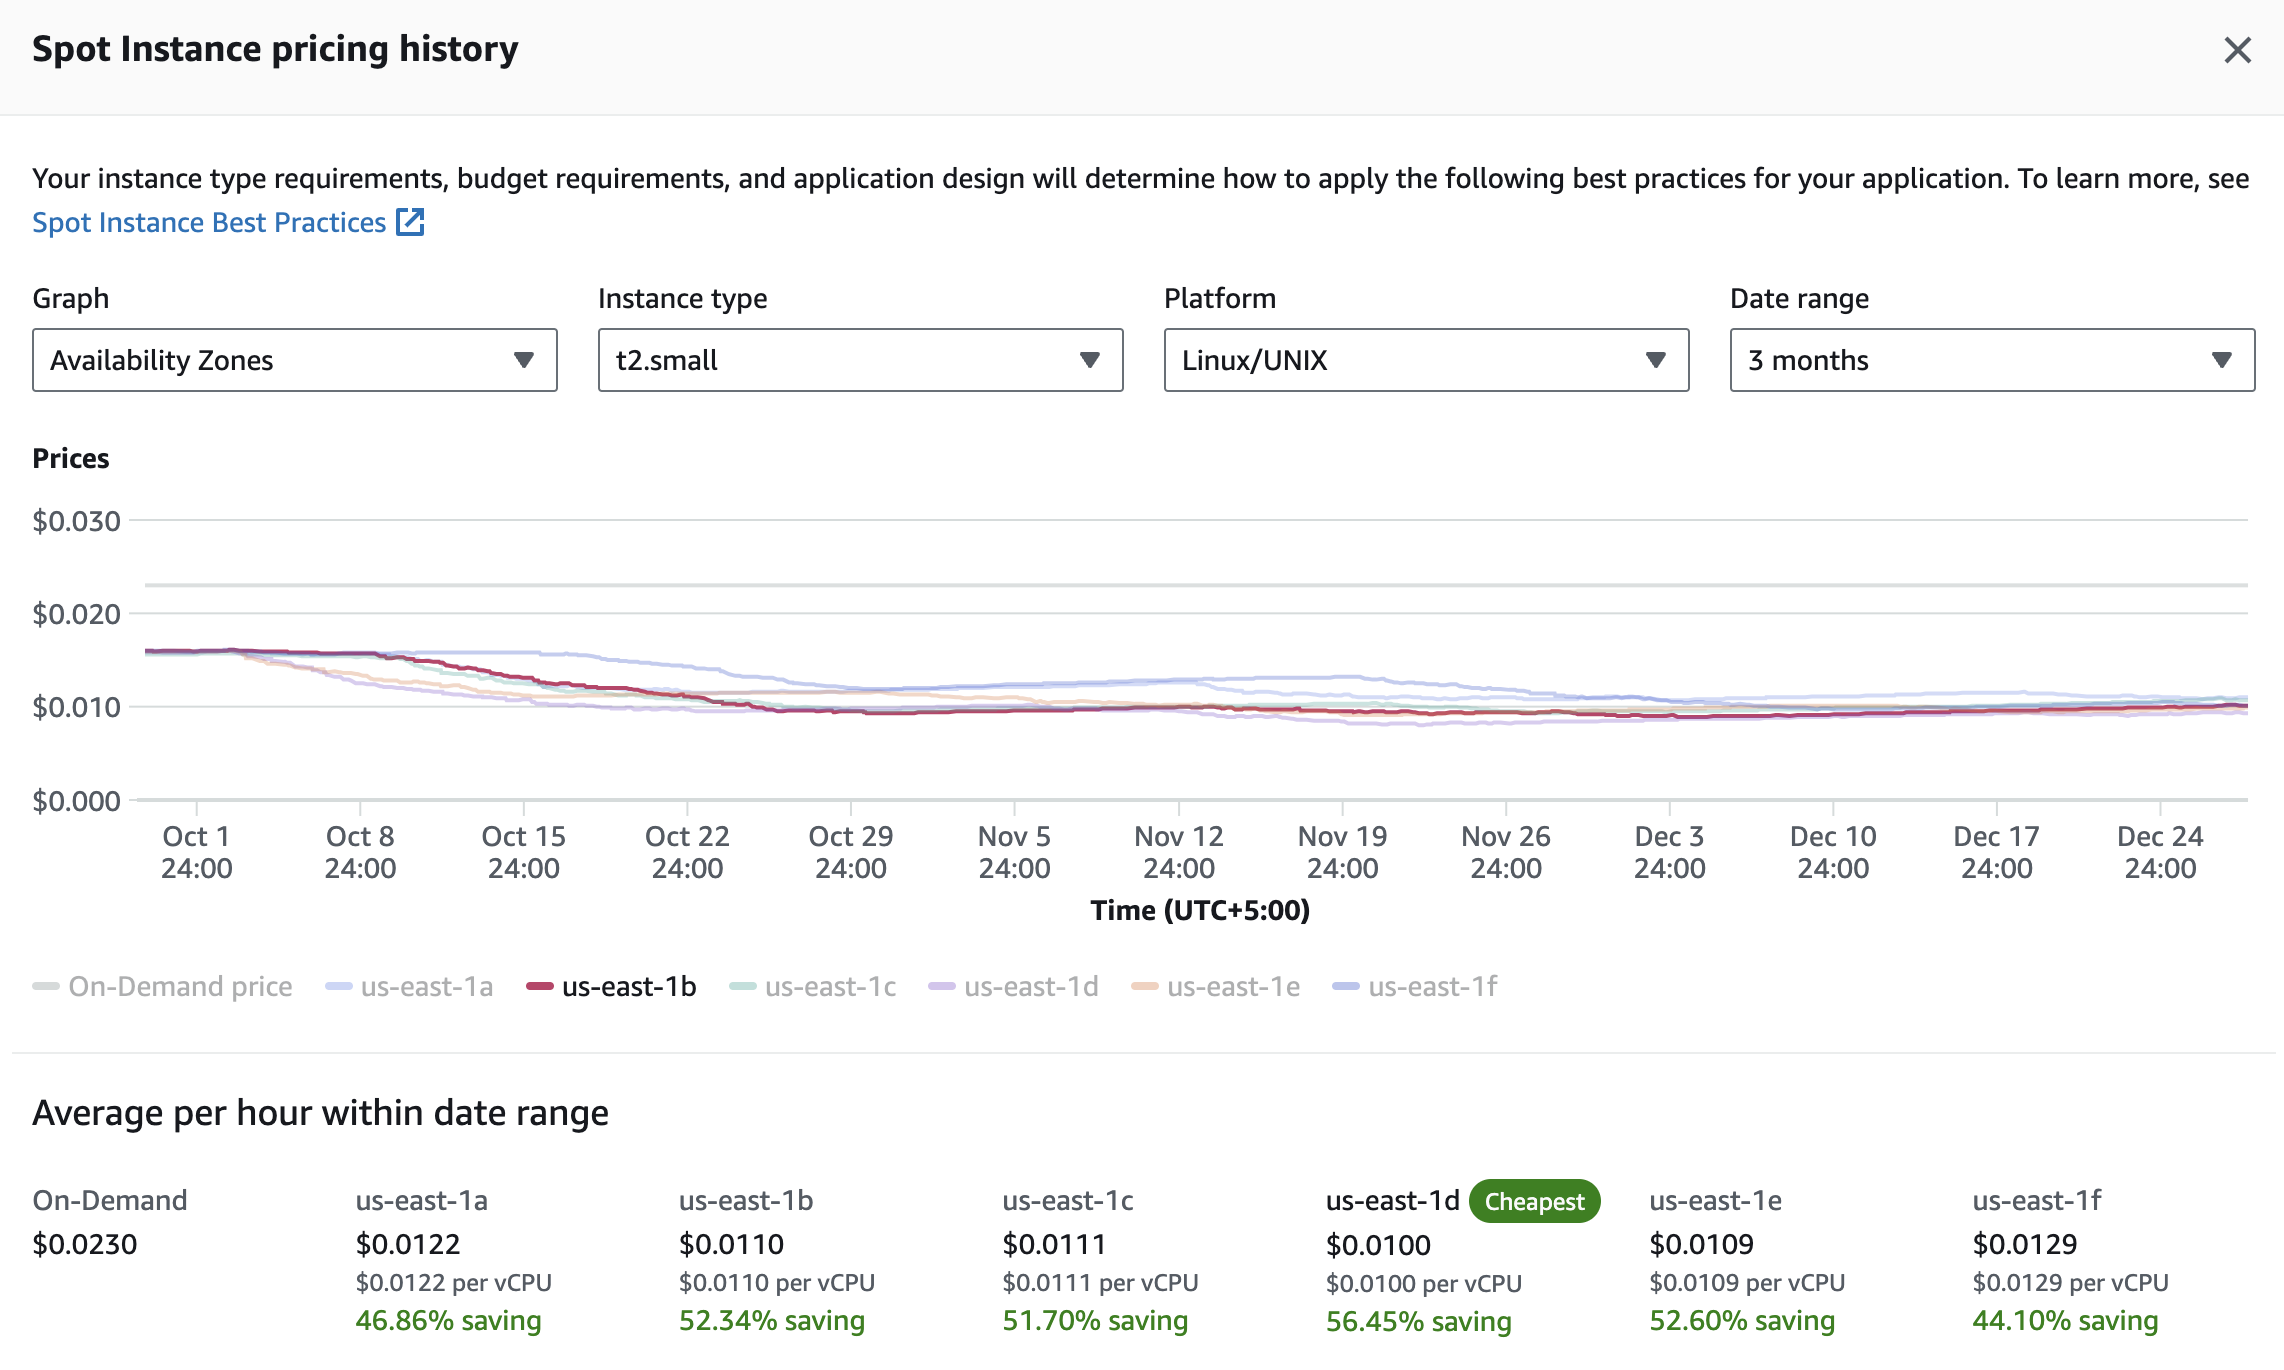
Let's look at the pricing history, say for three months
On the console - > Spot Requests under Instances -> Pricing history
This shows me from Oct, the price has been going down. And you can also compare it with the On-Demand price which is the top straight line.
To create a spot request:
On the console - > Spot Requests under Instances -> Request Spot Instances
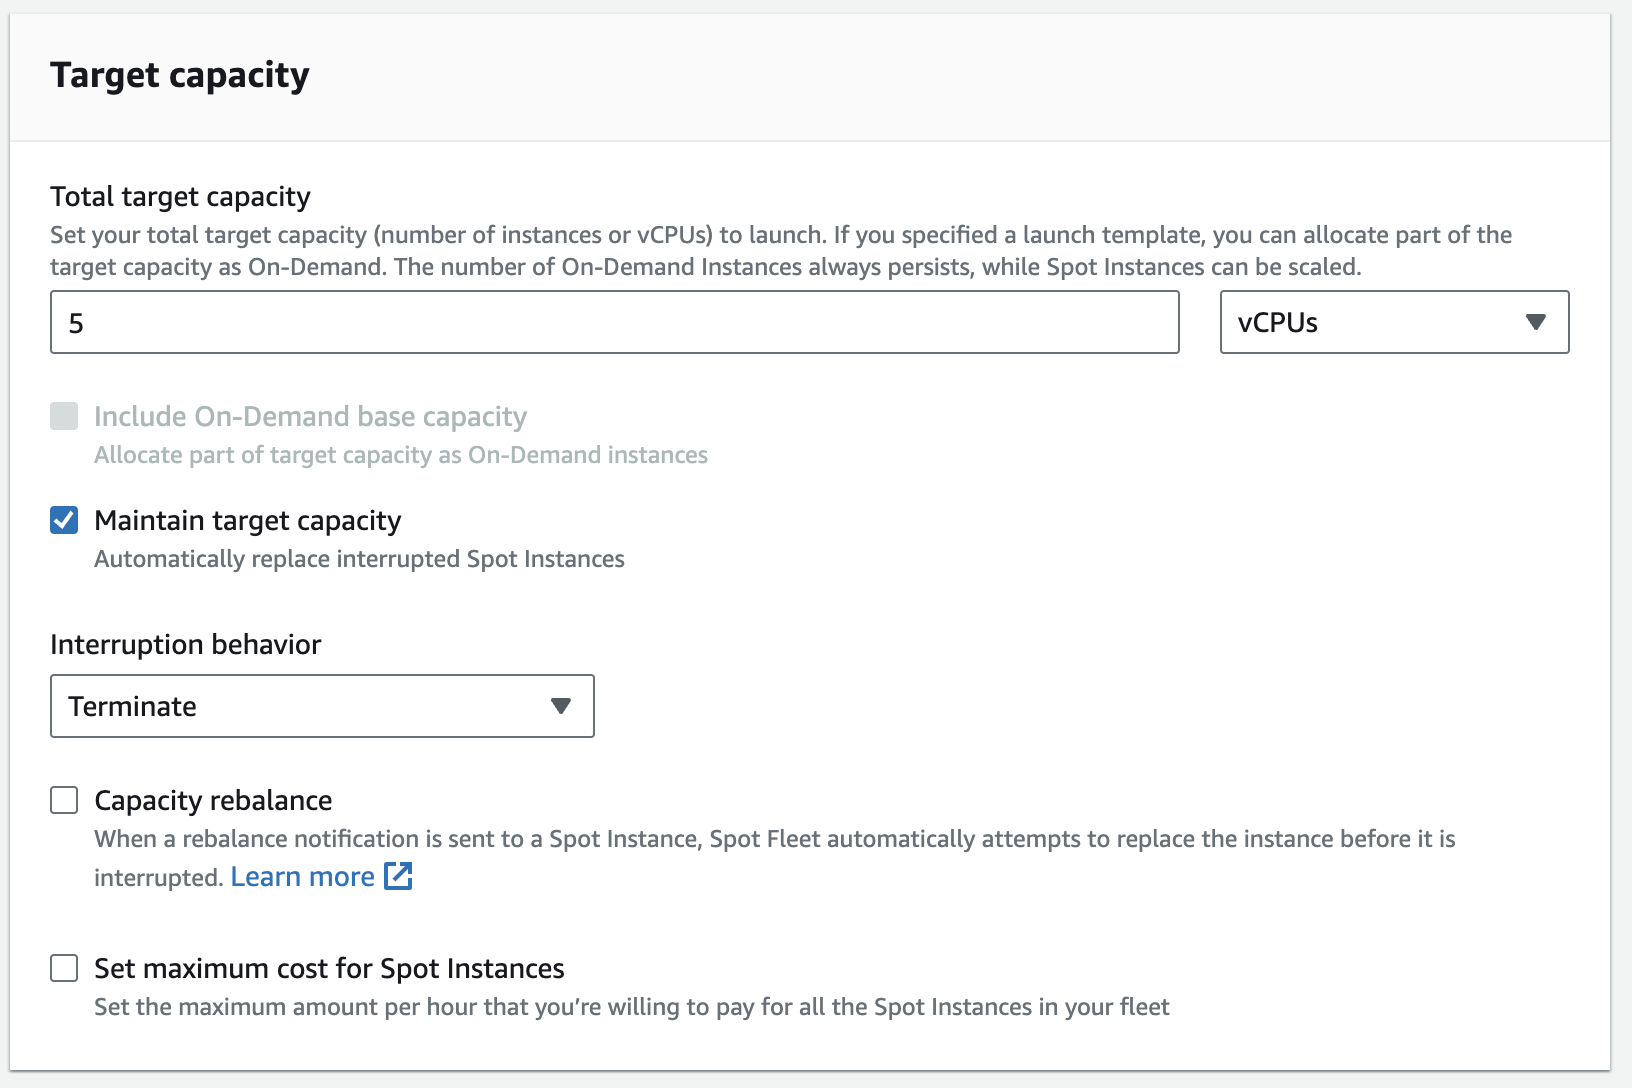
There are several settings which are not related to this blog post. However, in the Target capacity section, you can specify the number of target CPUs or Memory or Instances you want.
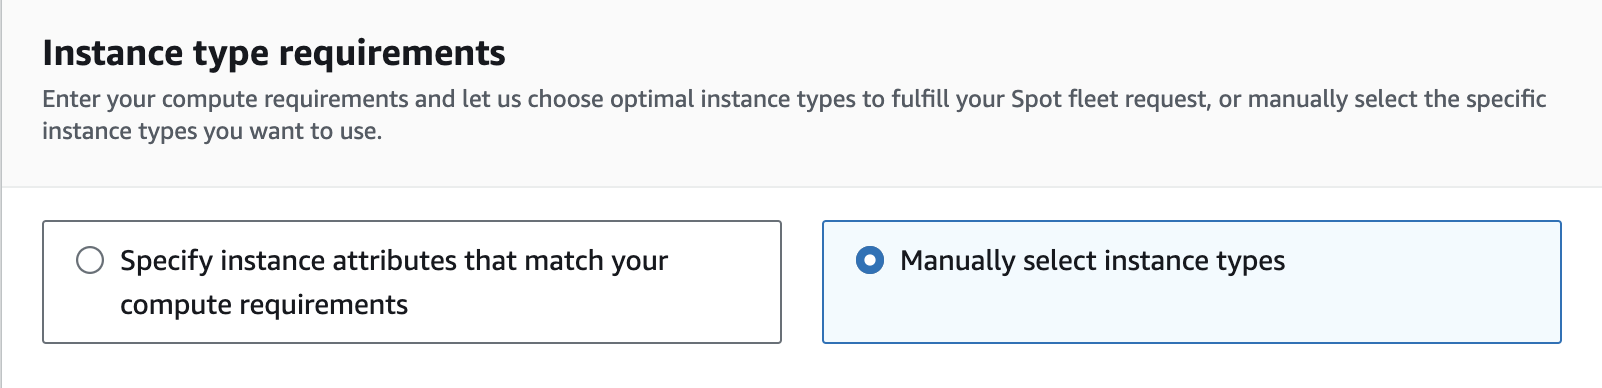
Under instance type requirements, you can manually specify the instance types or simply choose an instance by a specific attribute.
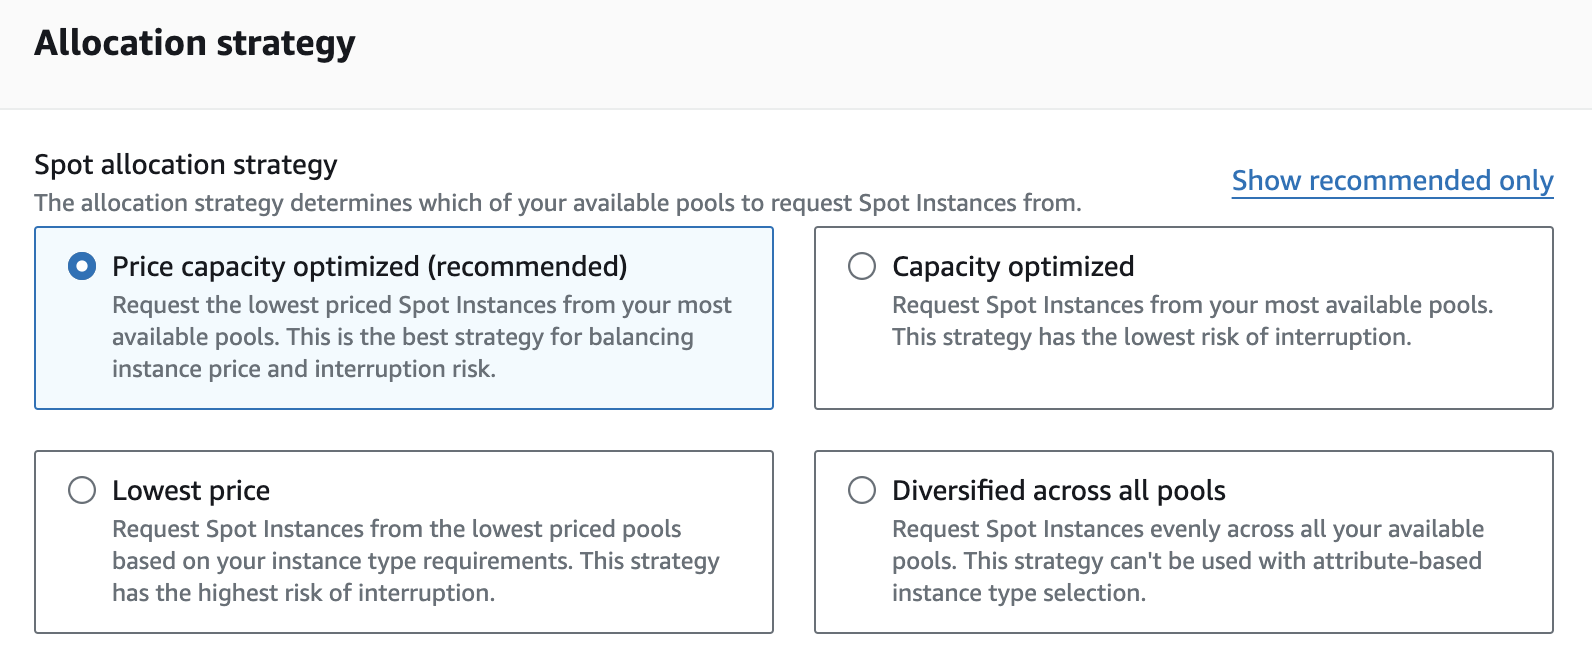
Then there is another option under "Allocation Strategy" which is Price Capacity Optimized (This strategy aims to launch instances that provide the best price-to-performance ratio, considering current spot prices and historical pricing data) or Capacity Optimized (This strategy is designed to launch instances on the most available capacity in the selected instance type, minimizing the likelihood of interruptions).
In the Price Capacity Optimized, it's like booking with the best deals options. Whereas in Capacity Optimized, it's like booking a seat on an airplane with the most highly available stats which means there is a high chance to get a seat.
The interesting part is that based on what you have chosen, you will get a summary of your Spot Request which is at the end when completing it:
It also shows the savings compared to On-Demand instances.
There is another way to request "spot instances". This is when creating the EC2 instance:
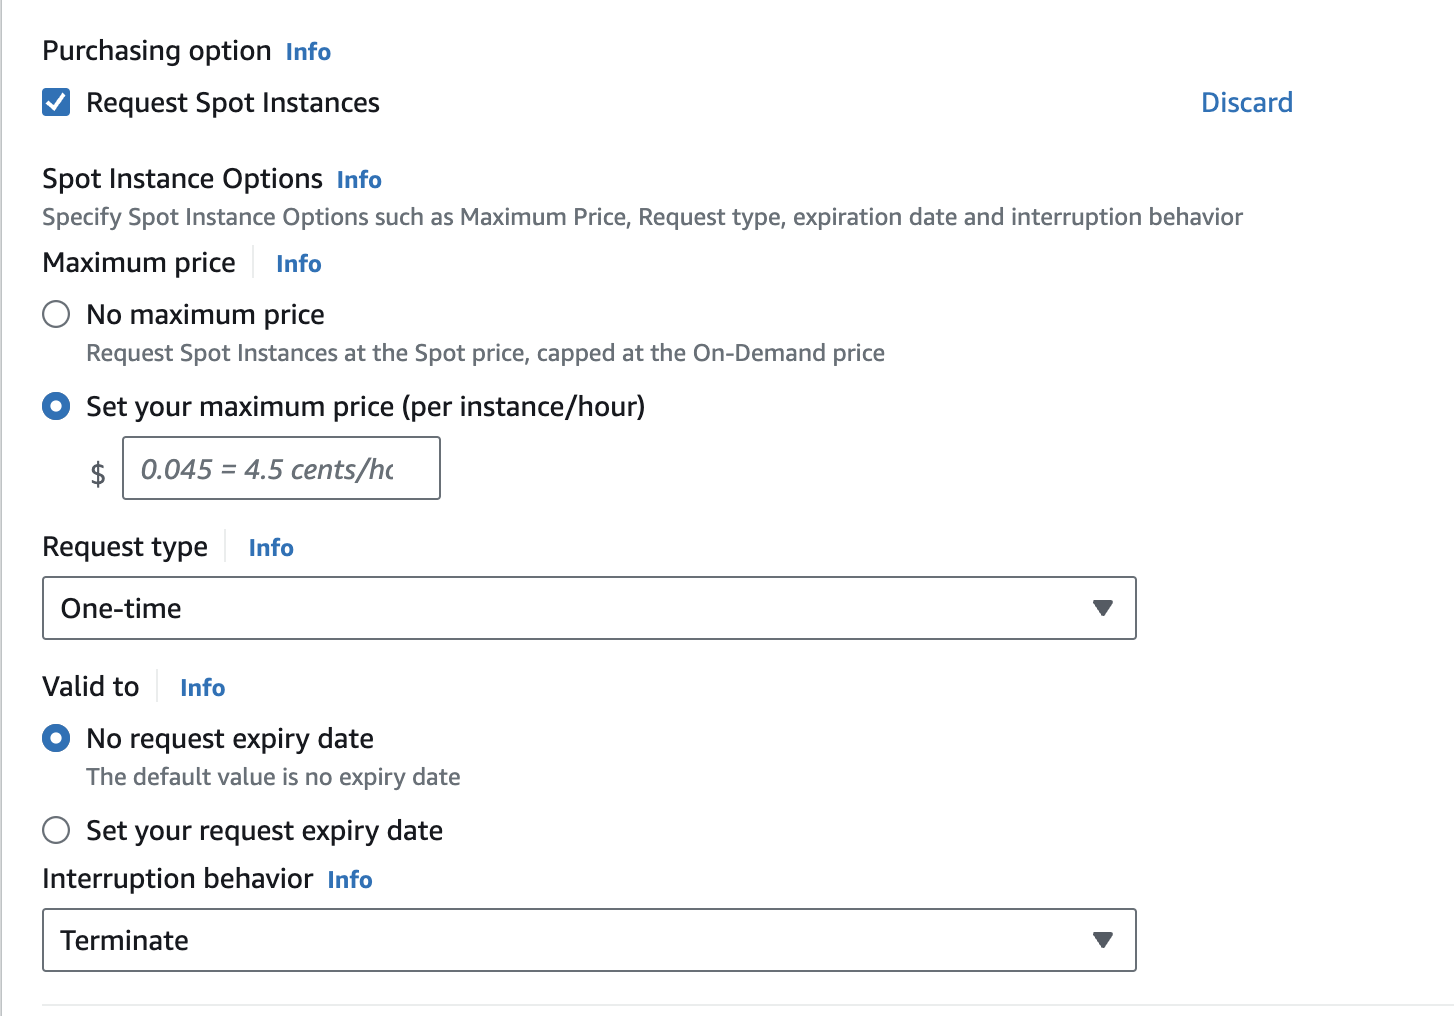
Console -> EC2 -> Instances -> Launch Instance -> go to Advanced Details -> under "purchasing options", click on "Request Spot Instance"
But, it is kind of tricky here as it says price is capped "Request Spot Instances at the Spot price, capped at the On-Demand price"
So if you need a cheaper one, just click on customize it... Now there is another option regarding "request type". Below I chose "one-time" and "Terminate" which means, that if the instance gets reclaimed (as it is a spot instance), it will get terminated on reclaim.
However, if you choose "persistent" instead of "one-time", the ec2 instance will keep on coming back, as per the price target which means that it is important to set the expiry date under "set your request expiry date"
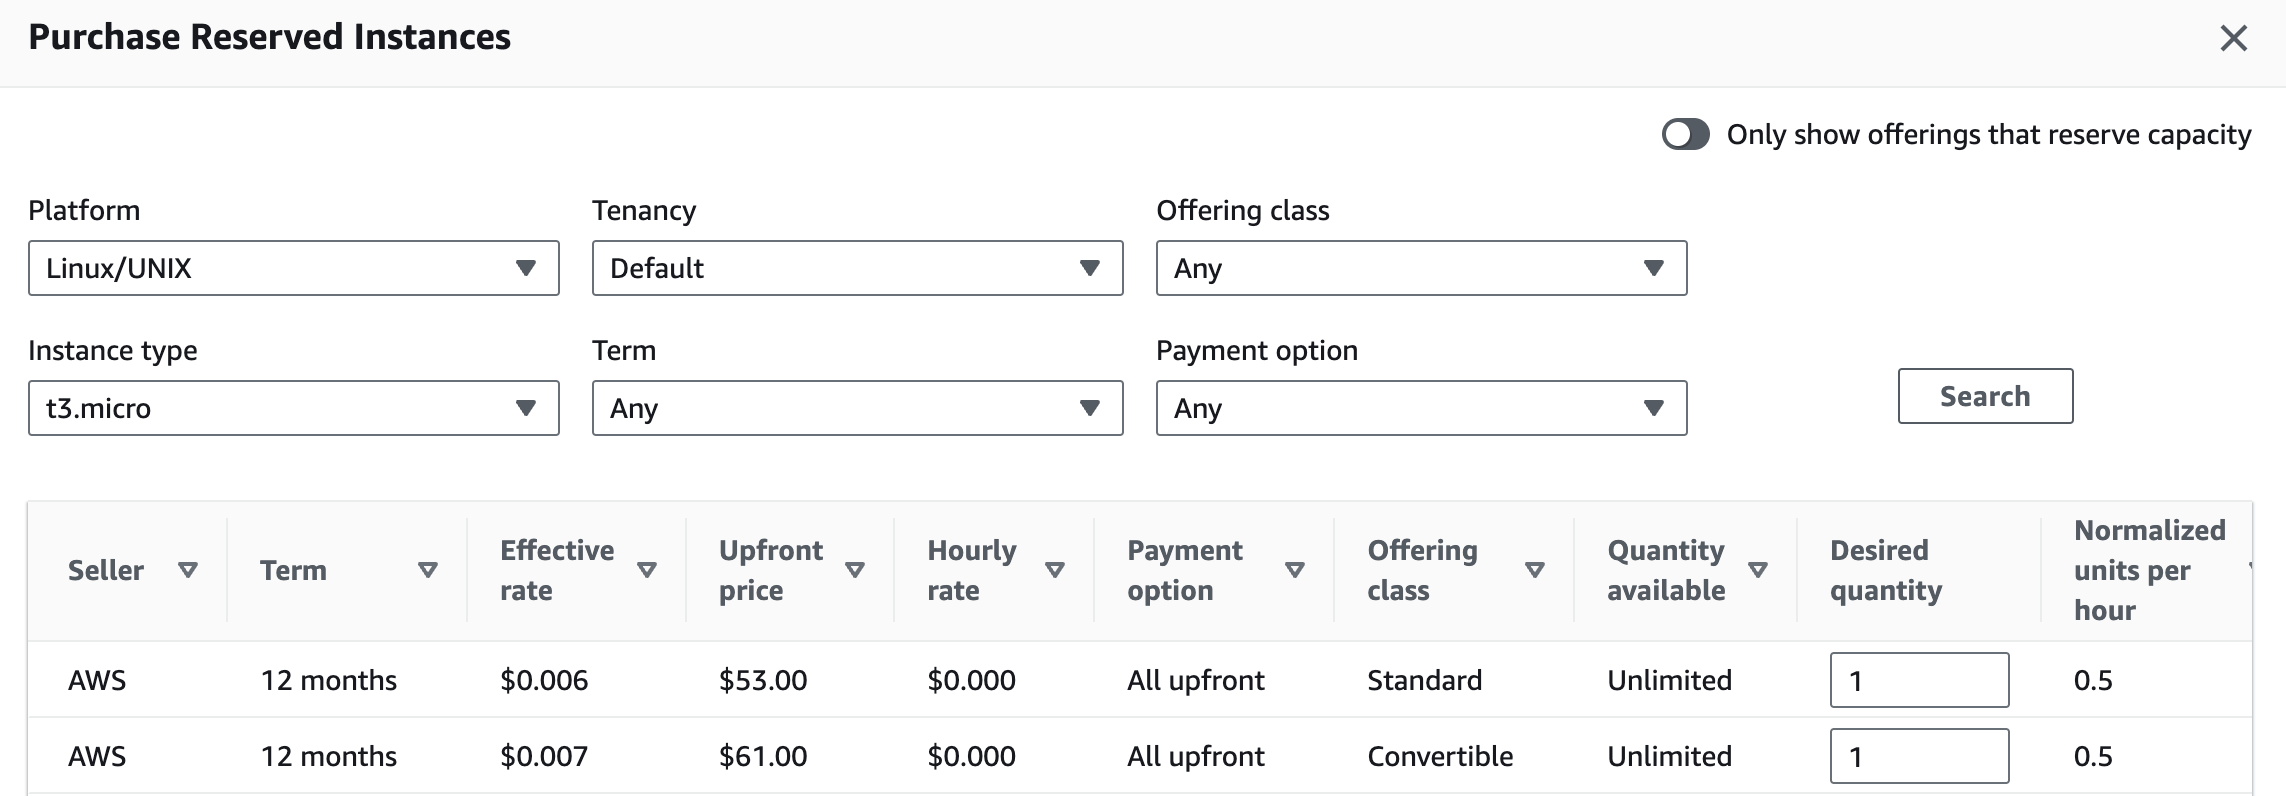
Reserved Instances
Console -> Instances -> Reserved Instances -> click on Purchased Reserved Instances
As you can see below, I chose a t3.micro and I can see the desired quantity I want and the term is gonna be valid.
Dedicated Hosts
Console -> Instances -> Dedicated Hosts -> Allocate Dedicated Hosts
This one gives better licensing management to save costs further. So the AWS License Manager would be an important aspect here
Simply choose the instance type, AZ, Quantity, etc.
Note: This blog post does not provide 100% full information about EC2 Instance types in AWS. This is a way for me to remember things especially using analogy which I am sharing with my readers.