An Aficionado Journey in Opensource & Linux – And now It's a FinTech touch!
Virtual Box not working on Apple Sillicon! Exit VBOX Enter UTM
Linux & BSD systems, Applications and Security
Published: 2024-01-07 05:37:06
Some months ago I bought an Apple M2 Max Macbook Pro. I was so excited to run Virtual Box for my experiment on VirtualBox. I believe I did install it and then, thought about running a Virtual Machine at a different time. I then realized that the version I was on was not supporting the M1/M2 processor type. However, it looks like Virtual Box still developing the version for the M1/M2 chip processors. So, I had no choice but to Exit VirtualBox and find another hypervisor for my MacOS. Enter UTM. GetUTM (Universal Turing Machine) is free and Open source. UTM employs Apple's Hypervisor virtualization framework to run ARM64 operating systems on Apple Silicon at near-native speeds.
[caption id="attachment_5332" align="aligncenter" width="300"] credits: mac.getutm.app[/caption]
I understand the pain when you cannot run your virtual machine like you used to do on the Virtual Box hypervisor. At the time, I am writing this blog post, Virtual Box, does not support Apple Silicon Chip yet. It used to be available as a Beta version, but then they stopped it. So, it's something we need to understand how things go in the Open Source community. However, I have switched to UTM hypervisor instead and in this blog post, I'm going to explain briefly how to run Virtual Machine on UTM.
UTM employs Apple's Hypervisor virtualization framework to run ARM64 operating systems on Apple Silicon at near-native speeds. On Intel Macs, the x86/x64 operating system can be virtualized. In addition, lower-performance emulation is available to run x86/x64 on Apple Silicon as well as ARM64 on Intel. For developers and enthusiasts, there are dozens of other emulated processors as well including ARM32, MIPS, PPC, and RISC-V. Your Mac can now truly run anything.
Great, it's open-source and free!
Let's quickly look at how to deploy a Virtual Machine with a Rocky Linux Minimal Installation.
1. Download the DMG, provide the necessary permissions if required, and install it from the official website: https://mac.getutm.app
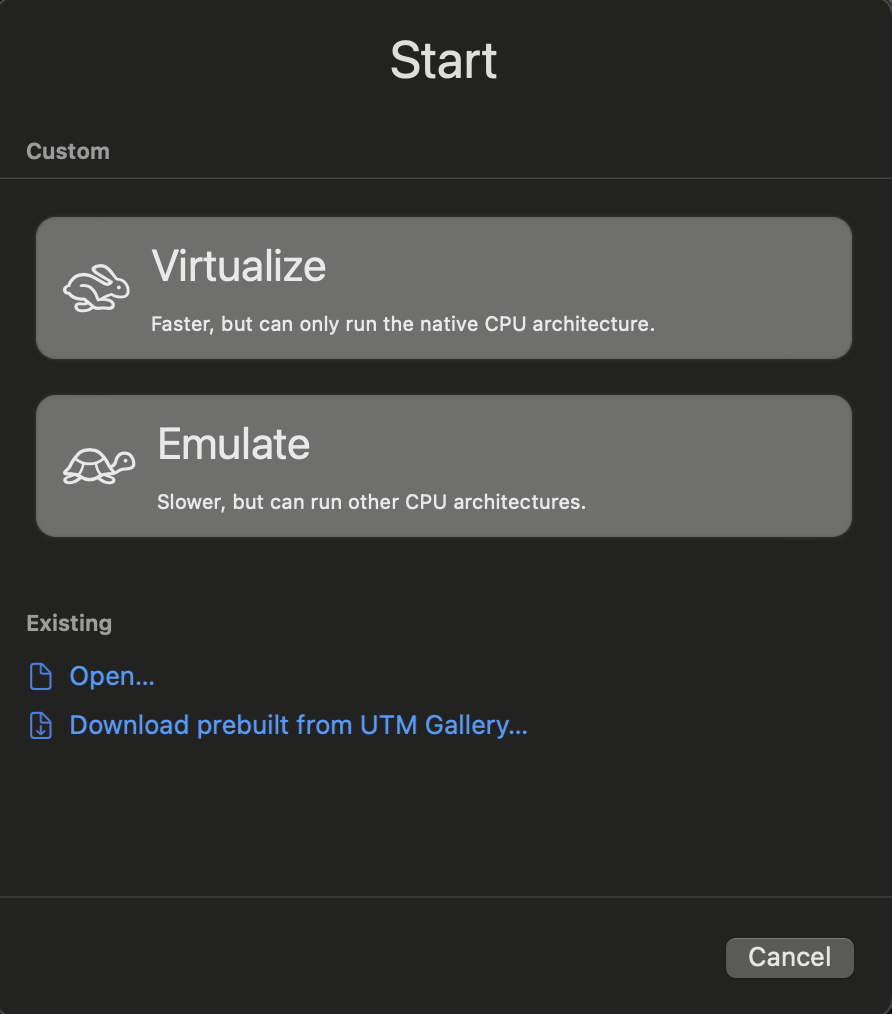
2. Once installed, file -> new -> Virtualize
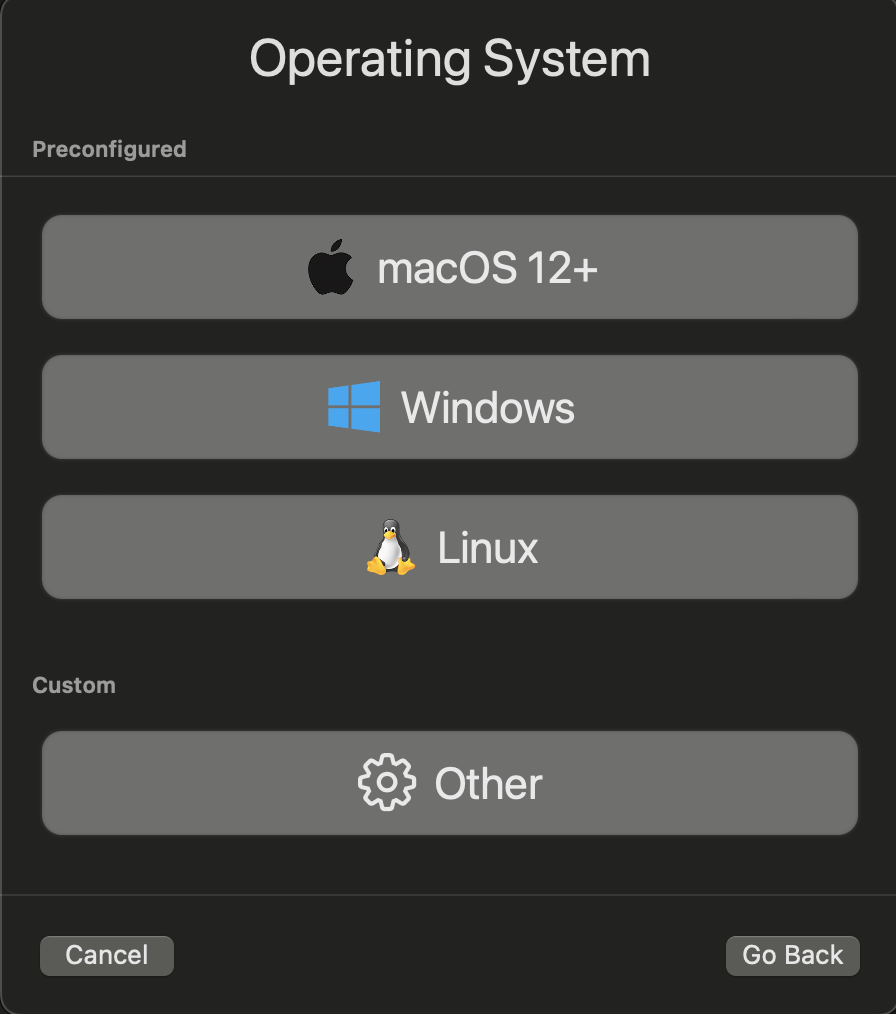
3. Hit Linux
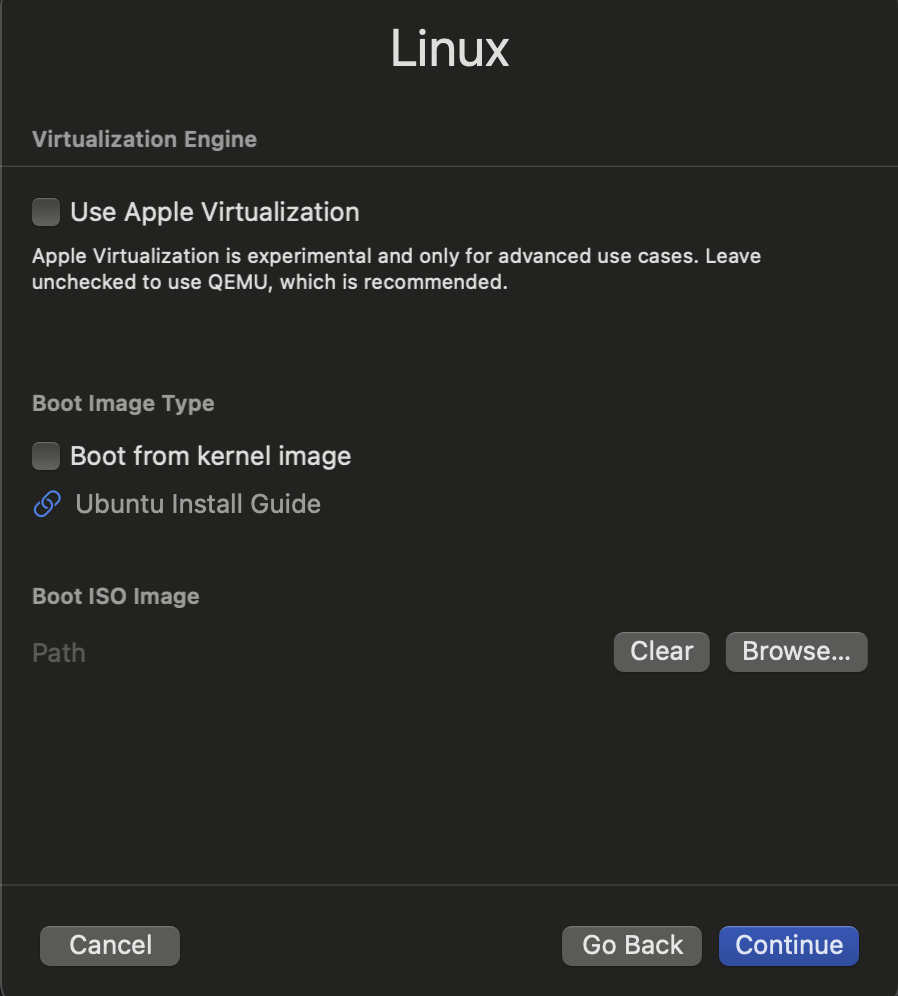
4. Hit on browse and search the boot image.
5. So the image I am using for Rocky Linux is a 9.3 Aarch minimal
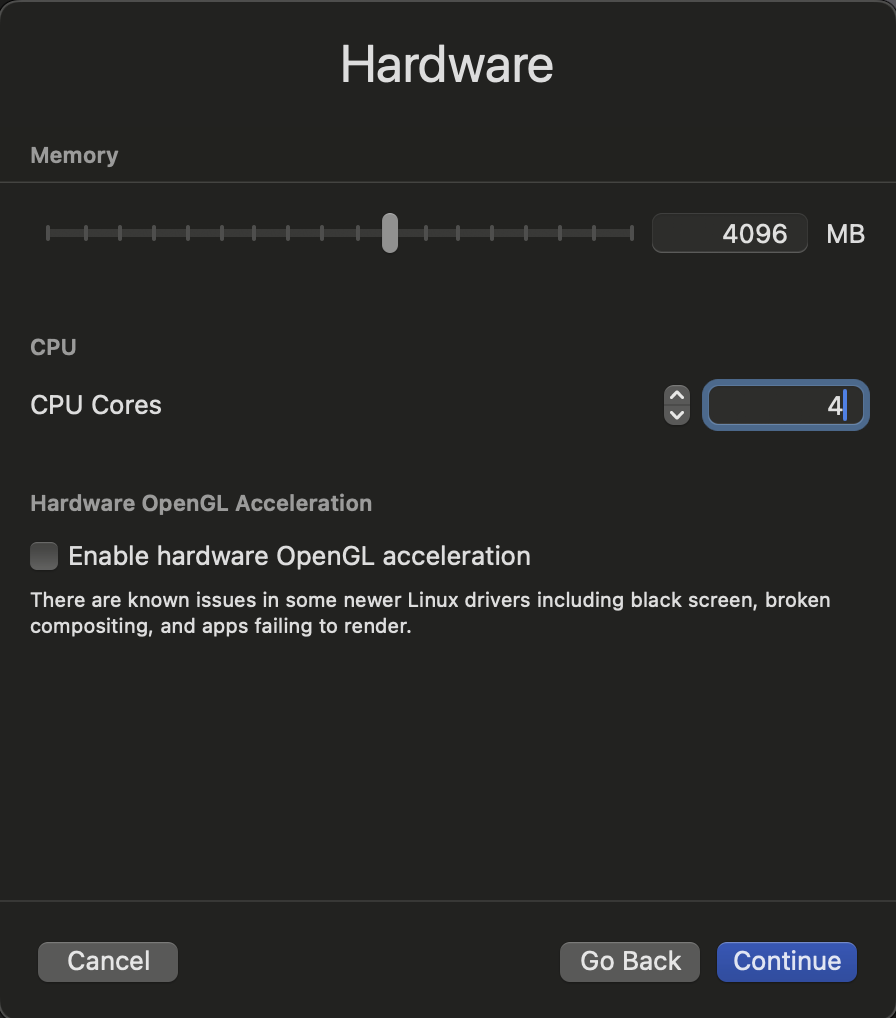
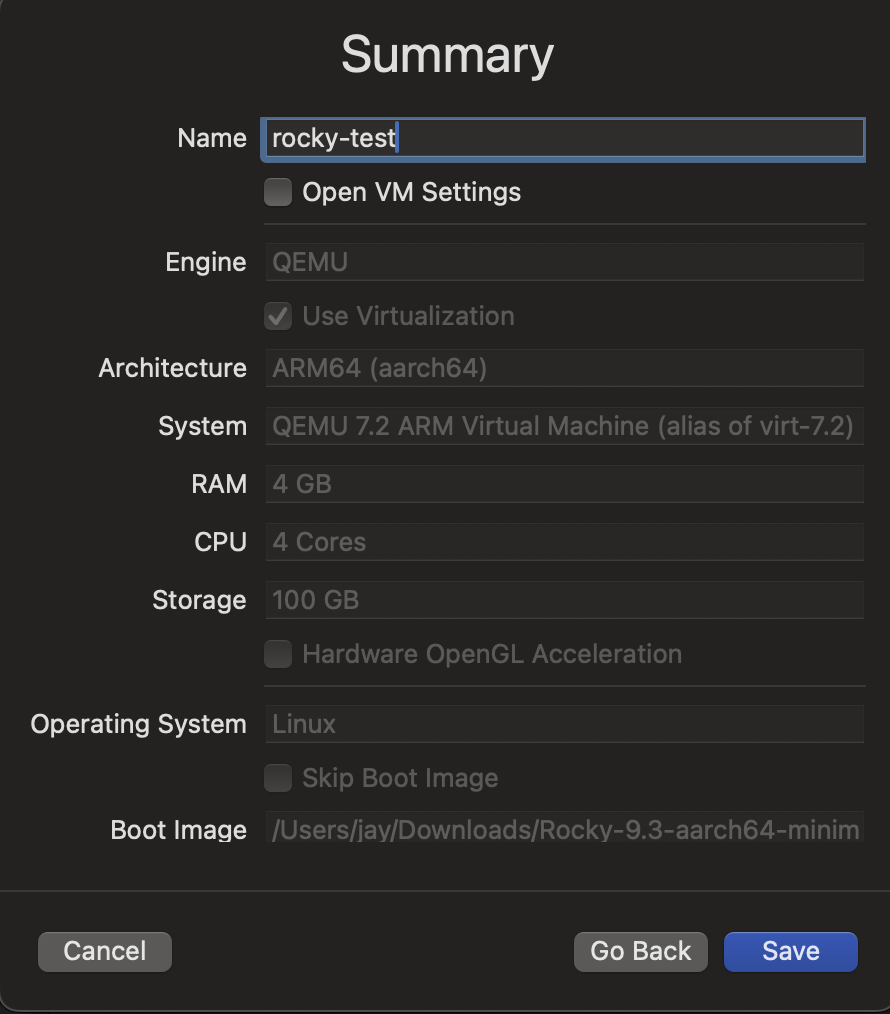
6. Then hit continue. Choose the memory and CPU you want to allocate. I decided to chose 4GB Ram and 4 CPU
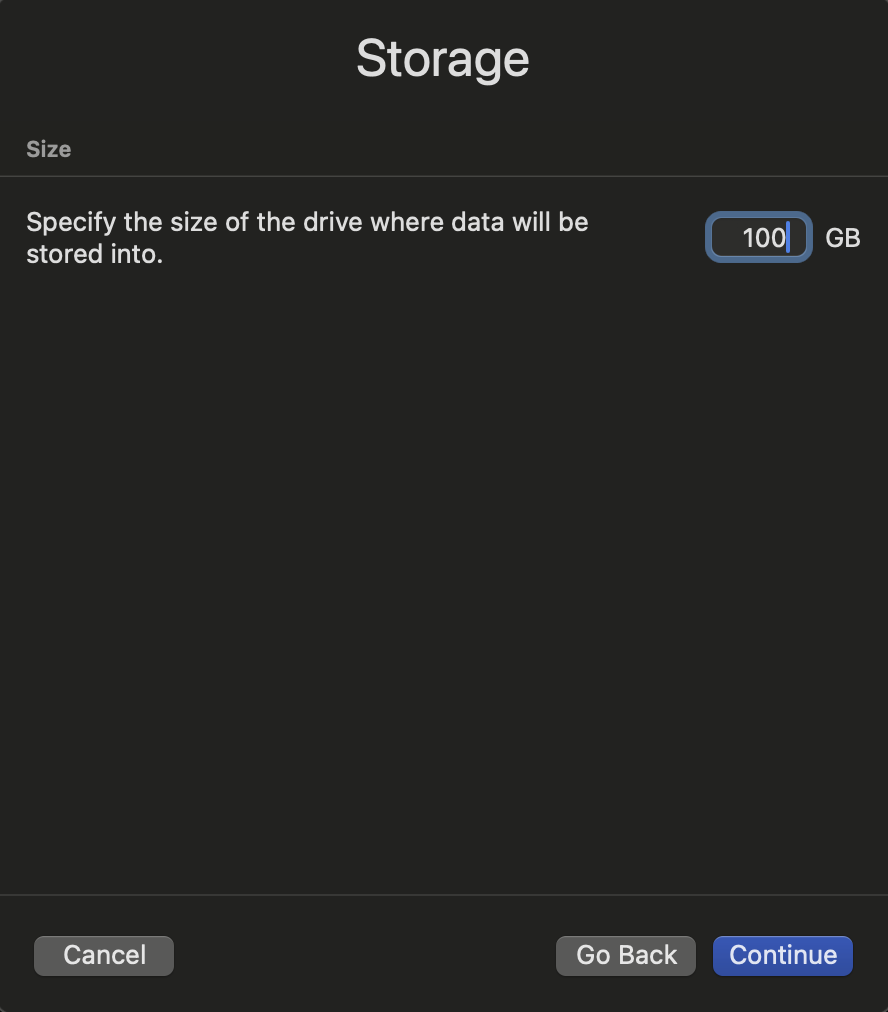
7. Next, Specify the disk size. I chose 100 GB
8. The shared directory is he you want a specific directory from your physical machine to be mapped on the OS.
9. Then, it's going to prompt you the configuration details
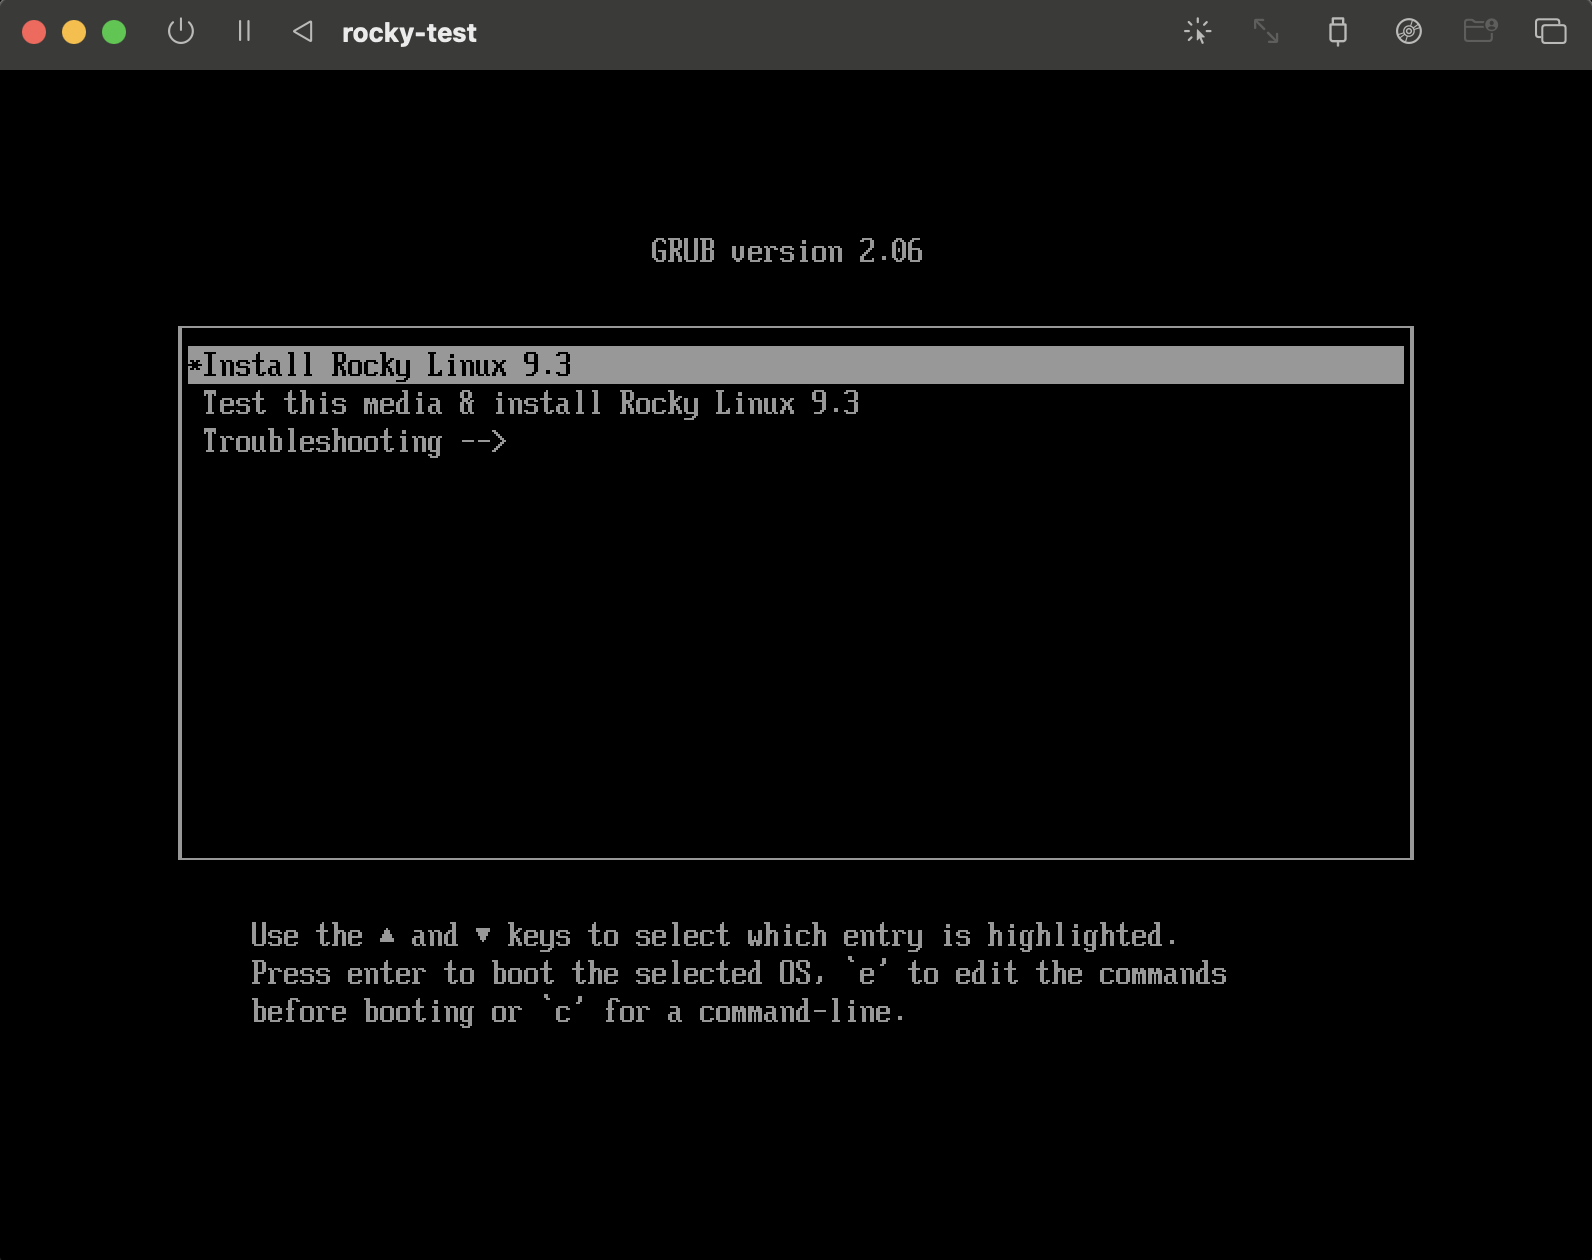
10. Hit the "save" button and start the VM. Once you hit start, it's gonna start the installation. I won't get into much detail about the installation.
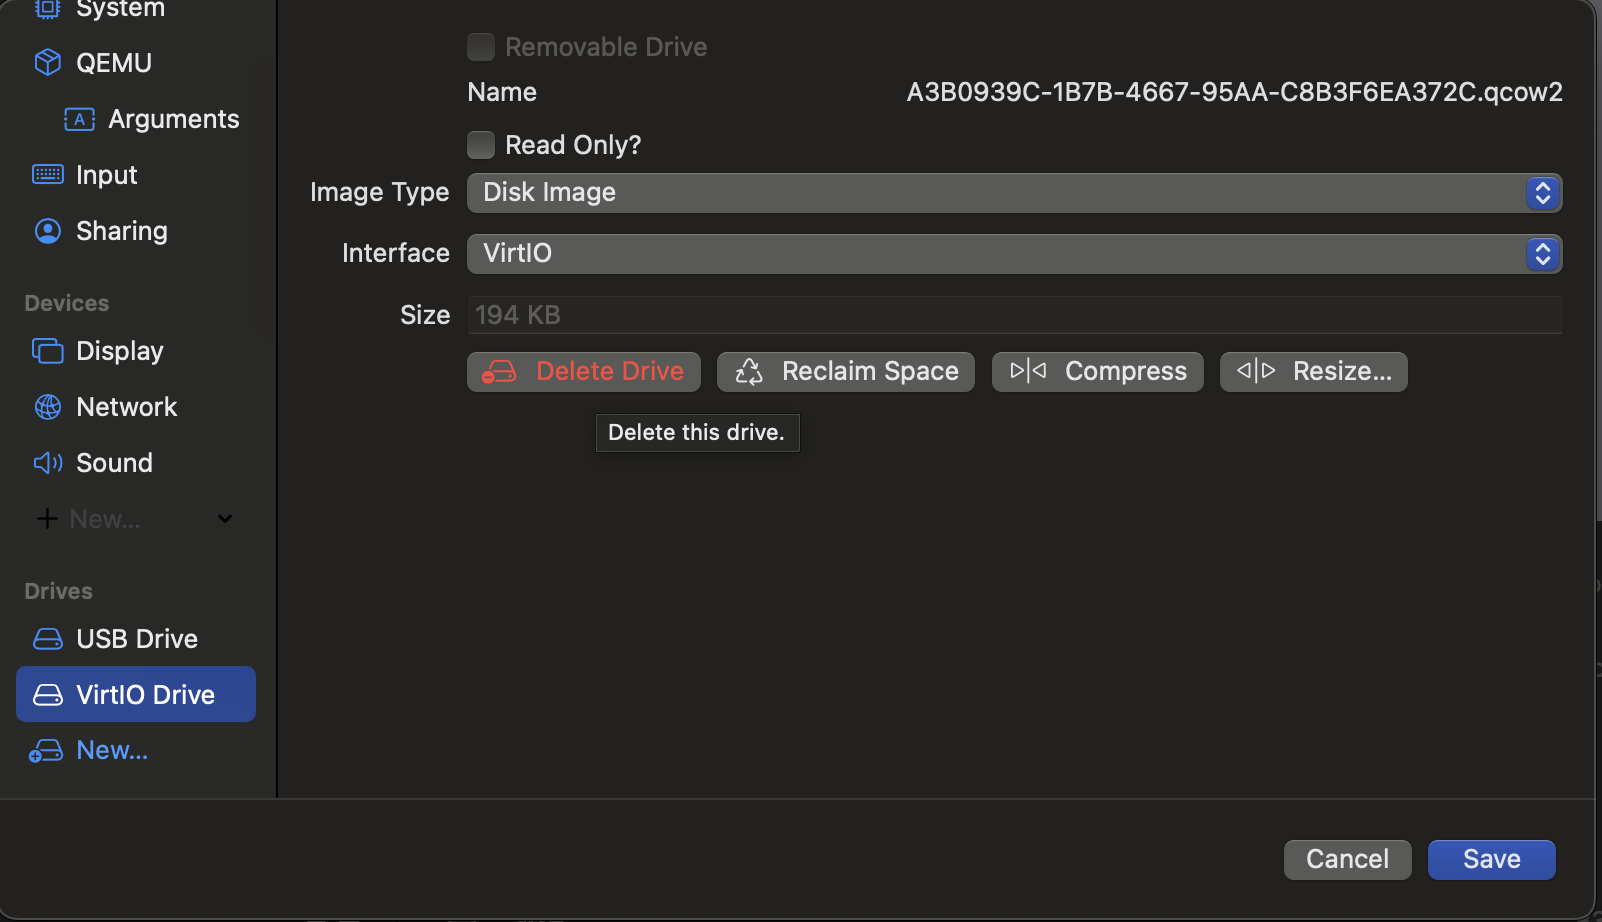
11. Once installed, shut down the VM, right-click, edit, and then go to VirtIO drive, then hit "Delete Drive"
You can now power on your virtual machine and it's pretty straightforward. In some future blog posts, I'll go into more details like emulated VLAN, bridge, and shared networking and installation on IOS.
Update from Social network:
"UTM works well. It's actually free but you have the paid version for little on the App Store. This will help the dev team." - André Jr Rondeau