An Aficionado Journey in Opensource & Linux – And now It's a FinTech touch!
Playing around with SSM, Tags, and Resource Group in AWS
AWS and Cloud Computing
Published: 2024-01-18 06:51:53
AWS Systems Manager is a service provided by Amazon Web Services (AWS) that helps you automate and manage your infrastructure at scale. It provides a unified user interface so that you can view operational data from multiple AWS services and automate operational tasks across your AWS resources. The way SSM (Systems Manager) works is by installing the SSM agent. It requires IAM permission/role as well. On AMI Linux, SSM is installed by default.
There are several features in AWS Systems Manager. Please check out the official AWS website as features within Systems Manager keep on changing.
Operations Management
Change Management
Application Management
Node Management
I'm going to share some of my practice with Node Management.
Register EC2 instances in the Systems Manager
1.On the console -> Systems Management -> Node Management -> Fleet Manager
That confirms nothing has been configured yet. There are no instances registered in the Fleet Manager.
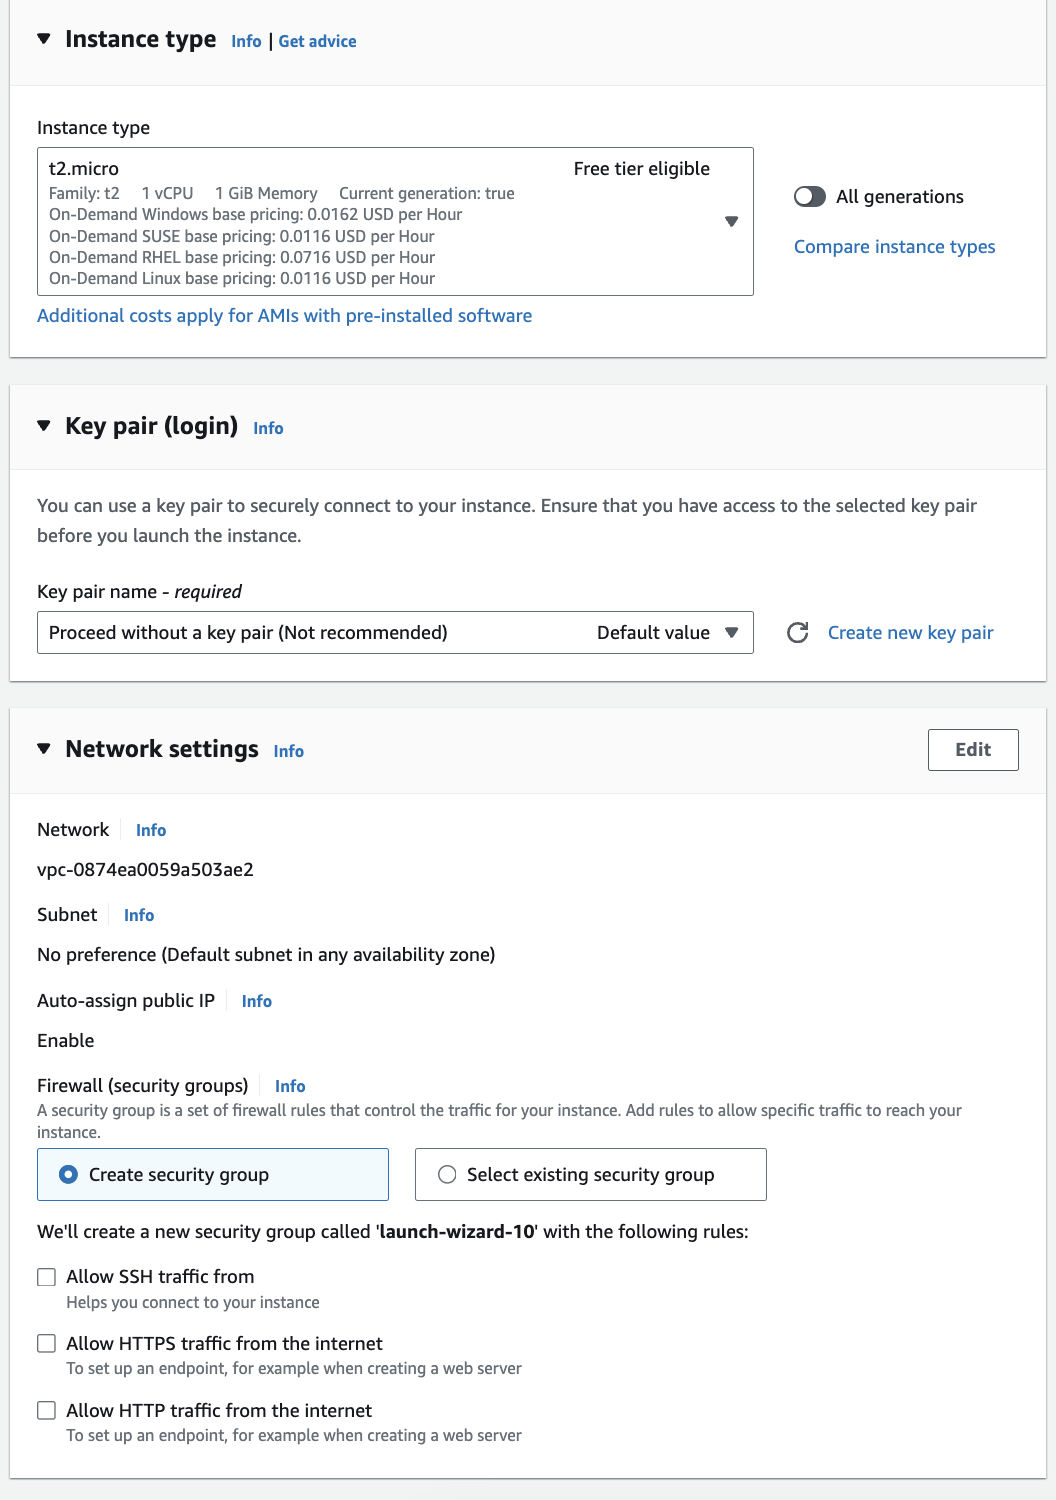
2. To register instances, first we need some instances ready. I created one instance with no key pair attached, new security groups by default without any rules in it
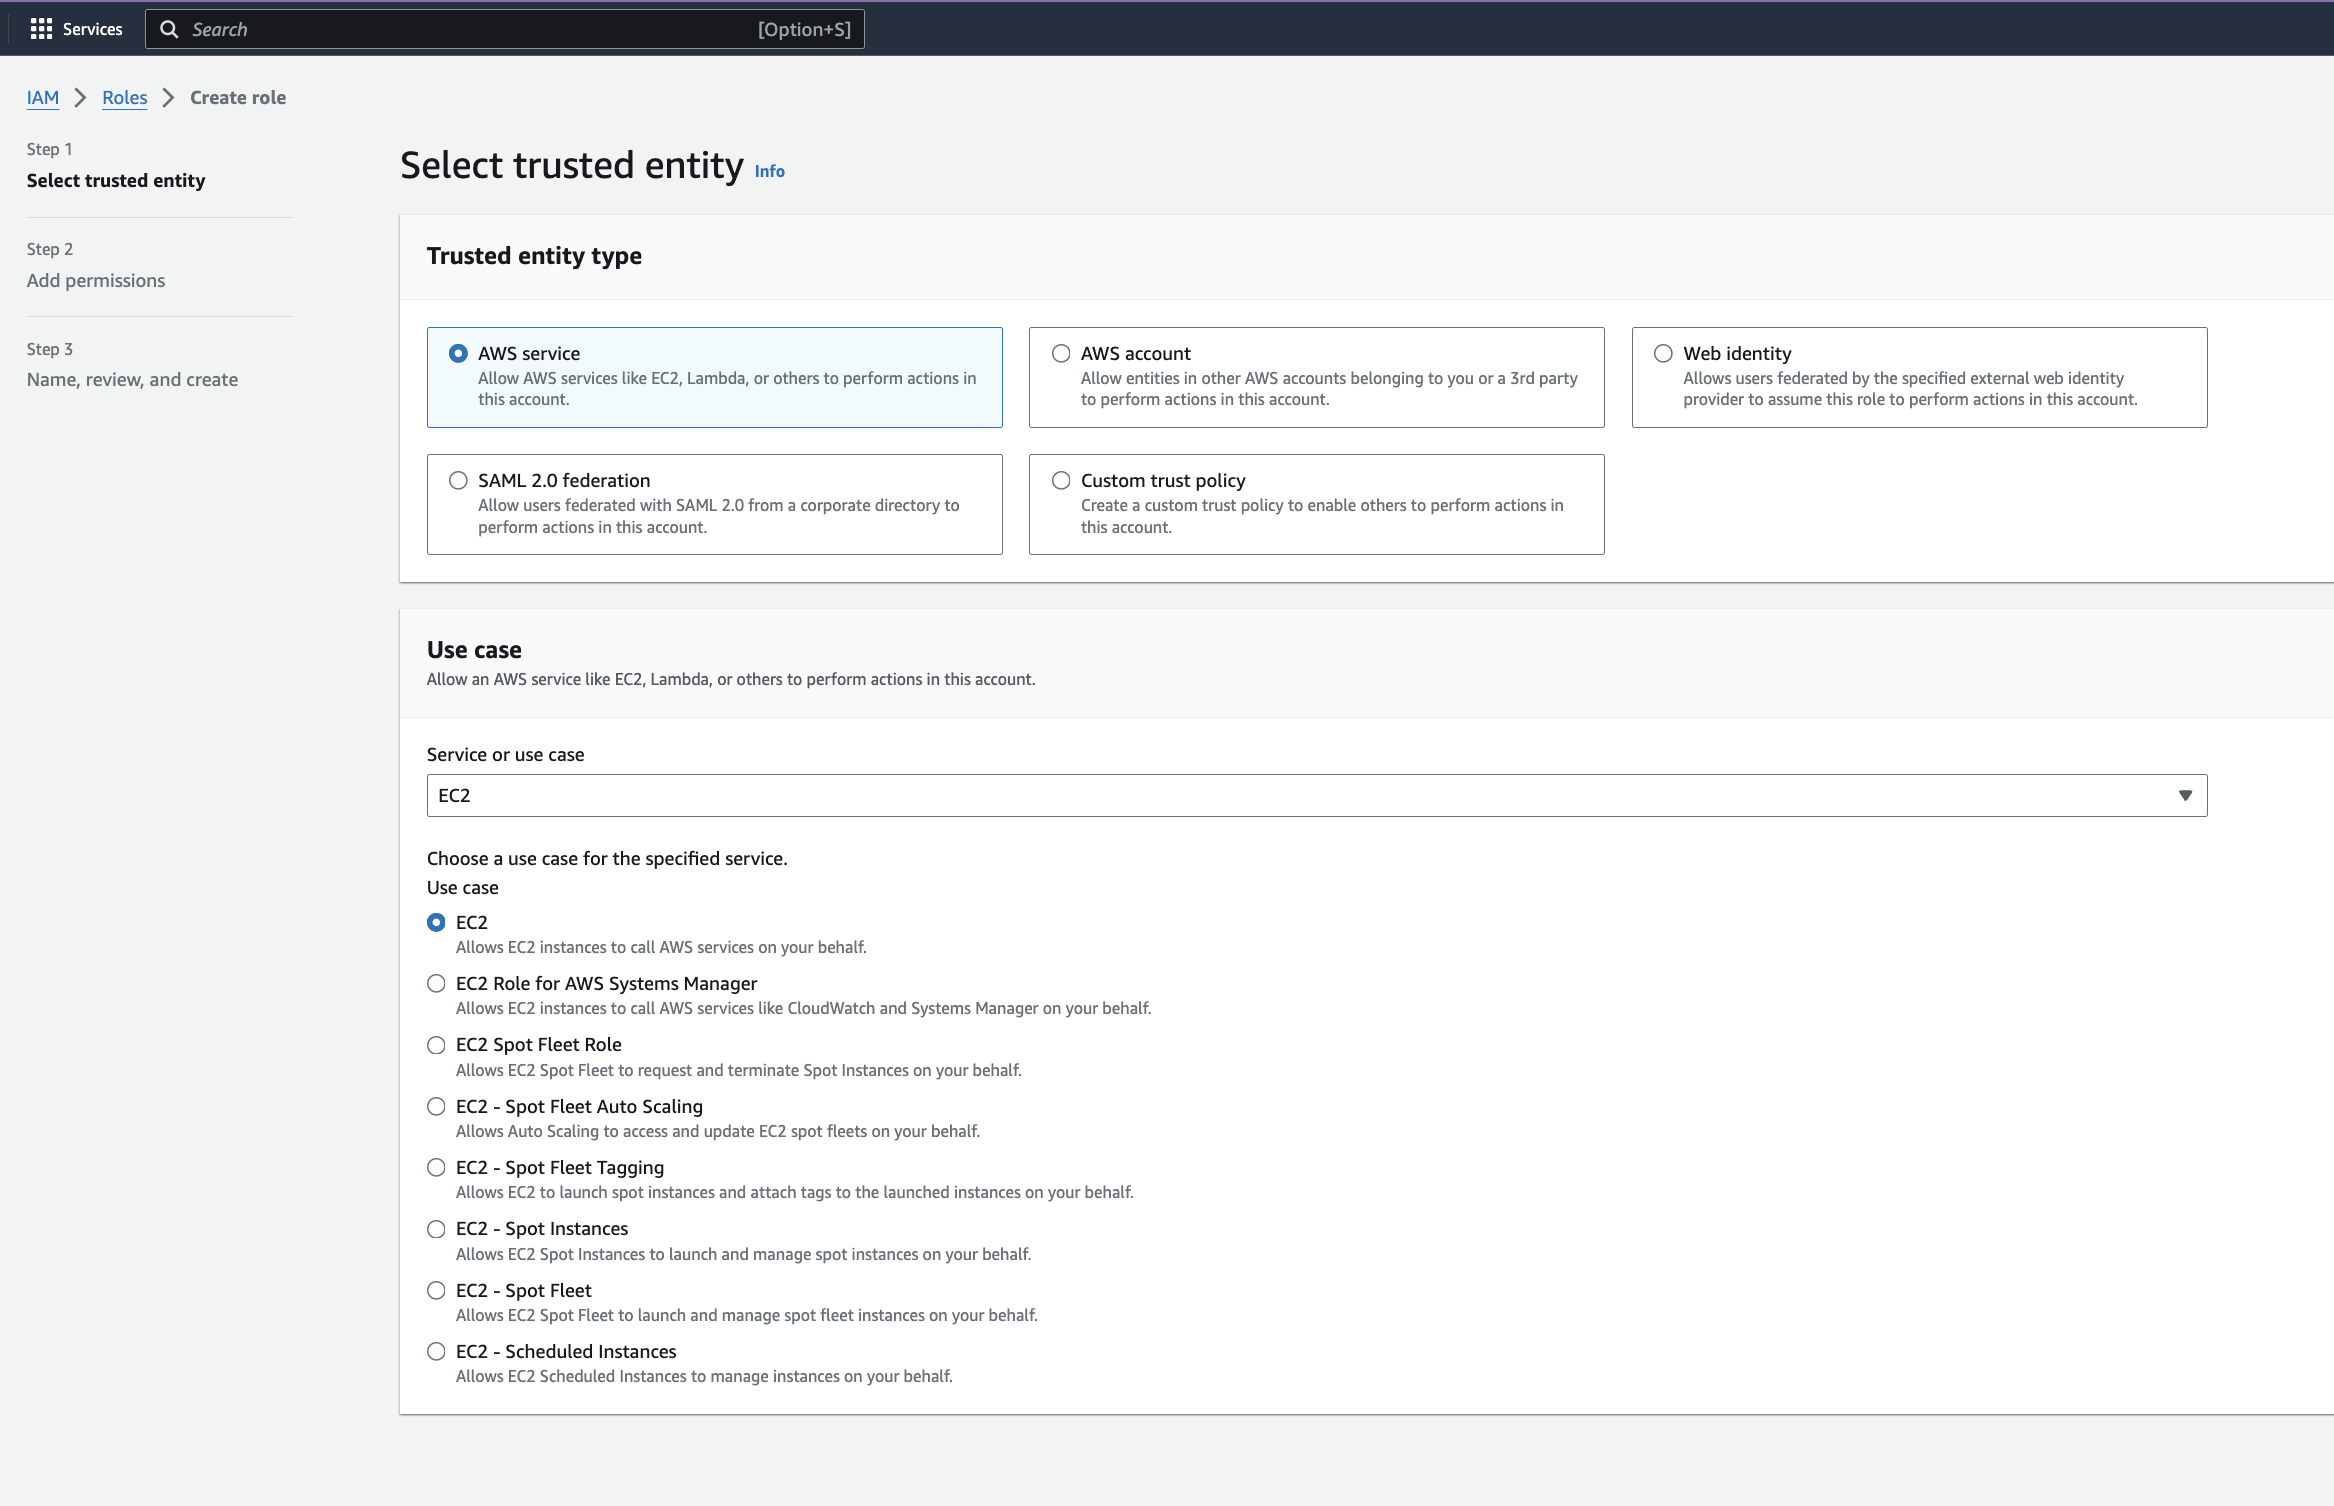
3. In "Advanced details", hit on "Create IAM Profile", this should bring you to the IAM -> Roles section:
IAM -> Create roles -> AWS Service -> Choose EC2
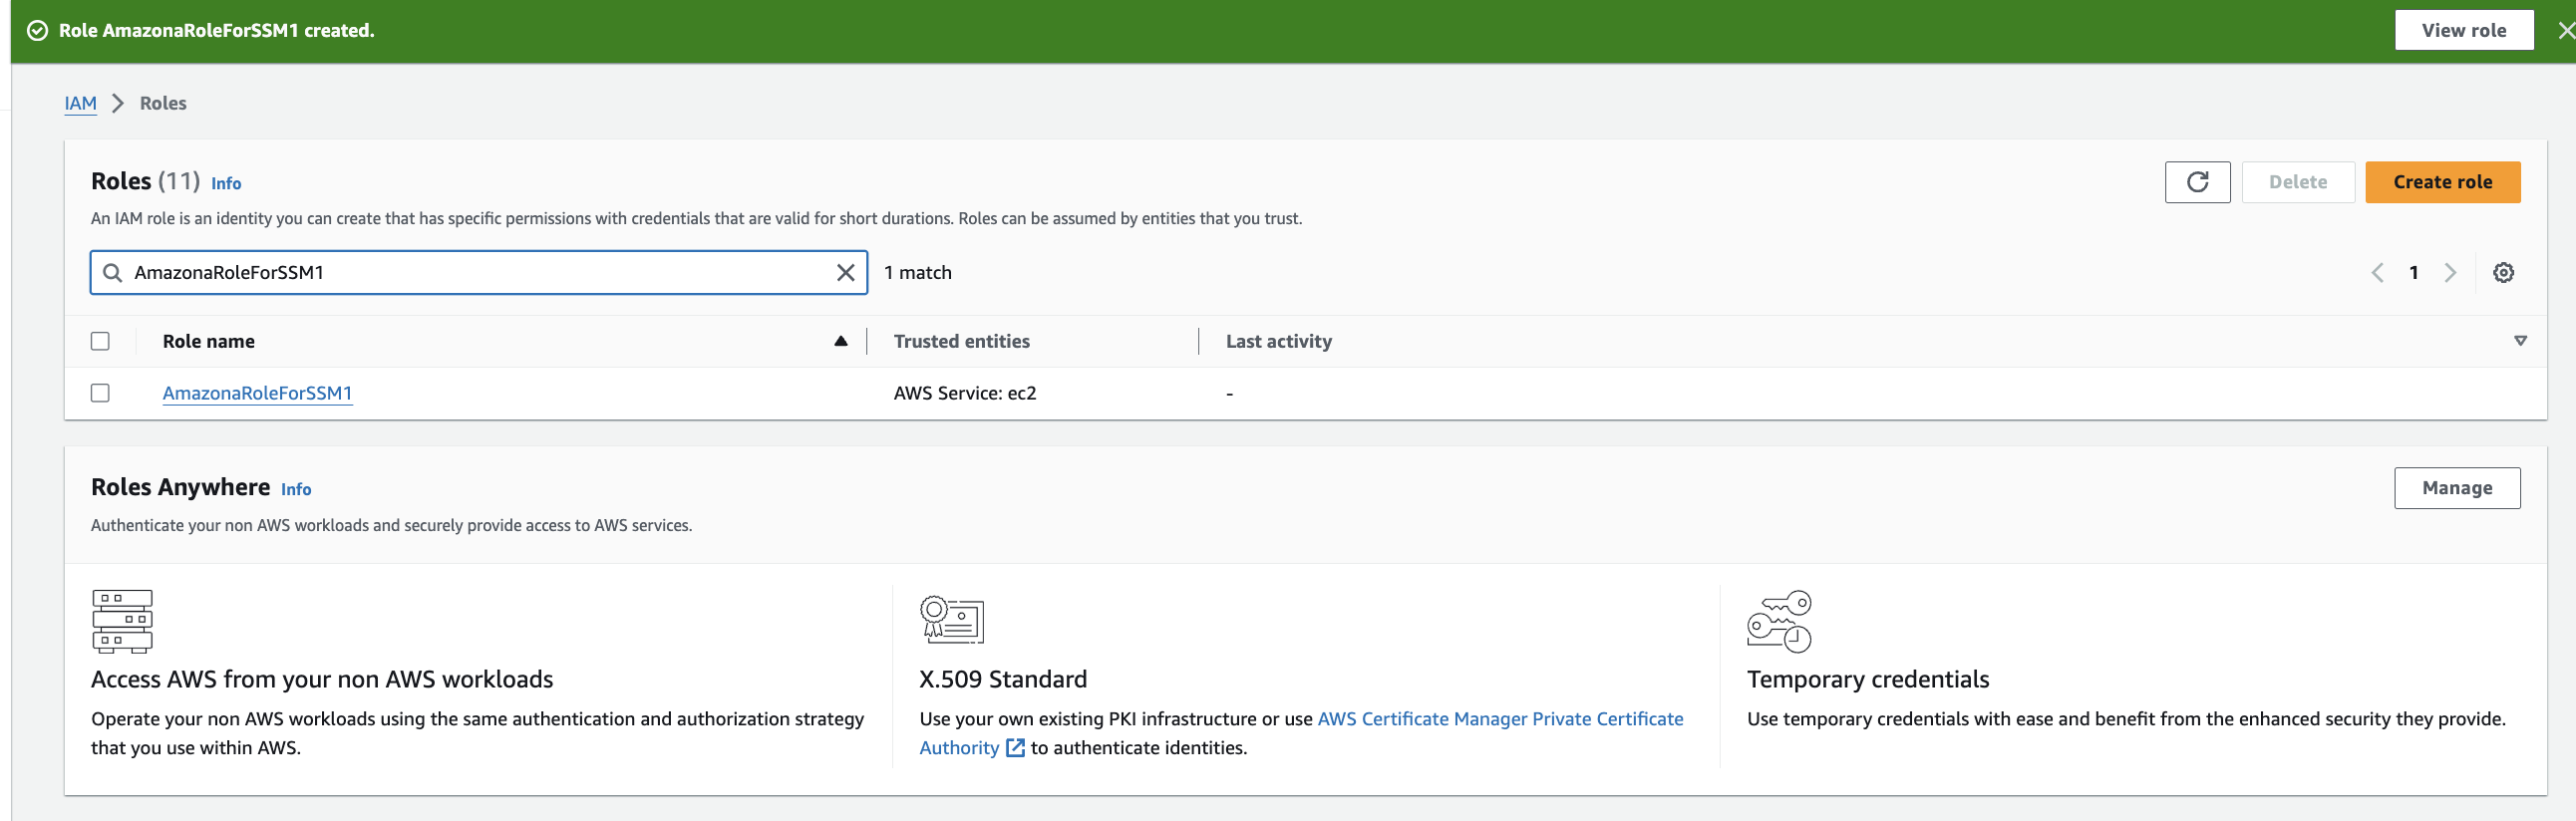
4. Now, need to attach the policies to the role: attached the following Policies (I searched SSM): AmazonSSMManagedInstanceCore. Hit next. Then give the role a name, for example: "AmazonaRoleForSSM1". Create the role
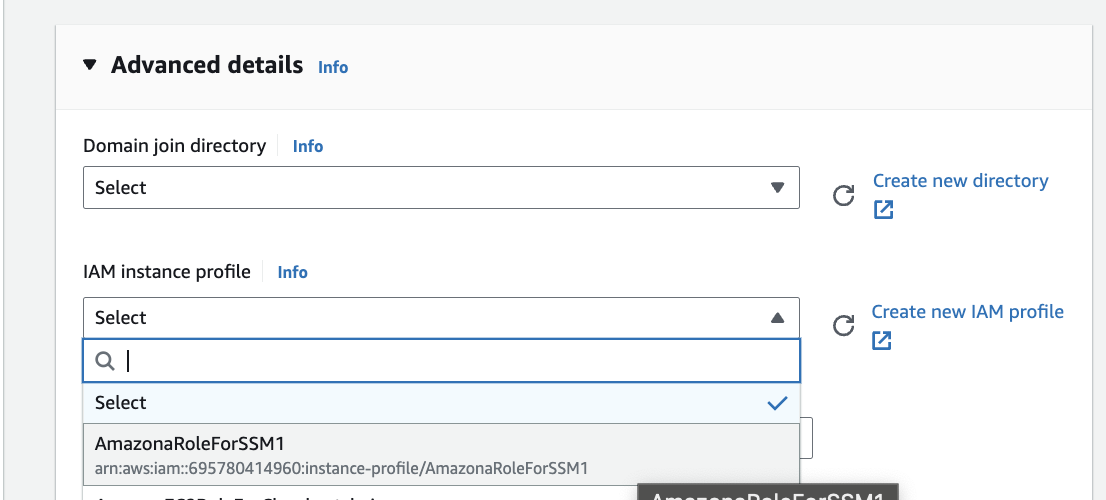
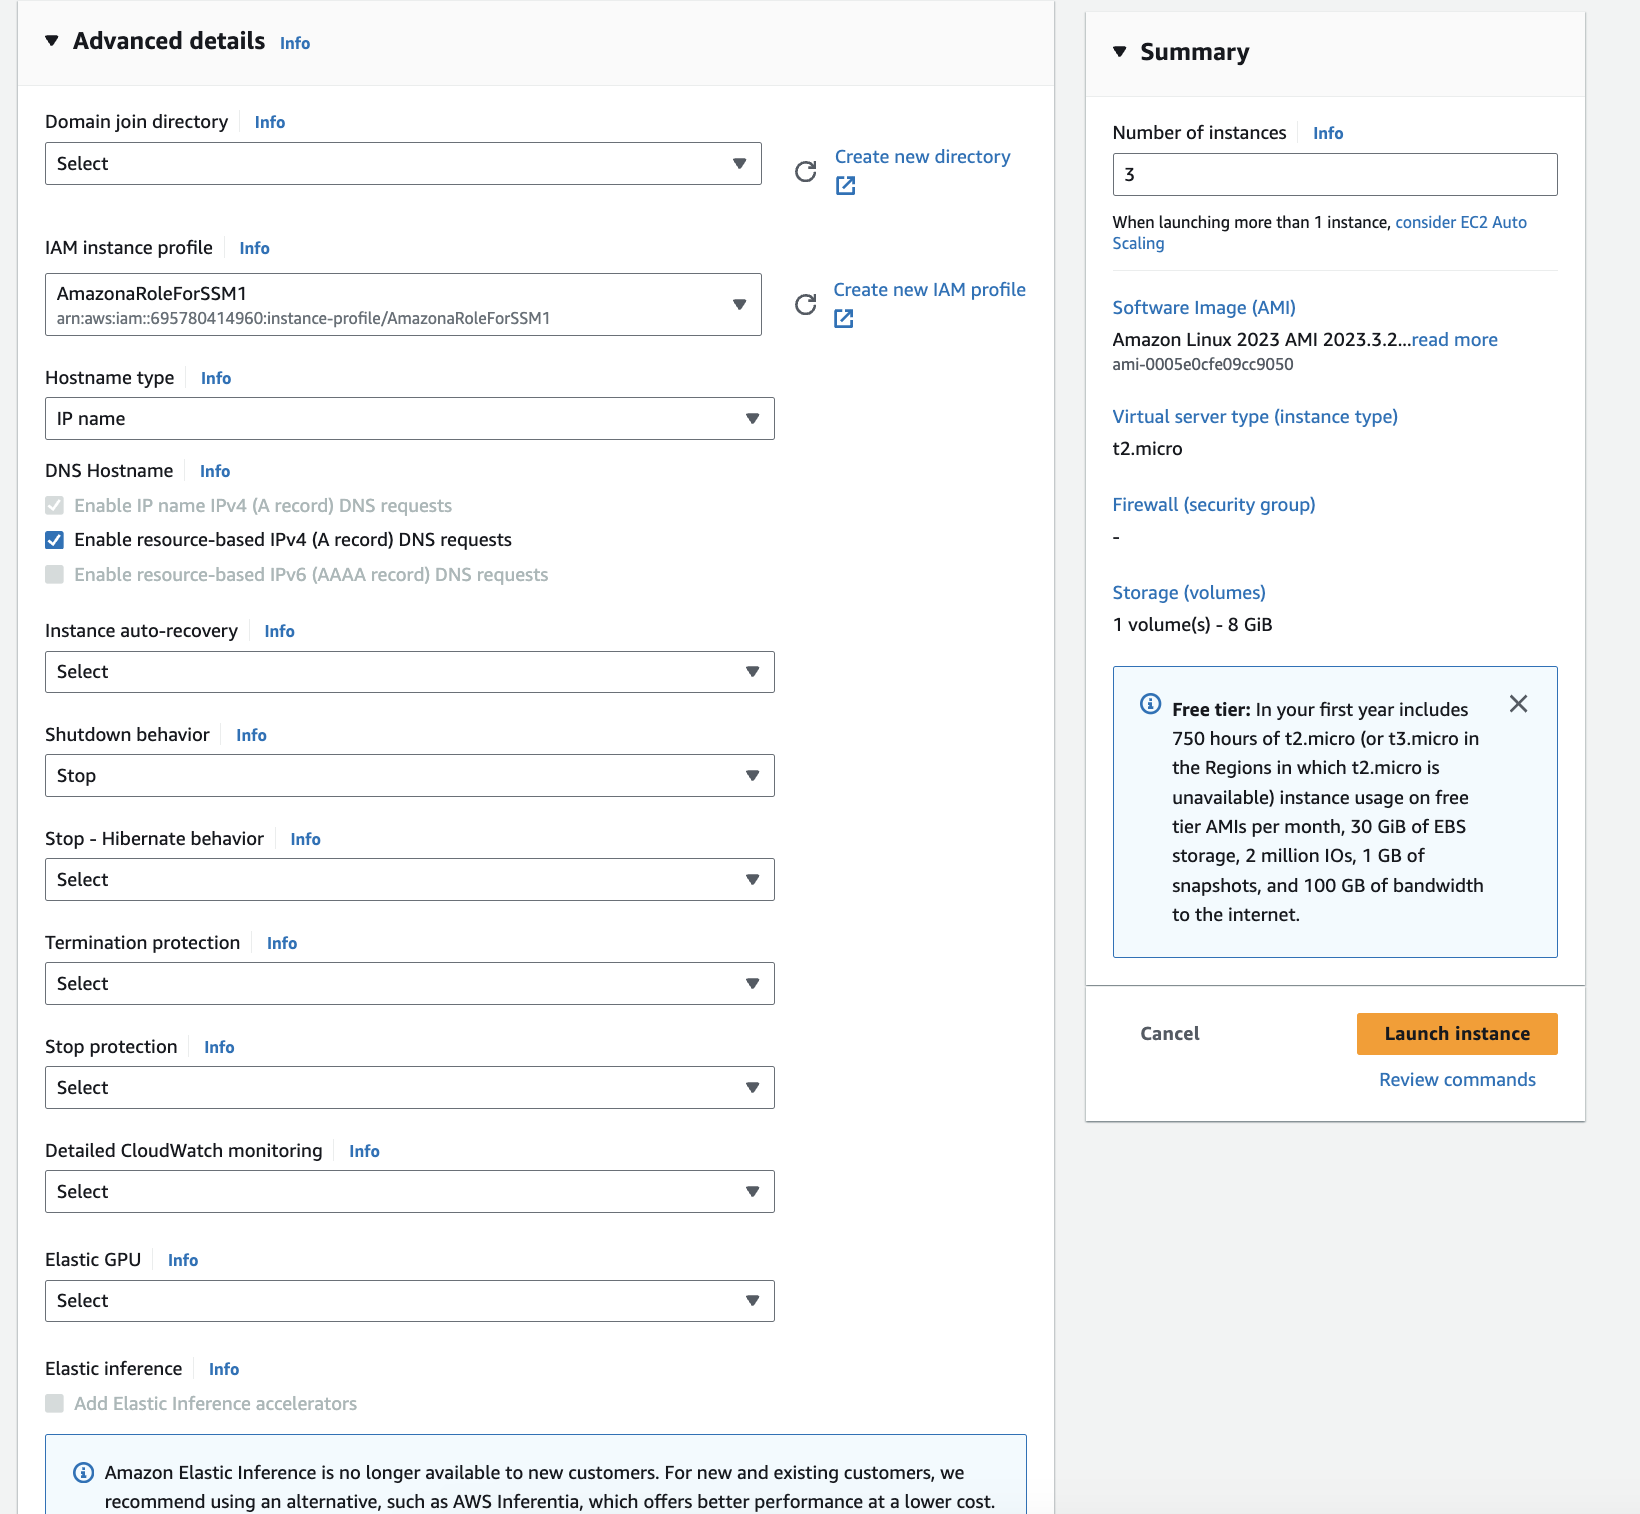
5. Under "Advanced details" when creating the instance, attach the role
6. I also chose 3 instances to be created and launched it.
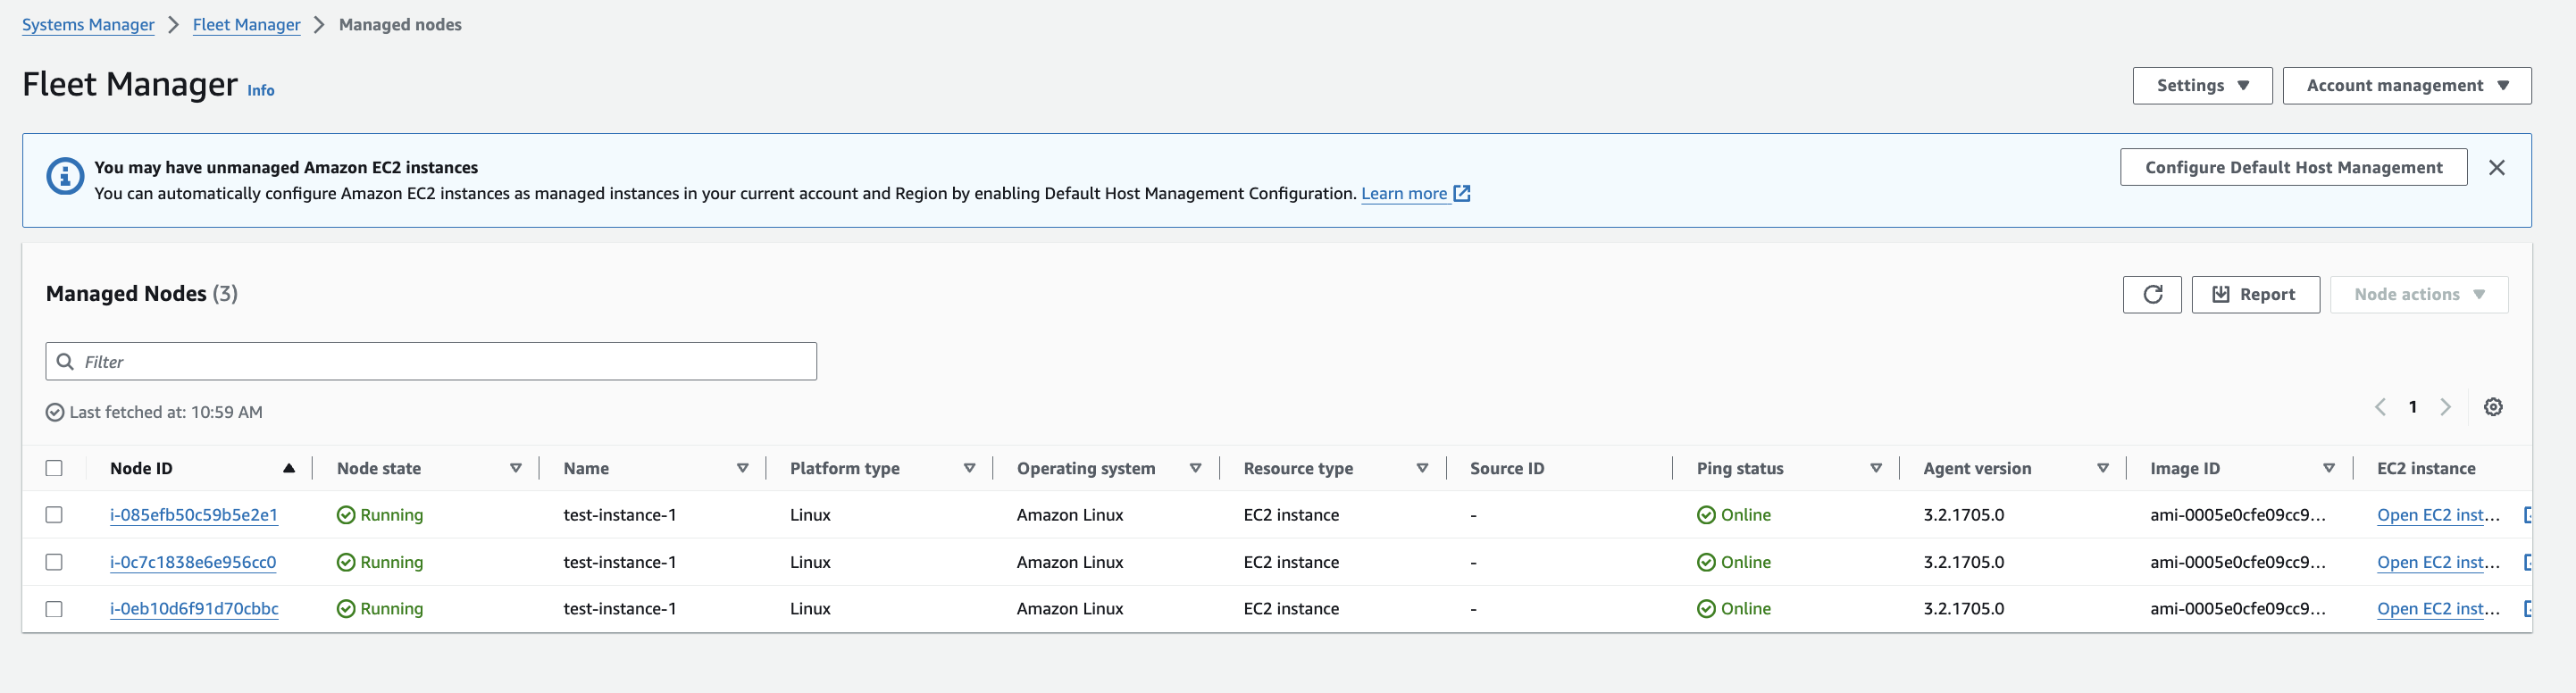
7. All three instances should now appear on the Fleet Manager under AWS Systems Manager.
AWS Tags
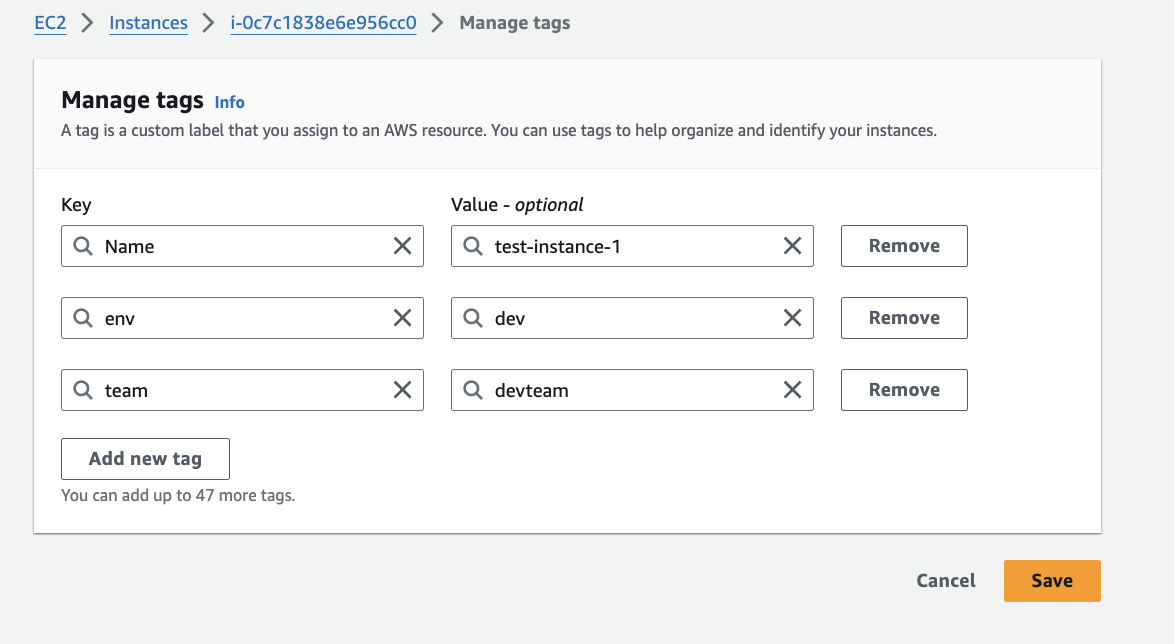
AWS Tags are used to add test key-value pairs to AWS Resources. Apart from identifying AWS Resources, it can also be used for Automation and Cost Allocation. I will now add Tags to those instances associating the Name, Environment, and Team.
8. To add the tags:
AWS -> Instances -> Select instance -> Tags -> Manage Tags
I did the same for the second instance except for the third one, I identified it with prod and prodteam. Also changed the "Name" tag value to instance1, instance2 and instance3
Resource Groups & Tag Editor
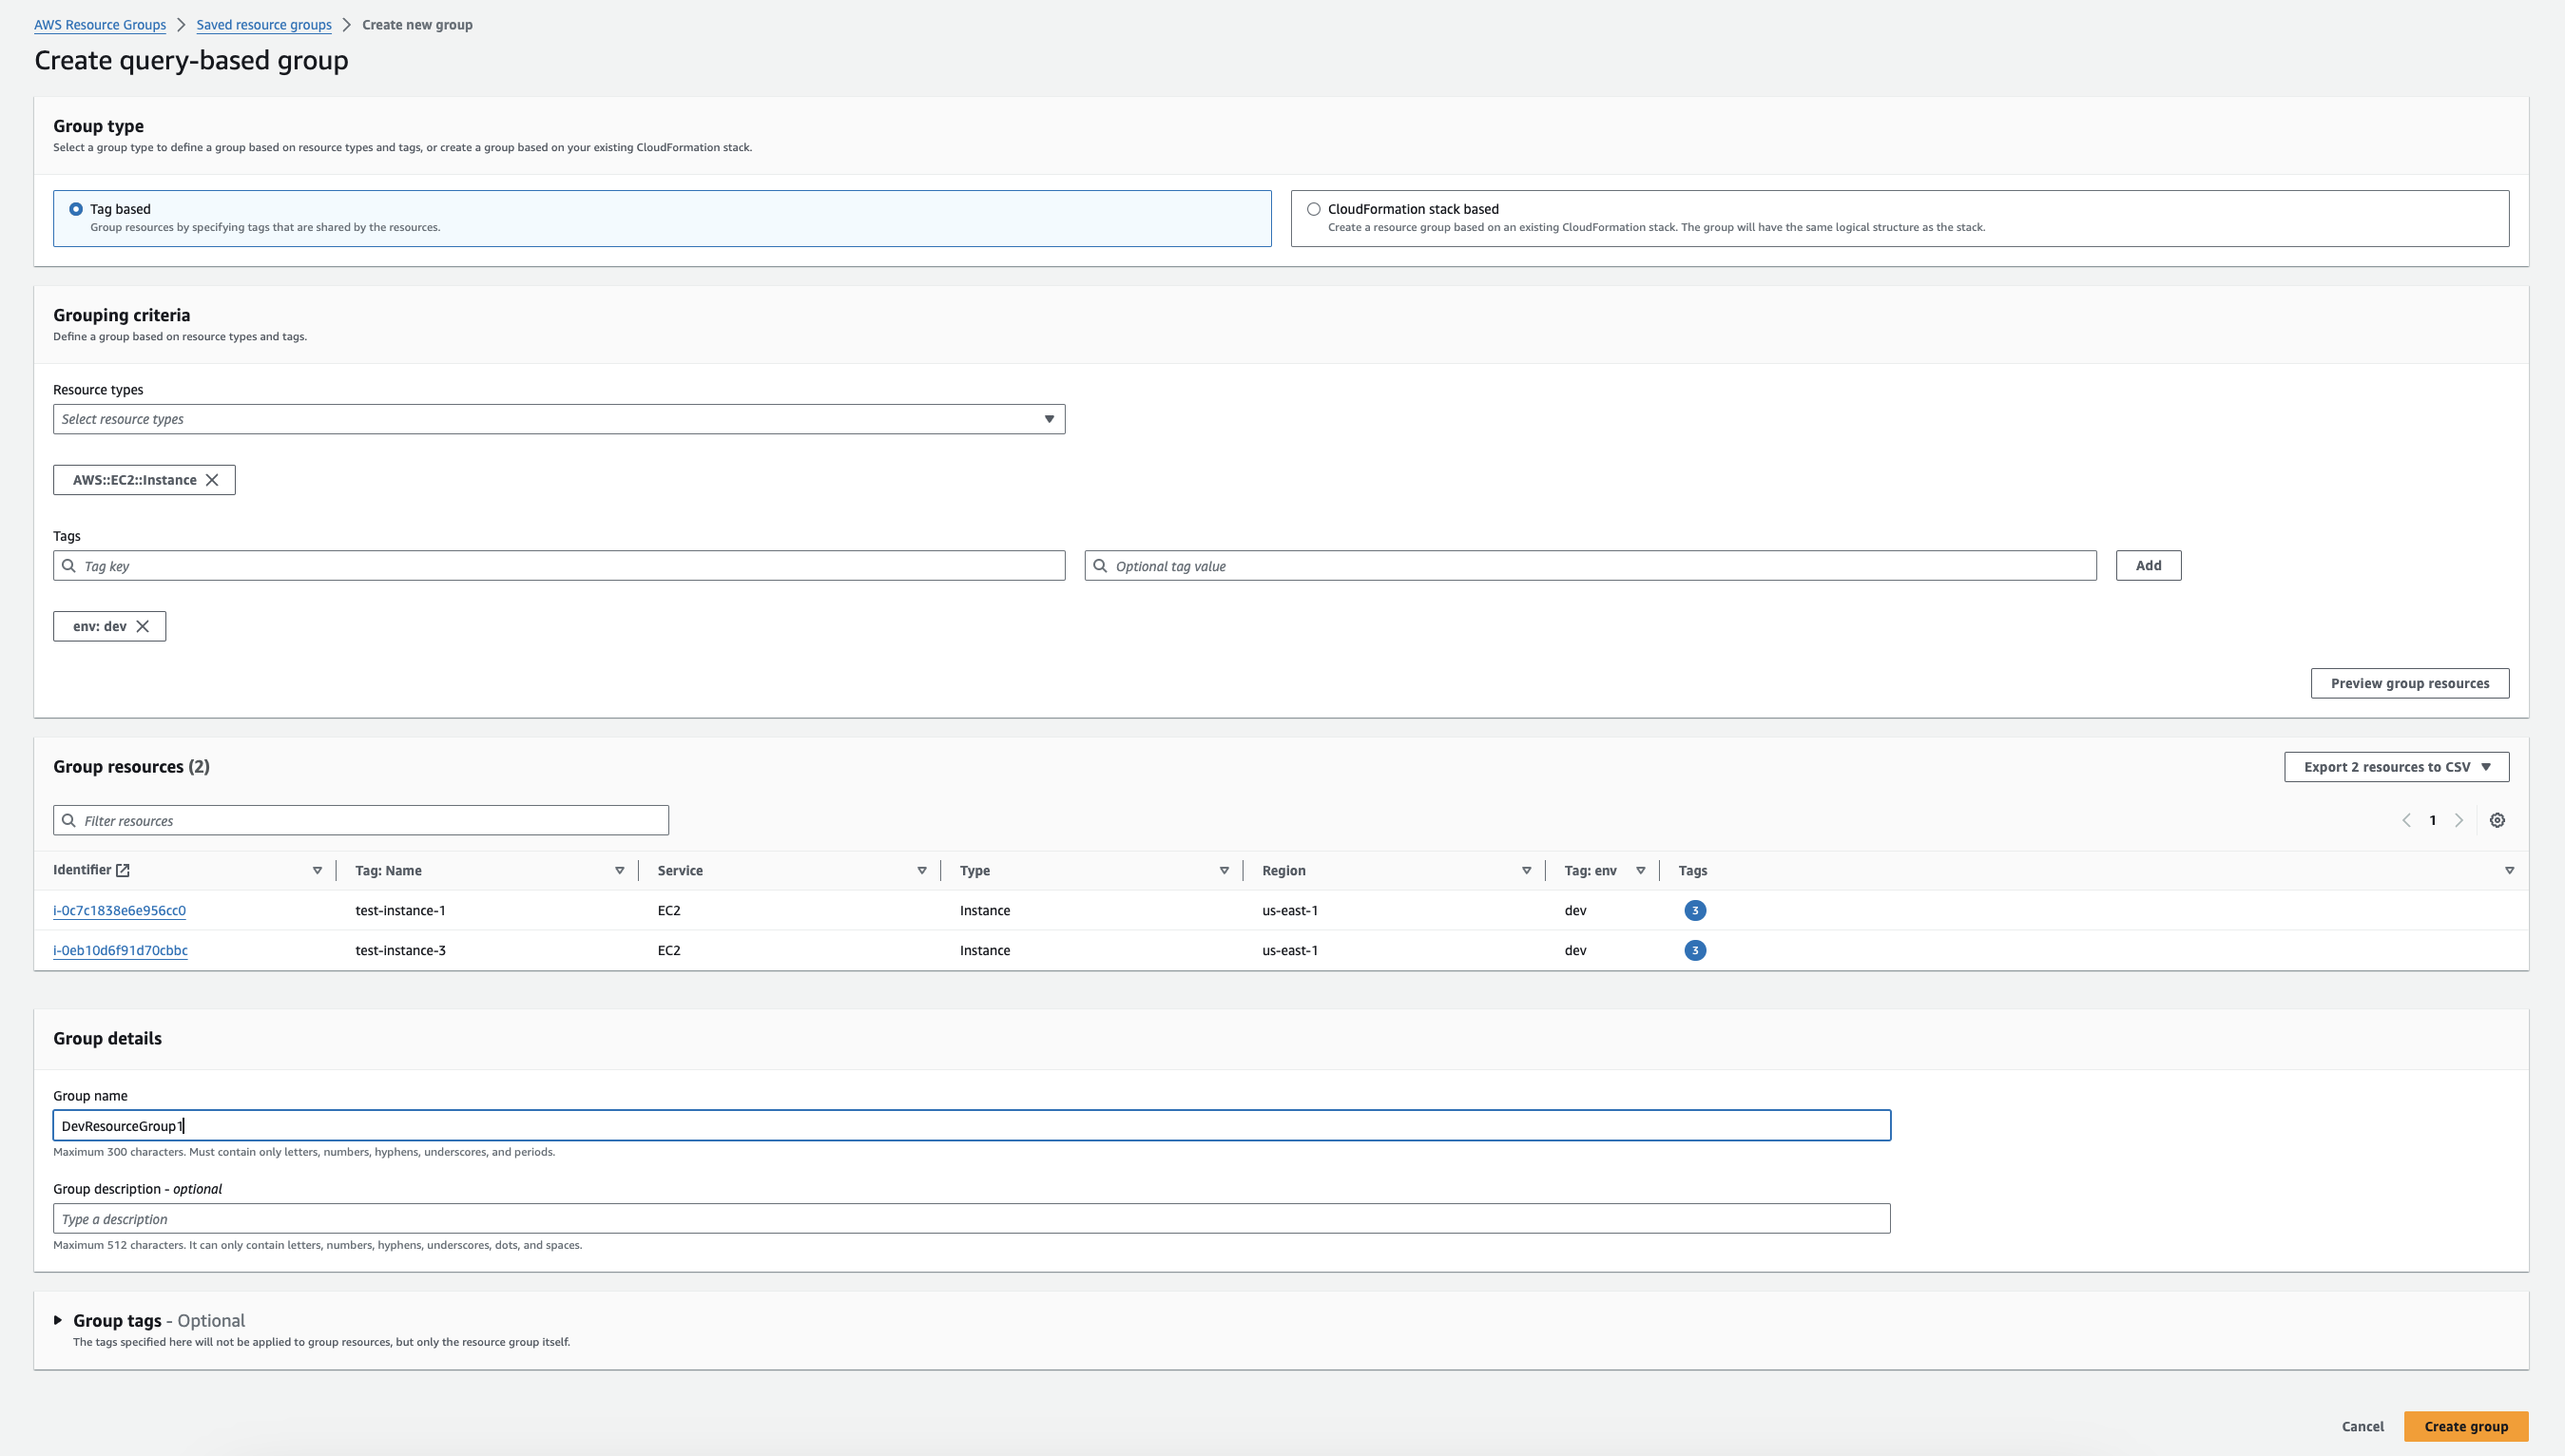
9. Once saved, go to Console -> Resource Groups & Tag Editor -> Create Resource Group.
Under Grouping criteria, search for EC2::Instance to narrow the search. The search for the tags "env" with value "dev". Hit the "Add" button. By clicking the "Preview" button, it will search for all EC2 instances with those specific tags. I also named it as "DevResourceGroup1"
Then hit "Create Group". Also did the same for the prod one.
10. I created 2 Resource groups as follows:
SSM Documents and SSM Command
AWS Systems Manager Documents, commonly known as SSM documents, are written in JavaScript Object Notation (JSON) or YAML and define the actions that the Systems Manager performs on managed instances. These documents provide a structured and organized way to specify configuration information and define tasks that you want to perform on your instances. SSM documents are used in various Systems Manager features, including Automation, Run Command, State Manager, and other capabilities (For example: retrieve data from Parameter Store).
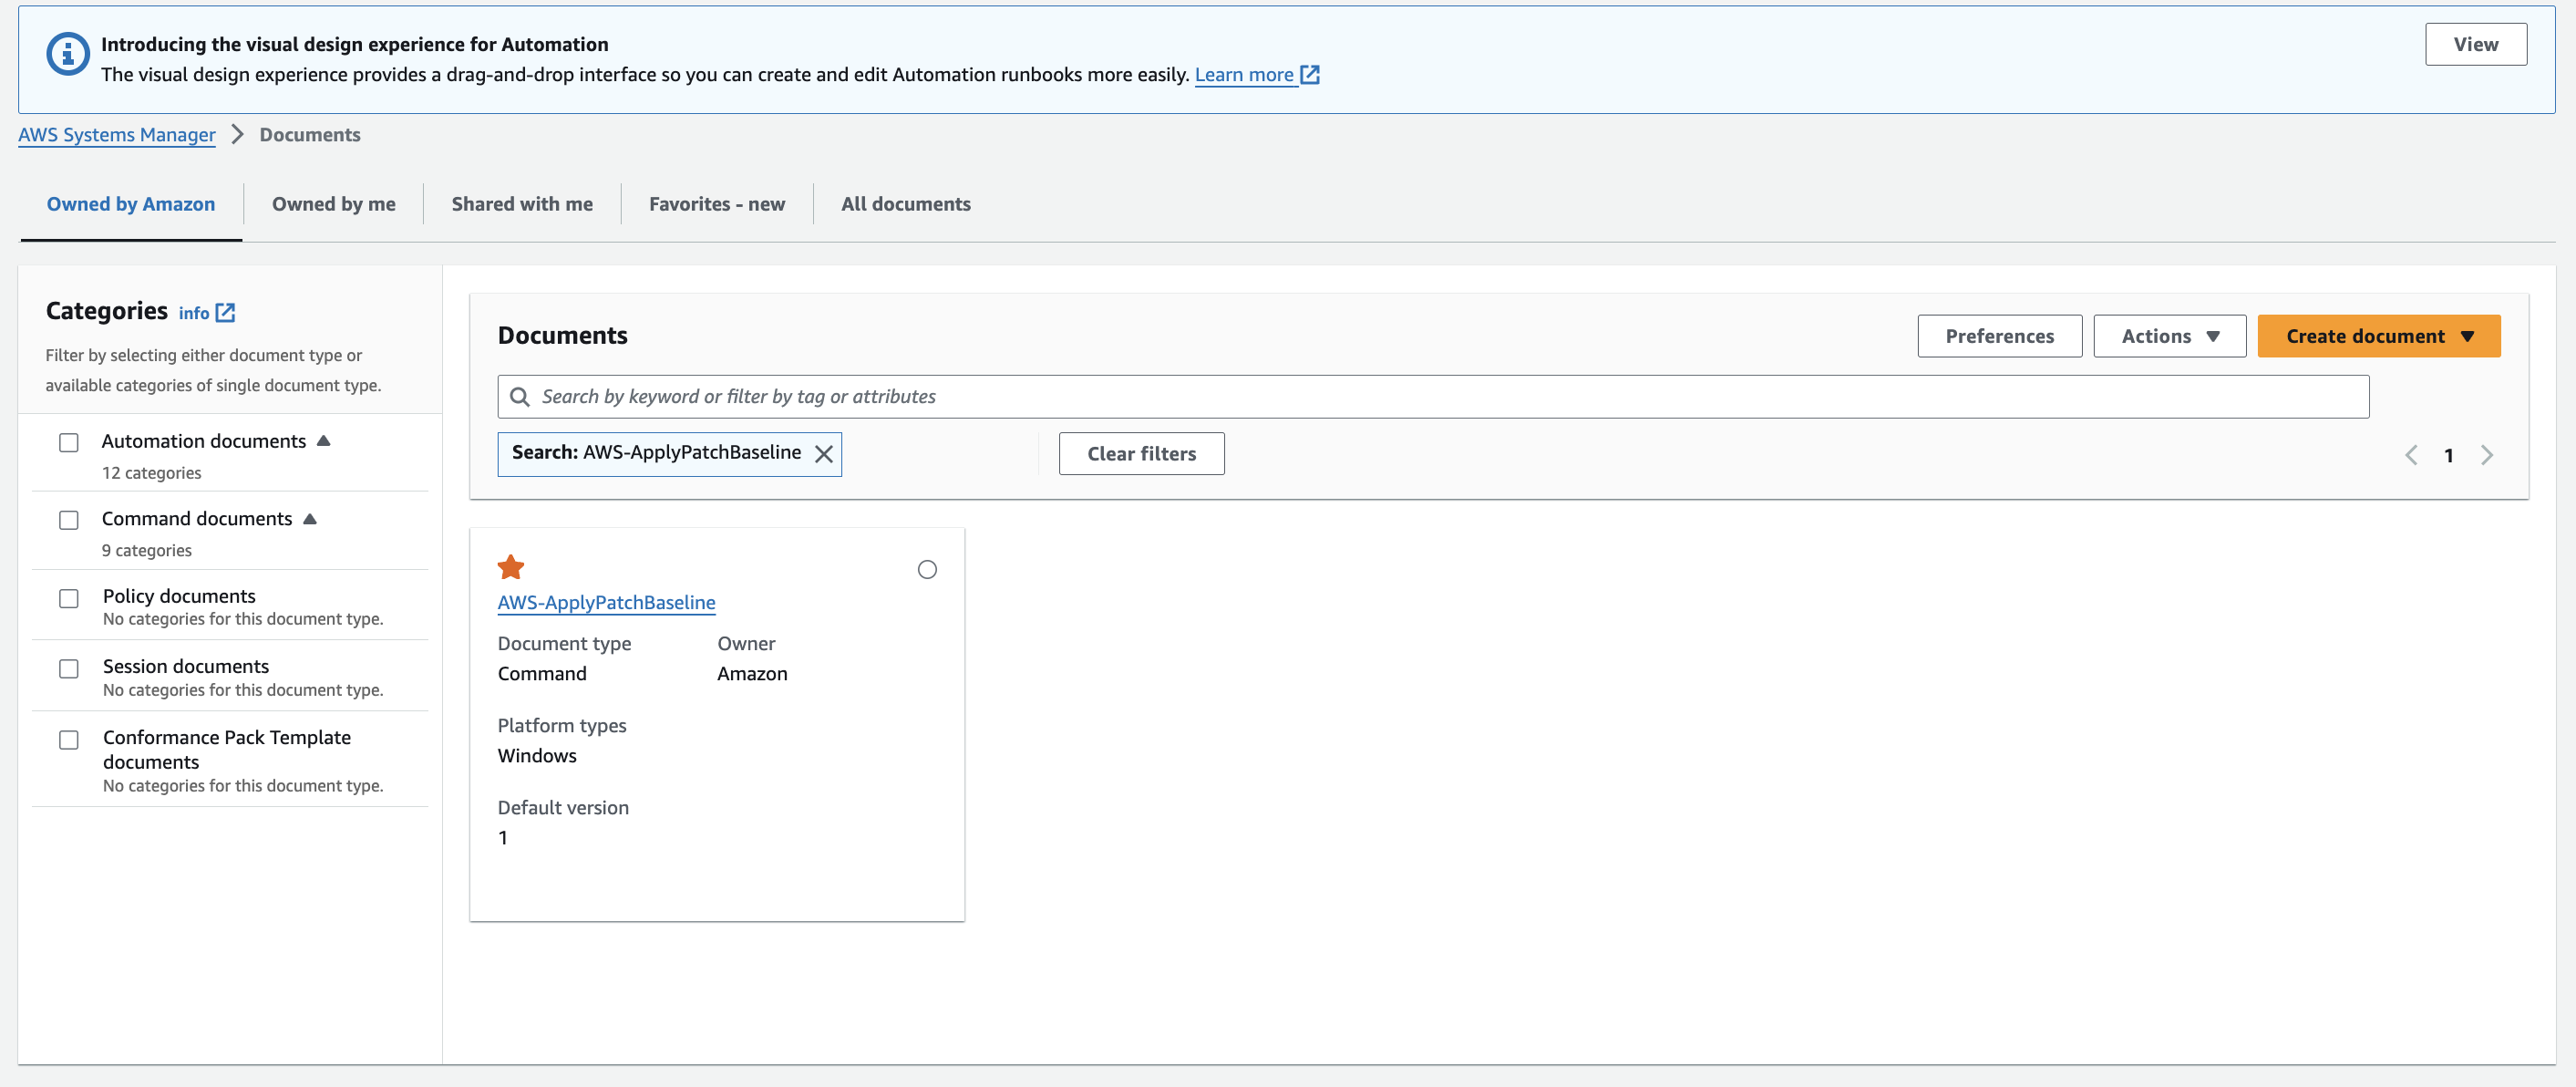
11. Go to Console -> Systems Manager - > Under Shared Resources -> Documents
I'm going to use a document owned by AWS called "AWS-ApplyPatchBaseline".
12. To run a command (execute a document) for a fleet of EC2 instances, we can create our own "Document " for a session.
AWS Systems Manager -> Documents -> Create Document
I gave the Document the name "mydocumentInstallNginx". Then select the Target Type as "EC2::Instance", and the Document type as "Command". Select YAML. And tweak the current YAML as follows:
This should create the Document
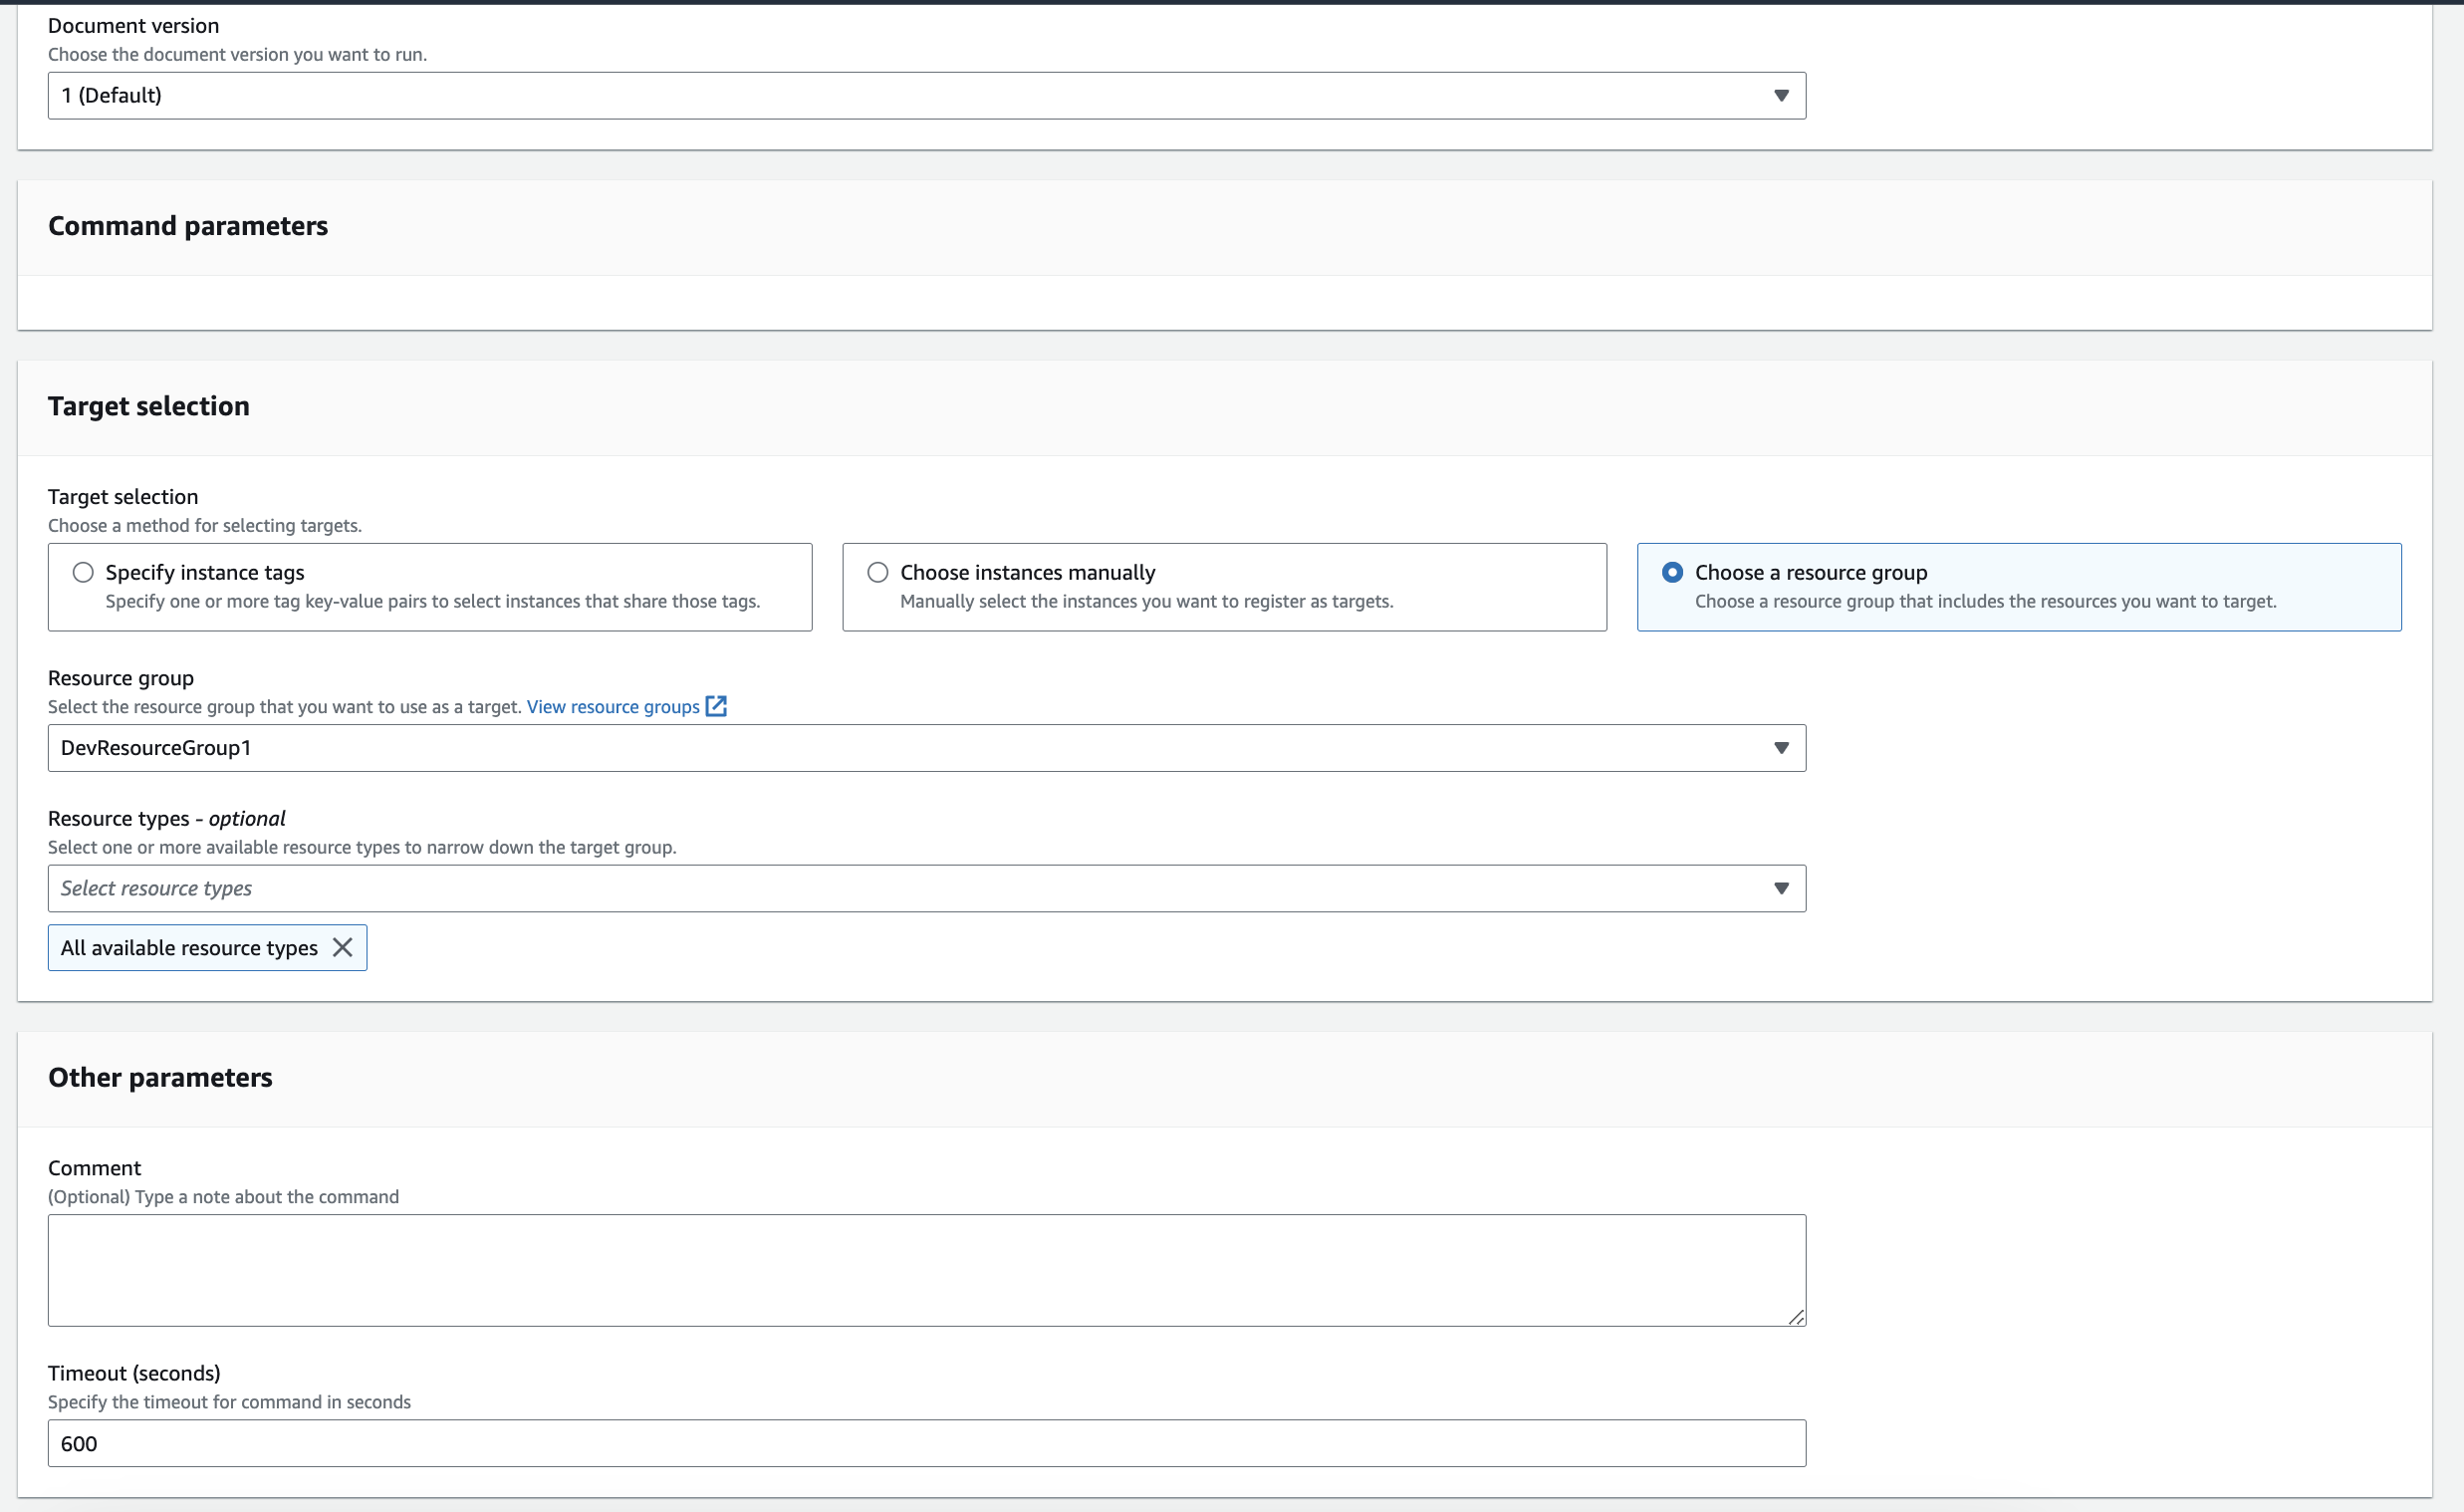
13. Go to Systems Manager -> Under Node Management -> Run Command -> Then search for the Document
14. Then, choose the document and choose Resource Groups
The timeout means if within 600 seconds the command does not get executed to stop it.
15. Next is the "Concurrency" and "Error Threshold" parameters under Rate control.
The "concurrency" parameter means if we want to run the command one at a time on each instance or all them, then specified how much concurrency is needed on per instance
The "Error Threshold" parameter is to measure how much errors should happen before it stopped executing the Document.
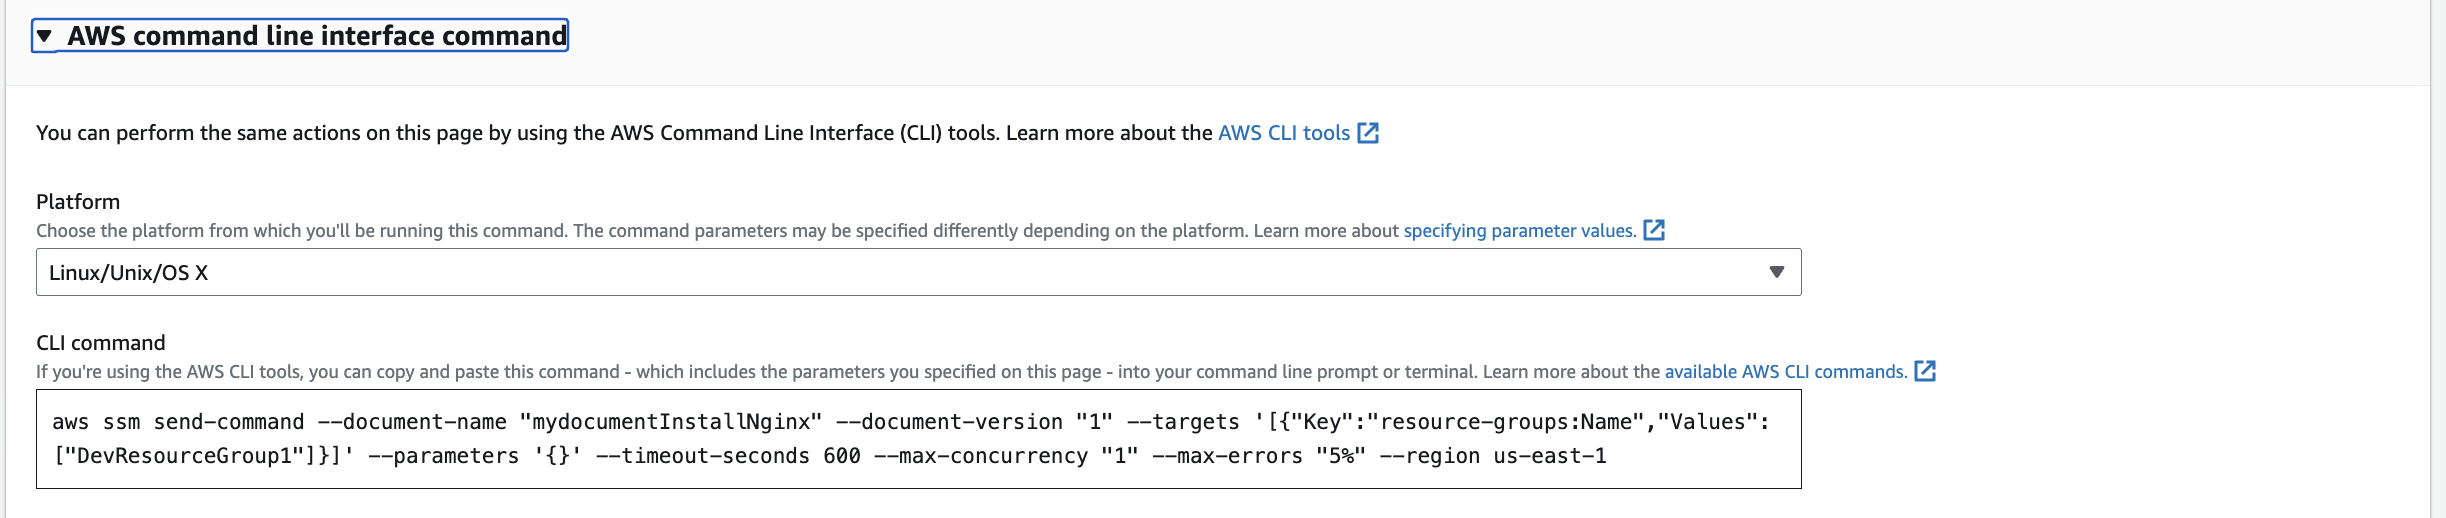
16. The AWS CLI options is the equivalent of the command if we want to run in manually through SSM
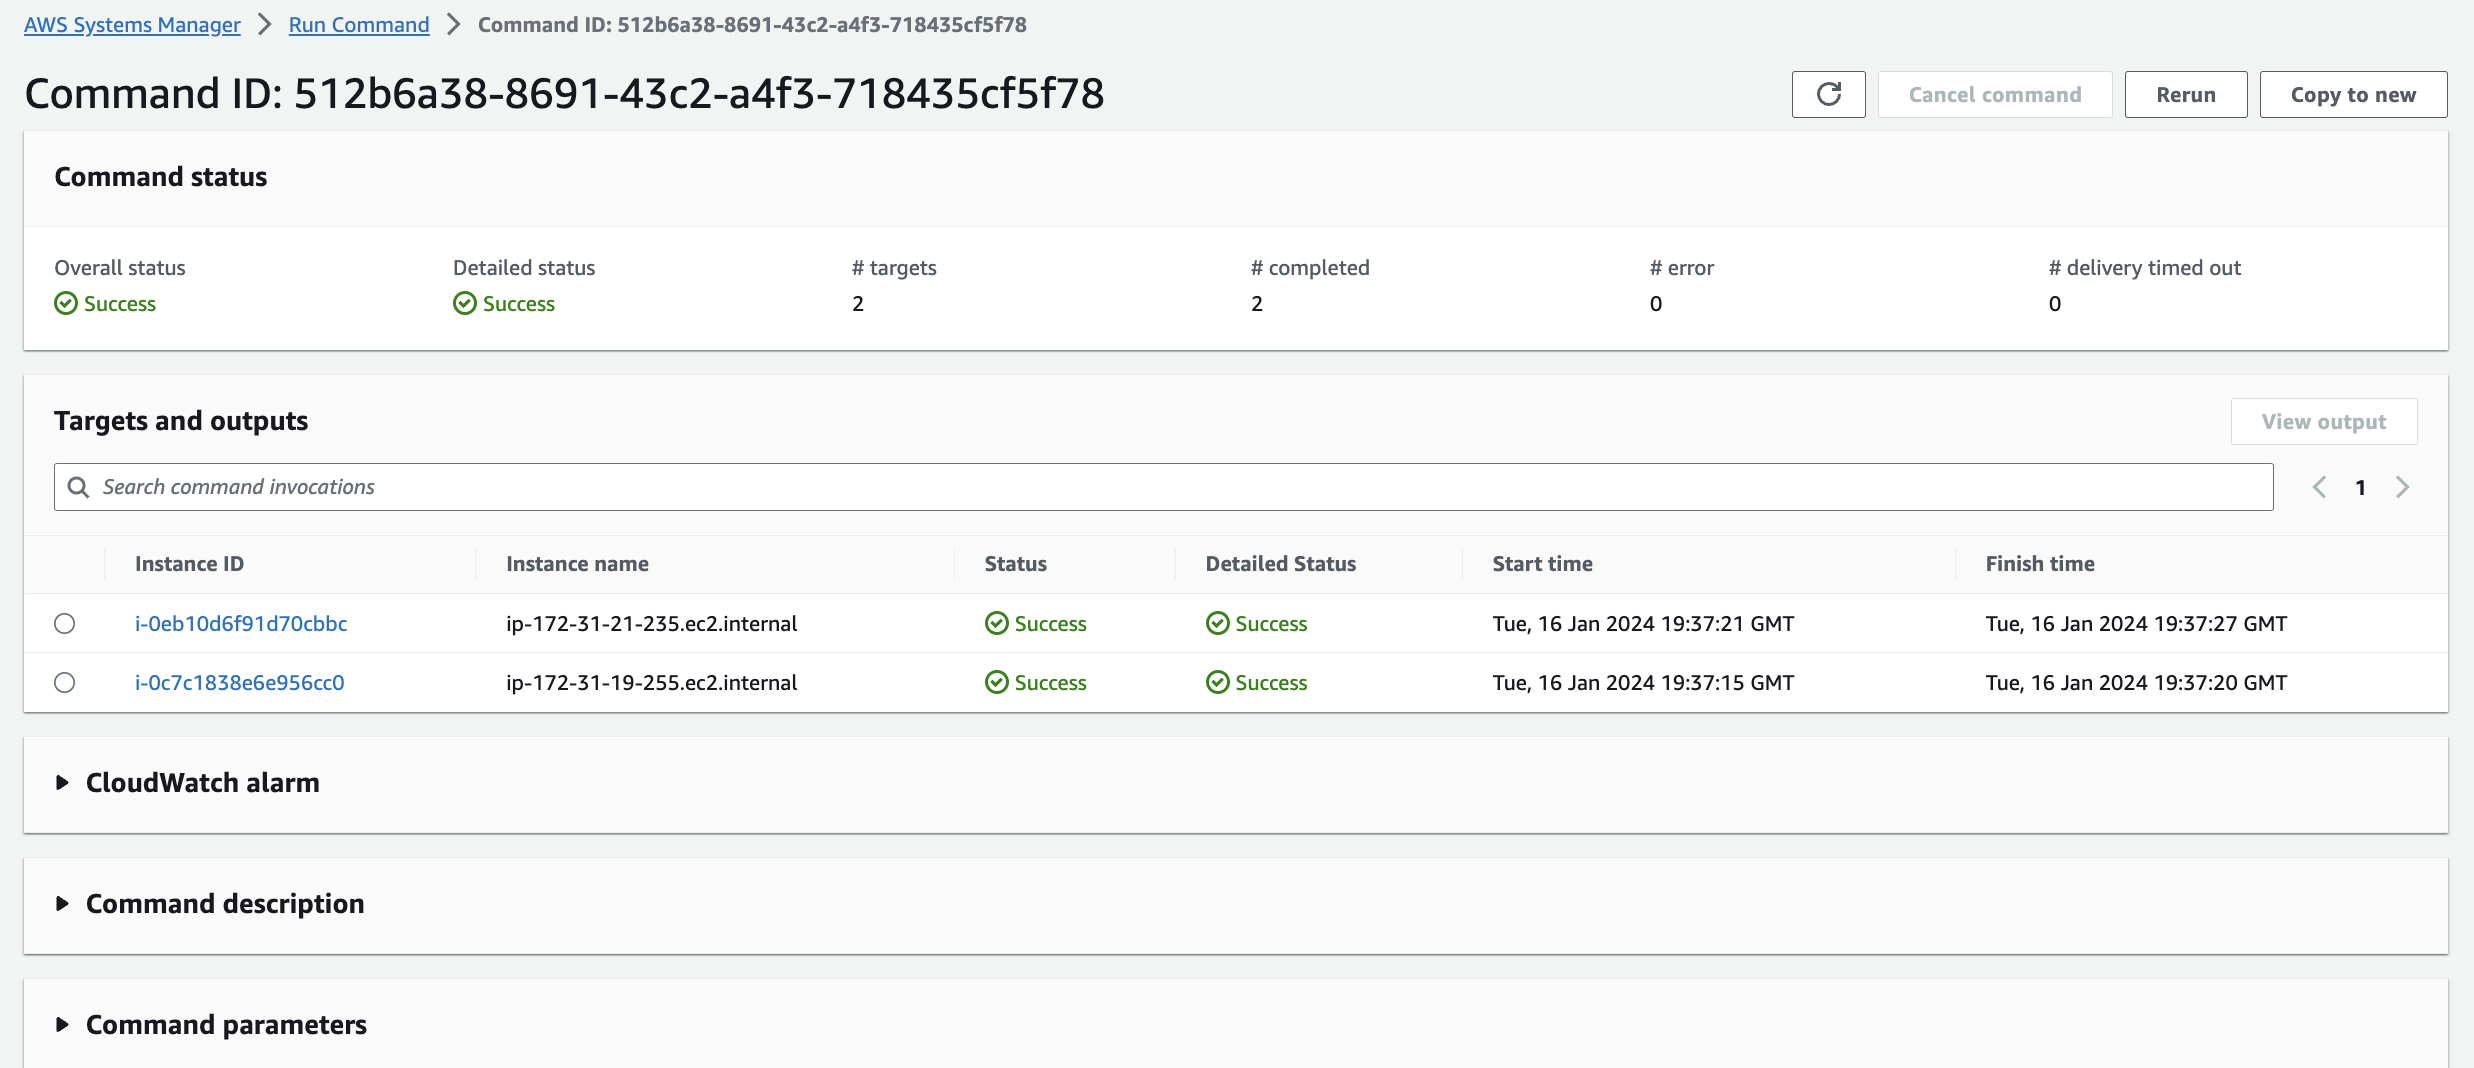
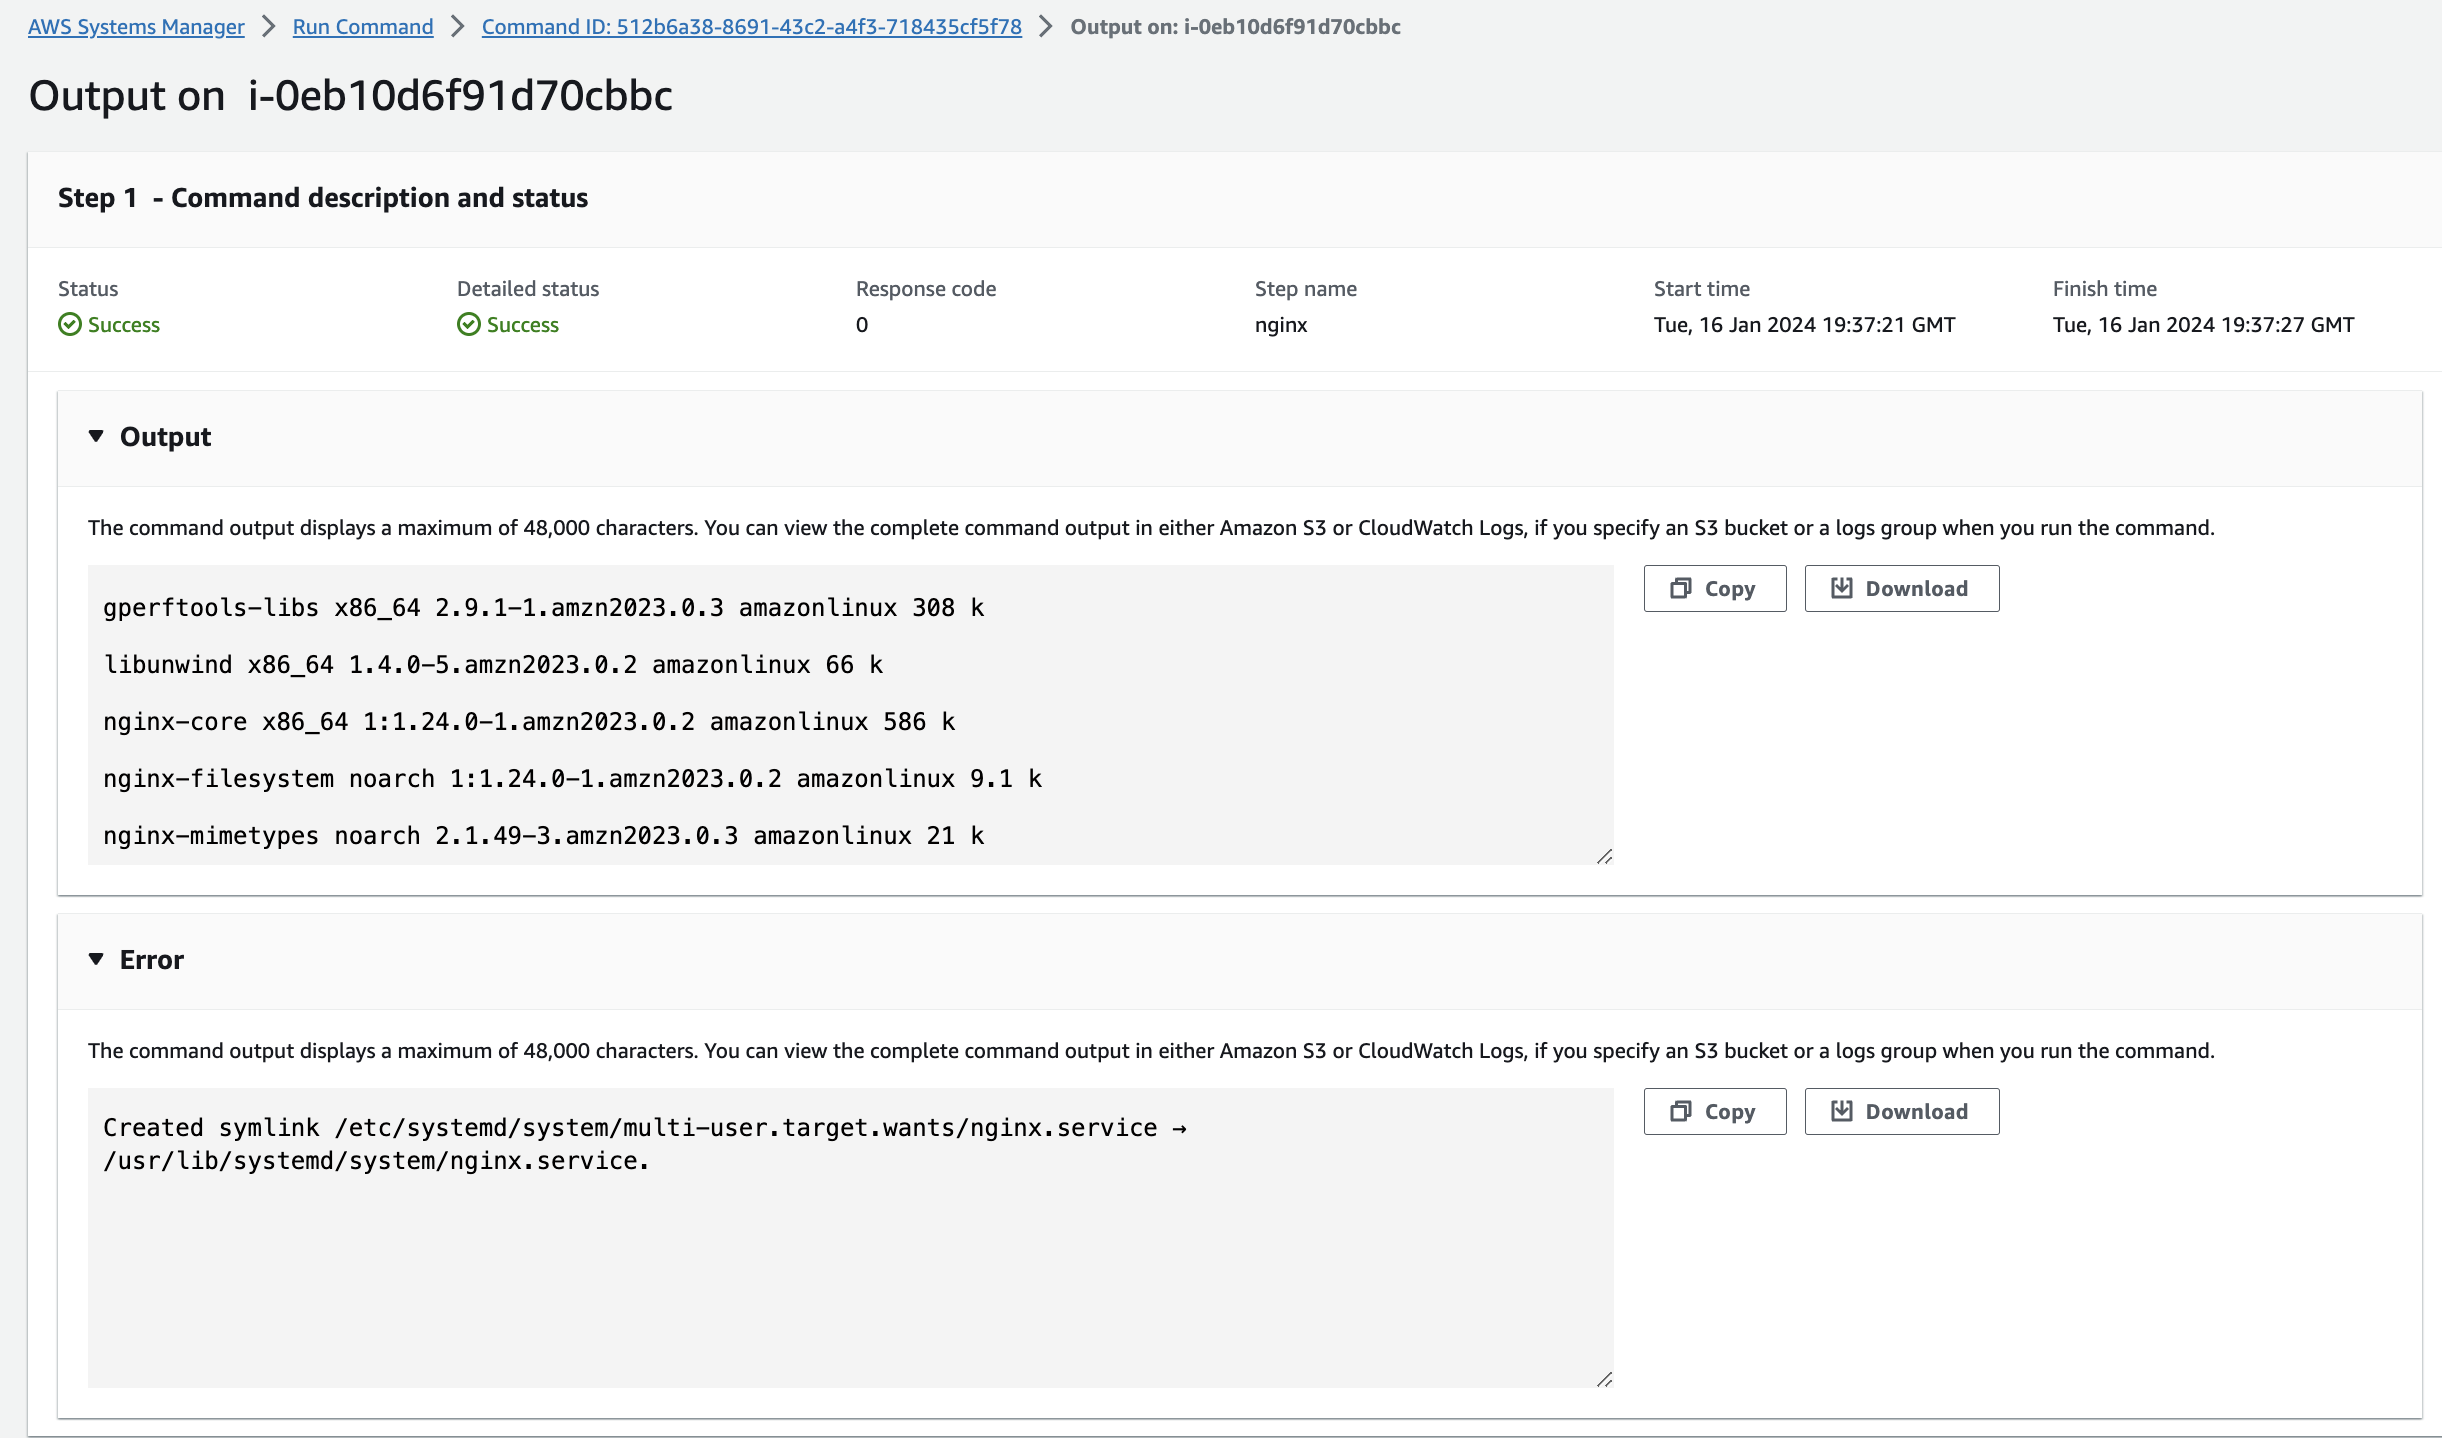
17. Once I hit "run", I can see it being executed on the groups which I specified:
18. We can also click on the instance, and go to output to see the output of the commands