An Aficionado Journey in Opensource & Linux – And now It's a FinTech touch!
My journey to AWS cloud practitioner - Account configurations - Part 2
AWS and Cloud Computing
Published: 2022-02-23 12:30:14
If you came across my first blog post about My Journey to AWS Cloud Practioner - Refreshing my memory with AWS CLI, then I guess this one would interest you as well. In this article, we will see how to configure Account Alias, Billing for IAM users, Billing Preferences, and Billing Alarms using the AWS CLI.
Configure Account
1. You can create an account URL alias using the following command:
[tunnelix@awslab .aws]$ aws iam create-account-alias --account-alias tunnelixlab
Now, this link will be available to sign in to my account.
https://tunnelixlab.signin.aws.amazon.com/console
2. You can also see which account alias has been created:
[tunnelix@awslab .aws]$ aws iam list-account-aliases{"AccountAliases": ["tunnelixlab"]}
Billing Access
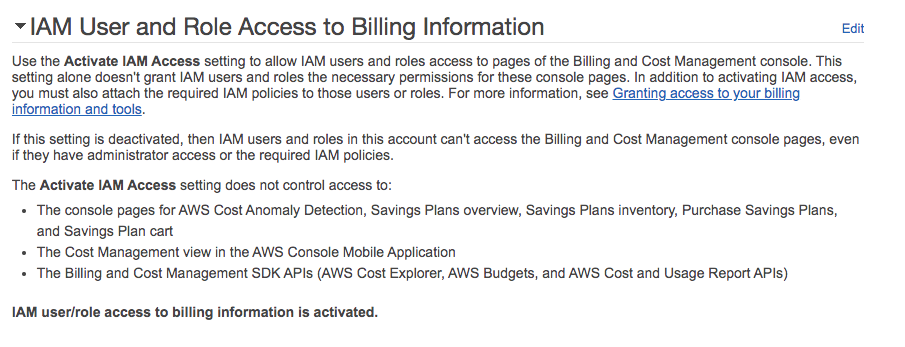
3. To update the billing information, go to "Account" and then scroll down go to "IAM User and Role Access to Billing Information"
4. Hit, the "edit" button and tick the "Activate IAM access".
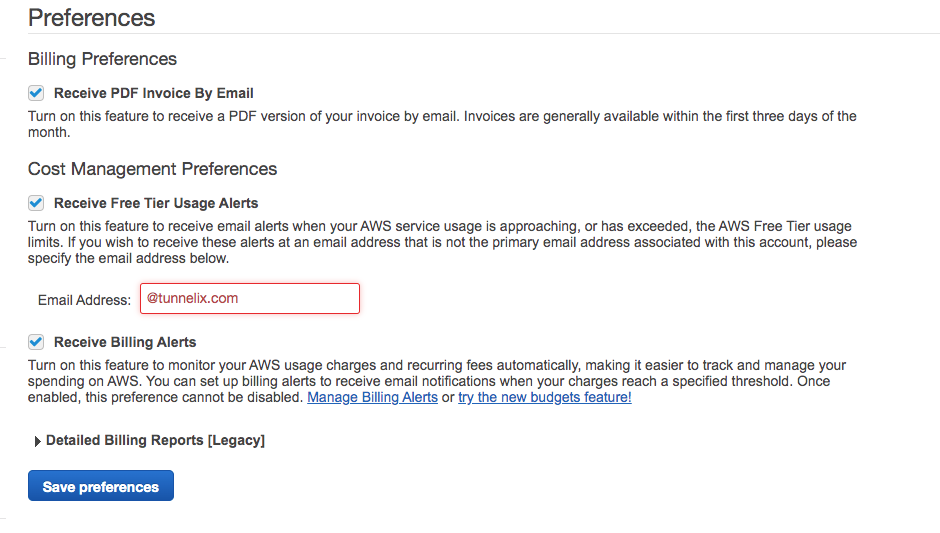
Then, go to "Billing Preferences" tick all the boxes for billing preferences, and add your email address to receive notifications for billing.
Setting up Billing Alarm
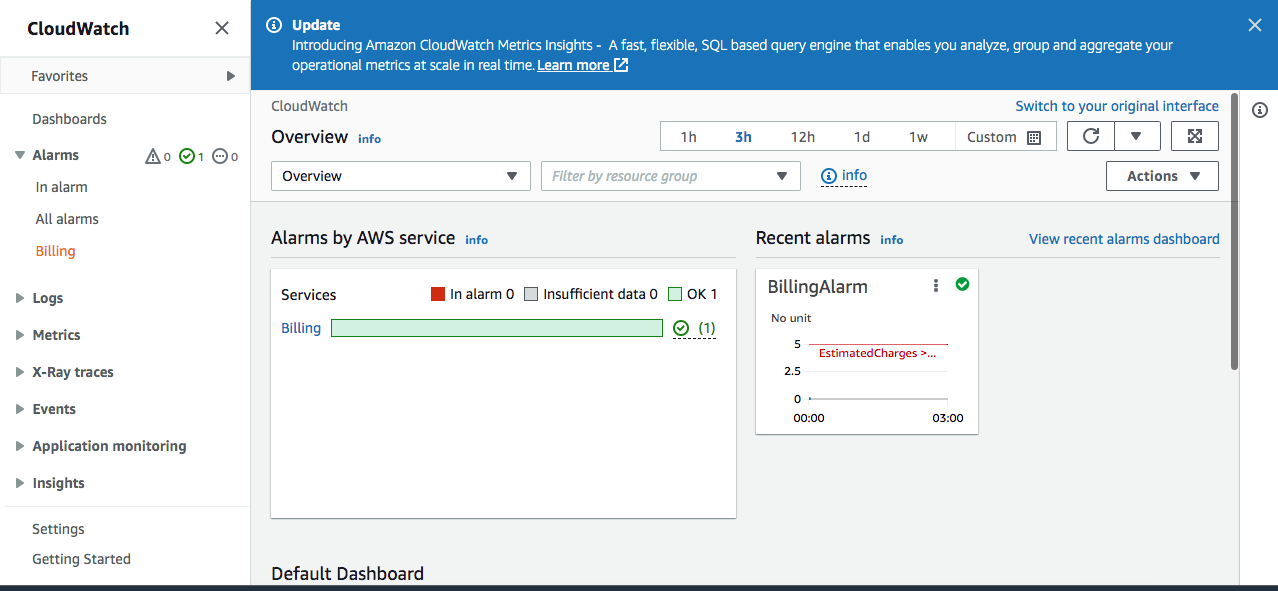
5. Go to "Management and Governance" and look for "Cloudwatch". This performance and billing information monitoring tool can send us notifications when a certain threshold is reached. On the Cloudwatch page, choose billing.
Once, on the billing page: "Create Alarm" -> "Select Metric" -> "Billing" -> "Total Estimated charge" -> "Tick the USD box" -> "Select Metric" which should bring you to the Specify metric and condition page.
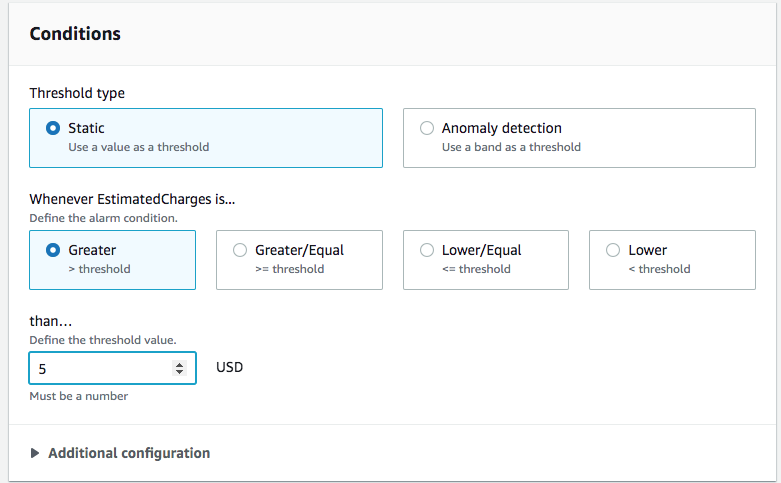
Then scroll down, set a condition to receive a notification. I'm setting up for a 5 USD threshold.
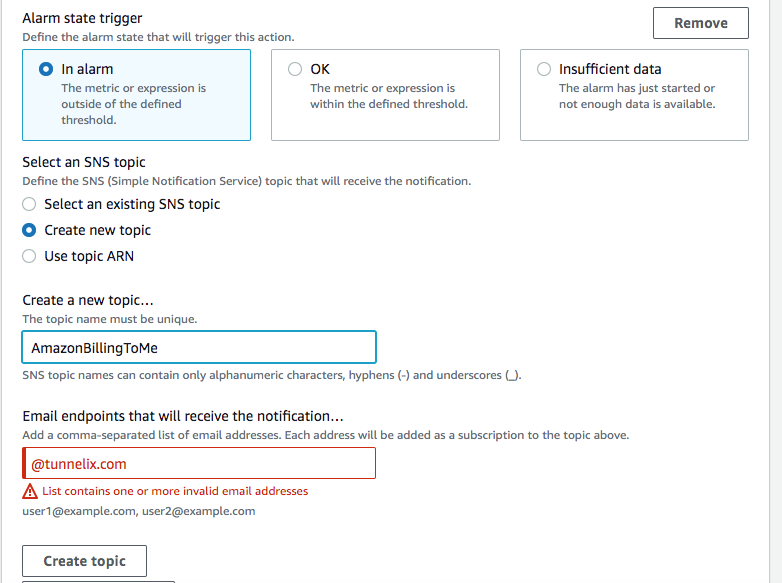
Then, hit next and "Create a Topic" add a message to alert you about billing, enter an email address. Then "create topic"
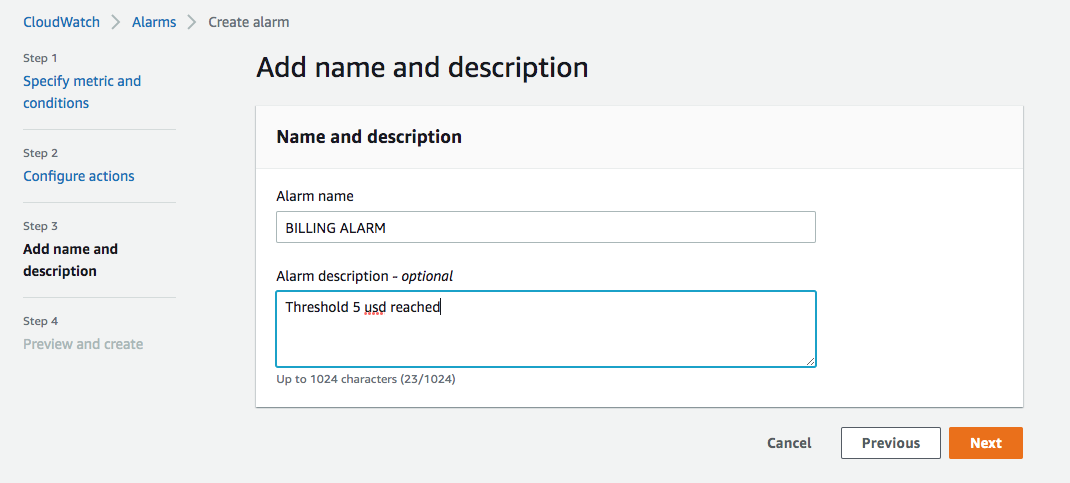
Hit "Next" -> Then give the alarm a name -> Then hit "Next"
After hitting "Next", hit "Create Alarm".
Very Important: You will receive an email to confirm that the alarm has been set. Please confirm to receive an alarm.
Activating MFA for the root user
This is a pretty simple step to activate MFA for the super root user. On the console, go to "Security Credentials" then to "MFA". Follow the steps to activate MFA. Use your phone to scan the QR code and setup the additional layer of security when you logged on to the web portal console. On the AWS CLI, you should be able to see the MFA when you do the following command