An Aficionado Journey in Opensource & Linux – And now It's a FinTech touch!
Unified Cloudwatch agent in AWS
Linux & BSD systems, Applications and Security
Published: 2024-01-04 07:03:25
The Unified Cloudwatch Metric agent allowed metrics and logs to be collected from EC2 instances and on-premise servers. In this blog post, I will focus on its installation and how to leverage it for metrics and logs. As per AWS "CloudWatch includes a unified CloudWatch agent that can collect both logs and metrics from EC2 instances and on-premises servers. The older logs-only agent is deprecated and is no longer supported." Please be careful when reading this blog, as AWS made several updates over time.
Creating an IAM role and attached policy to it
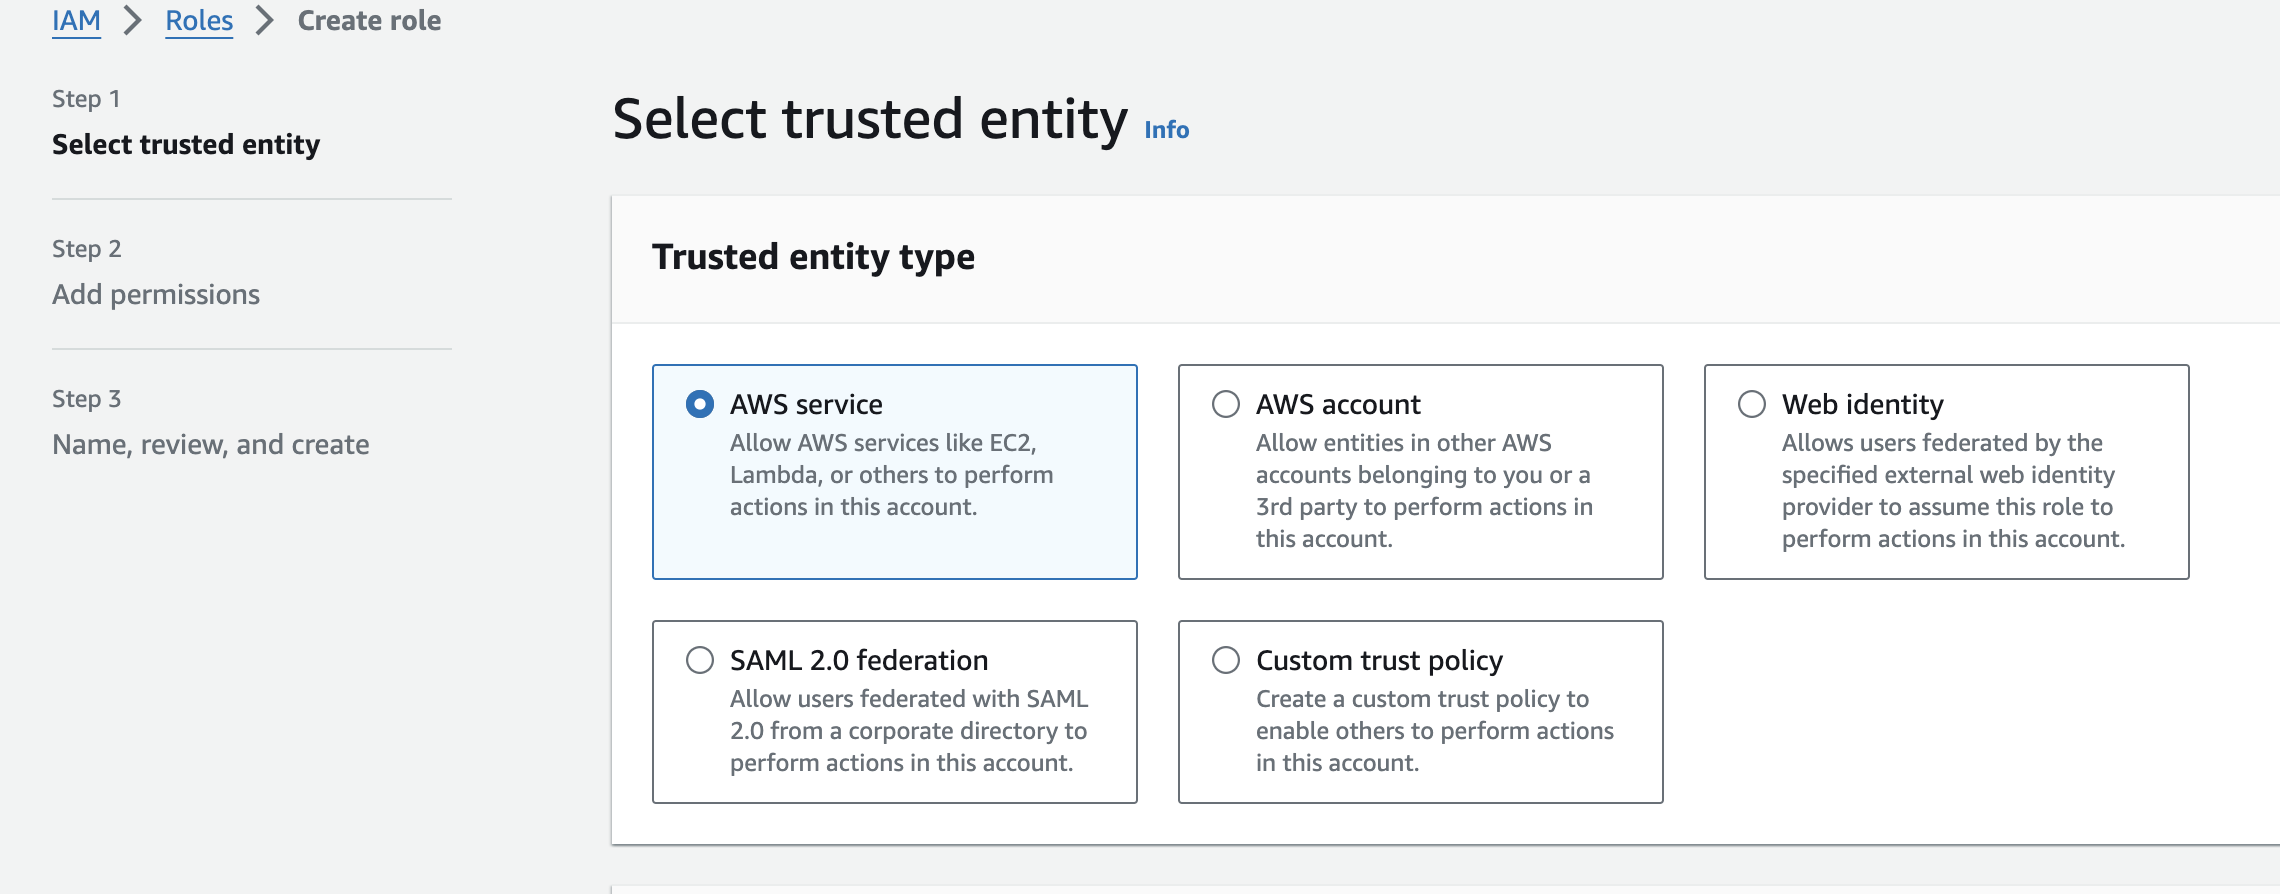
1. Creating an IAM role and that role is going to specifically send logs and metrics to Cloudwatch.
IAM -> Roles -> Create Role -> Roles for AWS Service
Under Use Case -> EC2 (as I'm going to install the agent on the EC2 instance).
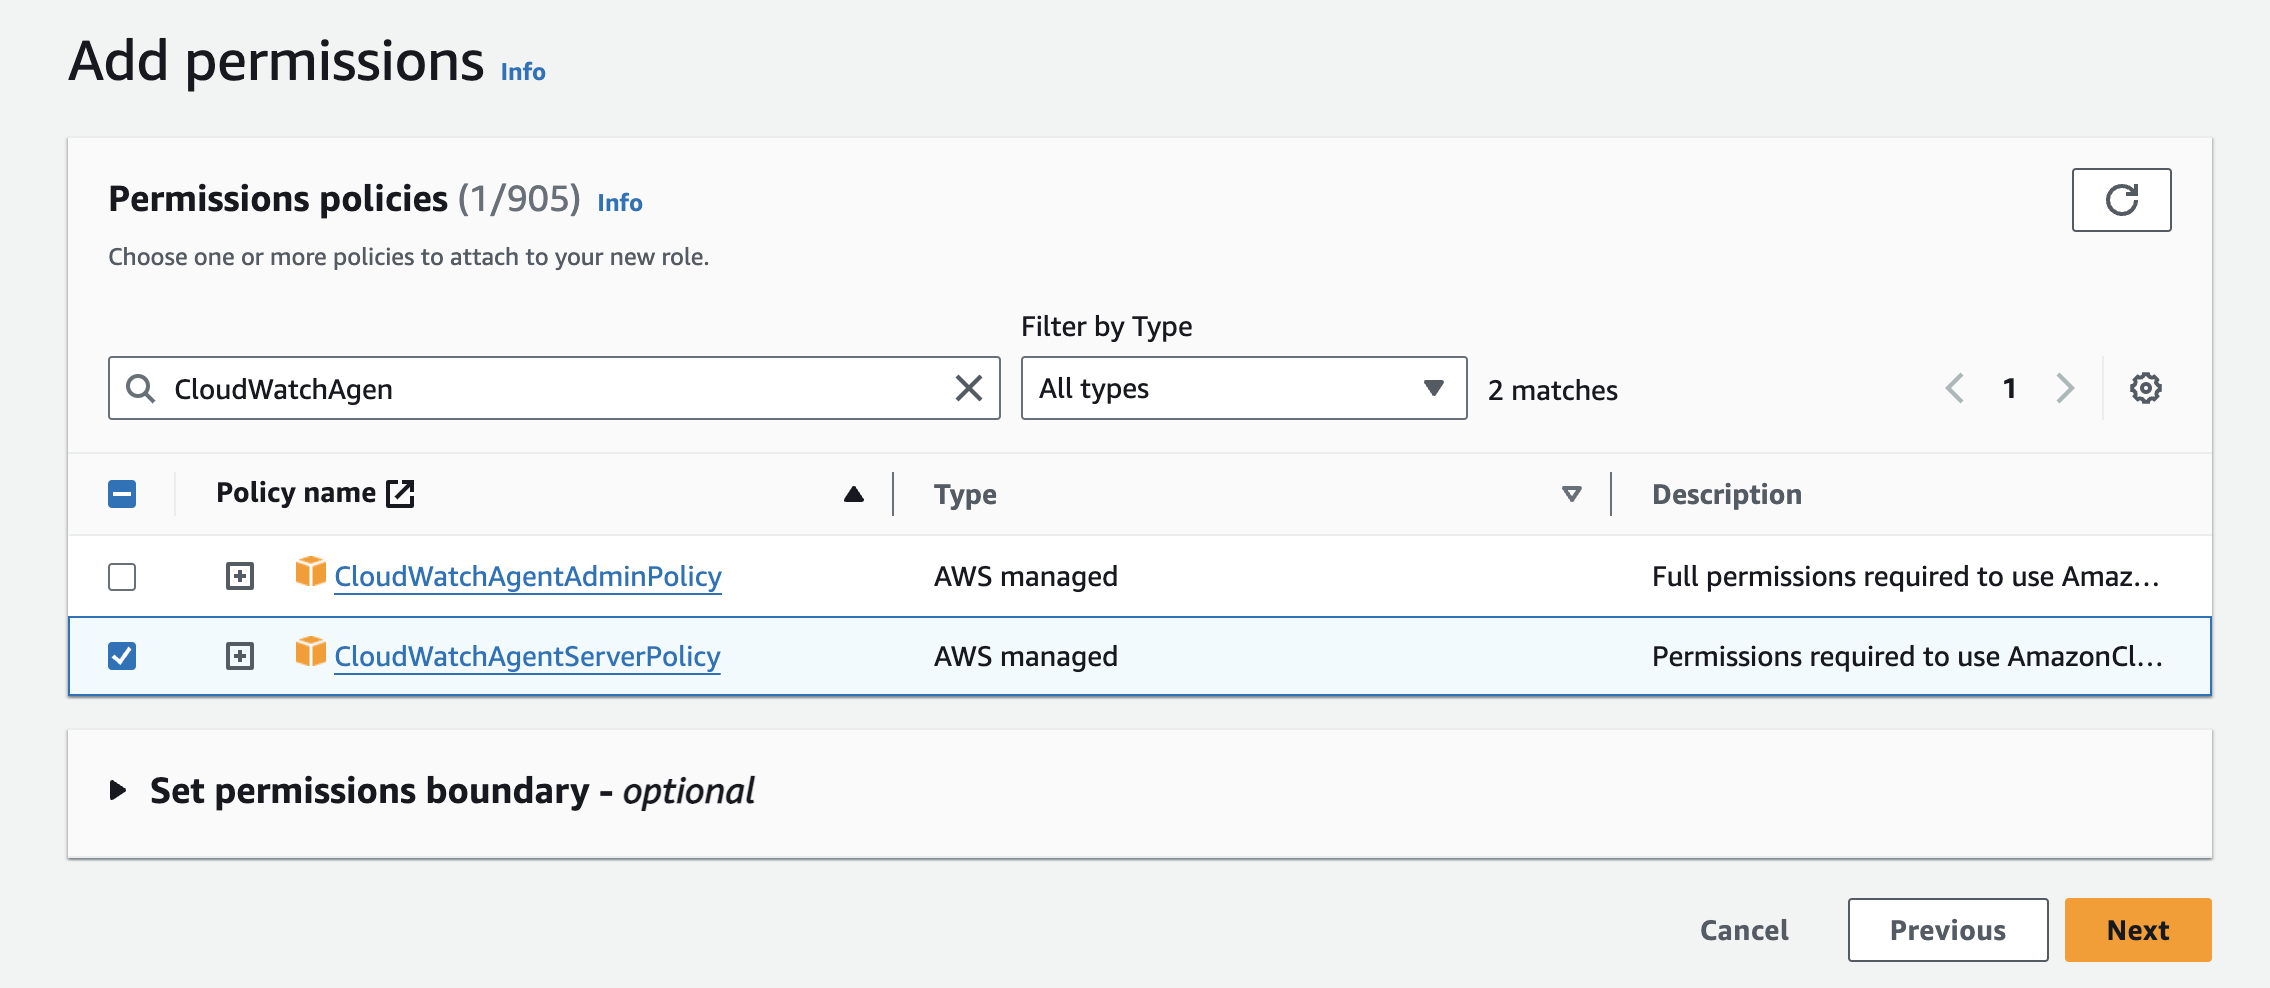
2. Then, need to find permission policies to apply to this role.
Add Permissions -> Search for "CloudWatchAgent" ->Add the "CloudWatchAgentServerPolicy" to that role
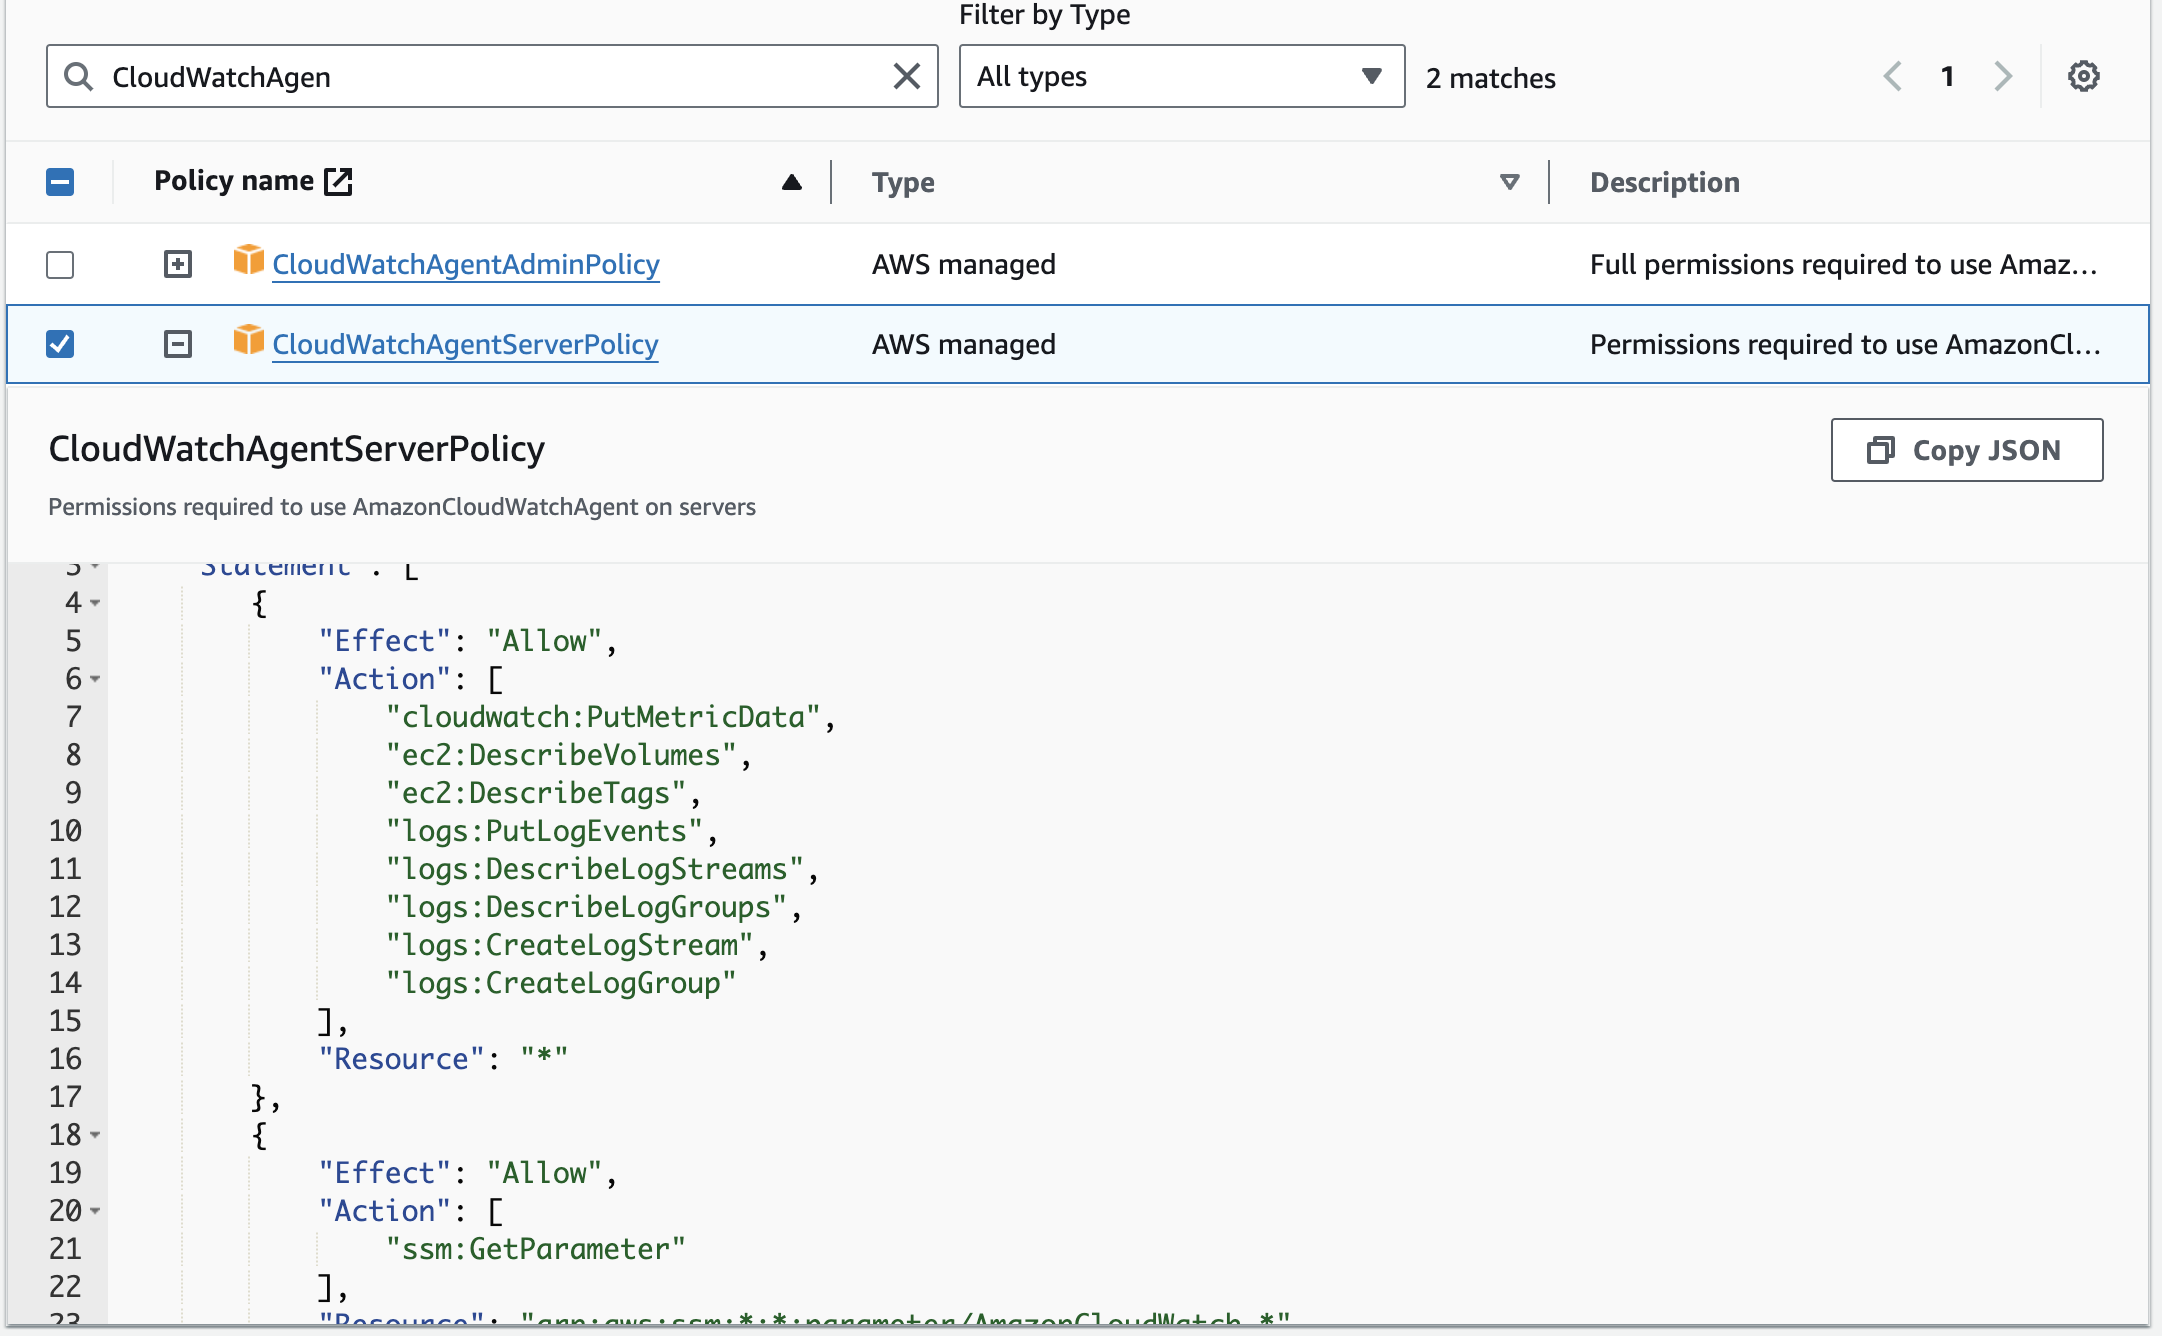
To better understand what is included in that policy, expand it and we can see it specify to put metric data into Cloudwatch and to send logs and get it also allows us to retrieve data directly from SSM
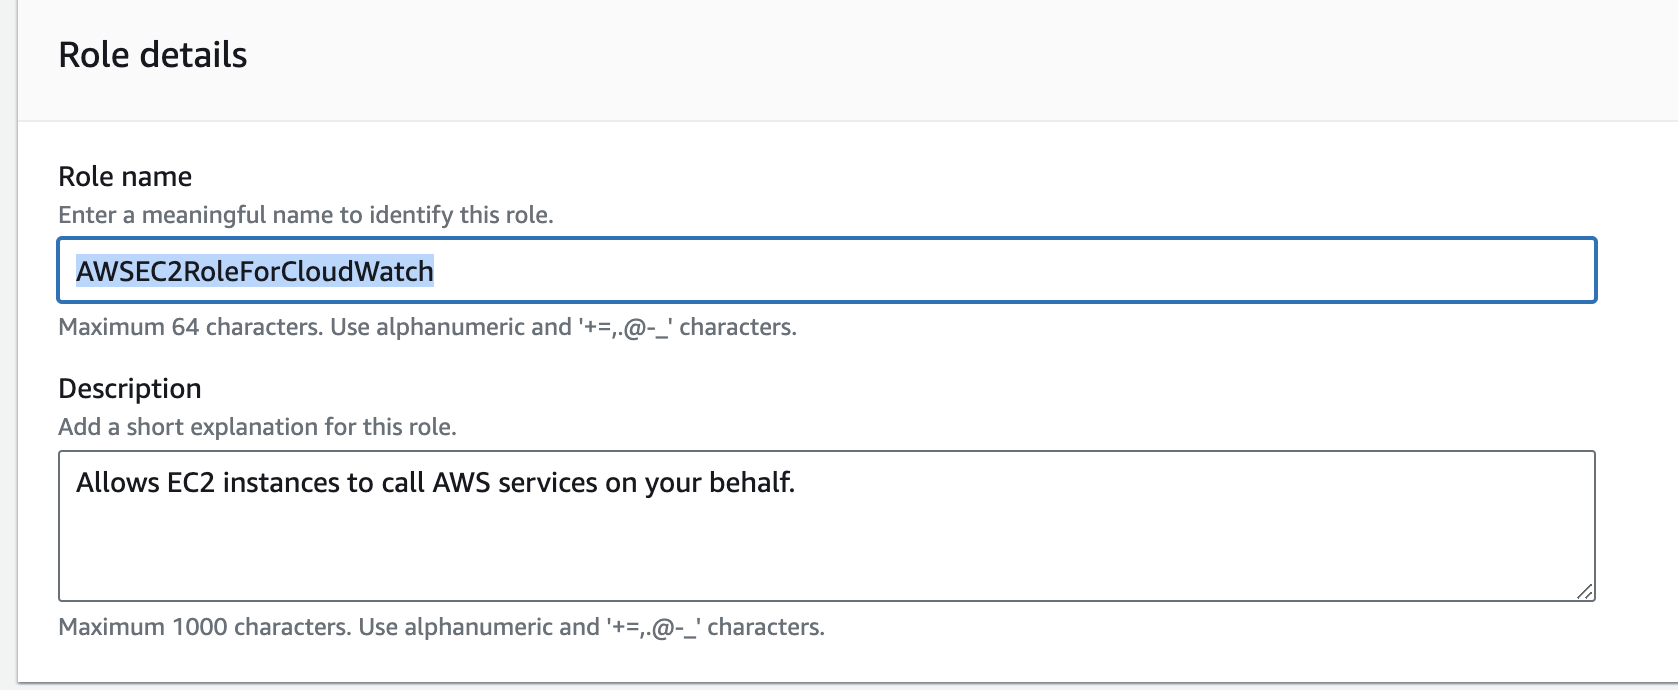
Then, hit next, name the role, and hit "create role".
Attach that role to an EC2 instance
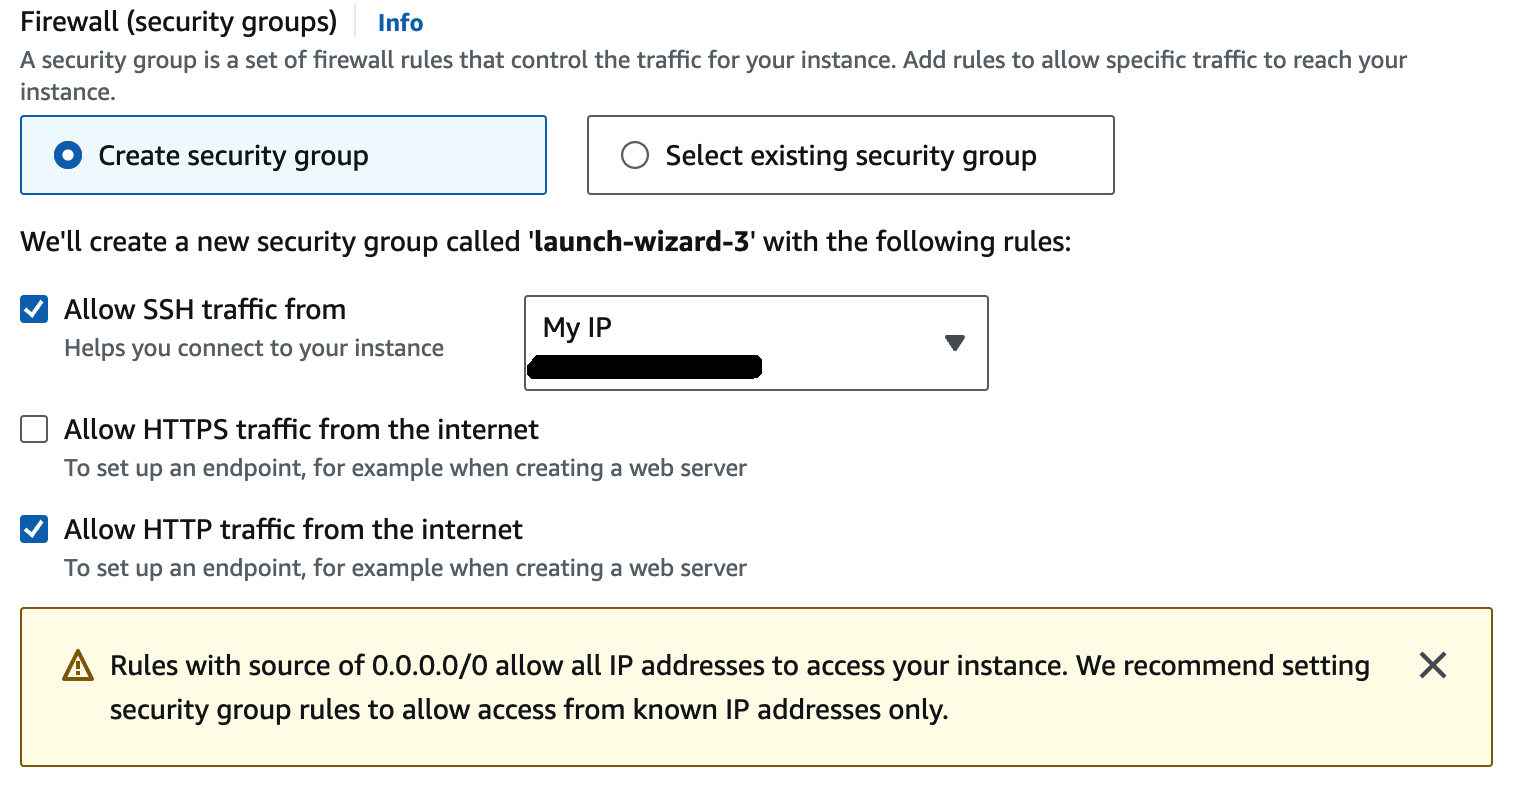
3. I won't get into the details of creating an EC2 instance as this has already been covered in a previous blog post. Whilst, creating the instance, I have put a temporary rule to allow SSH from my IP Address and HTTP from the Internet.
4. Once the instance has been launched or if you have modified an existing EC2 instance security group (This is for learning and testing purposes only) Once, the instance is ready, I connect to it using my key which was added to the instance. Then I installed Nginx and started the service. The web server was also accessible over the internet through HTTP.
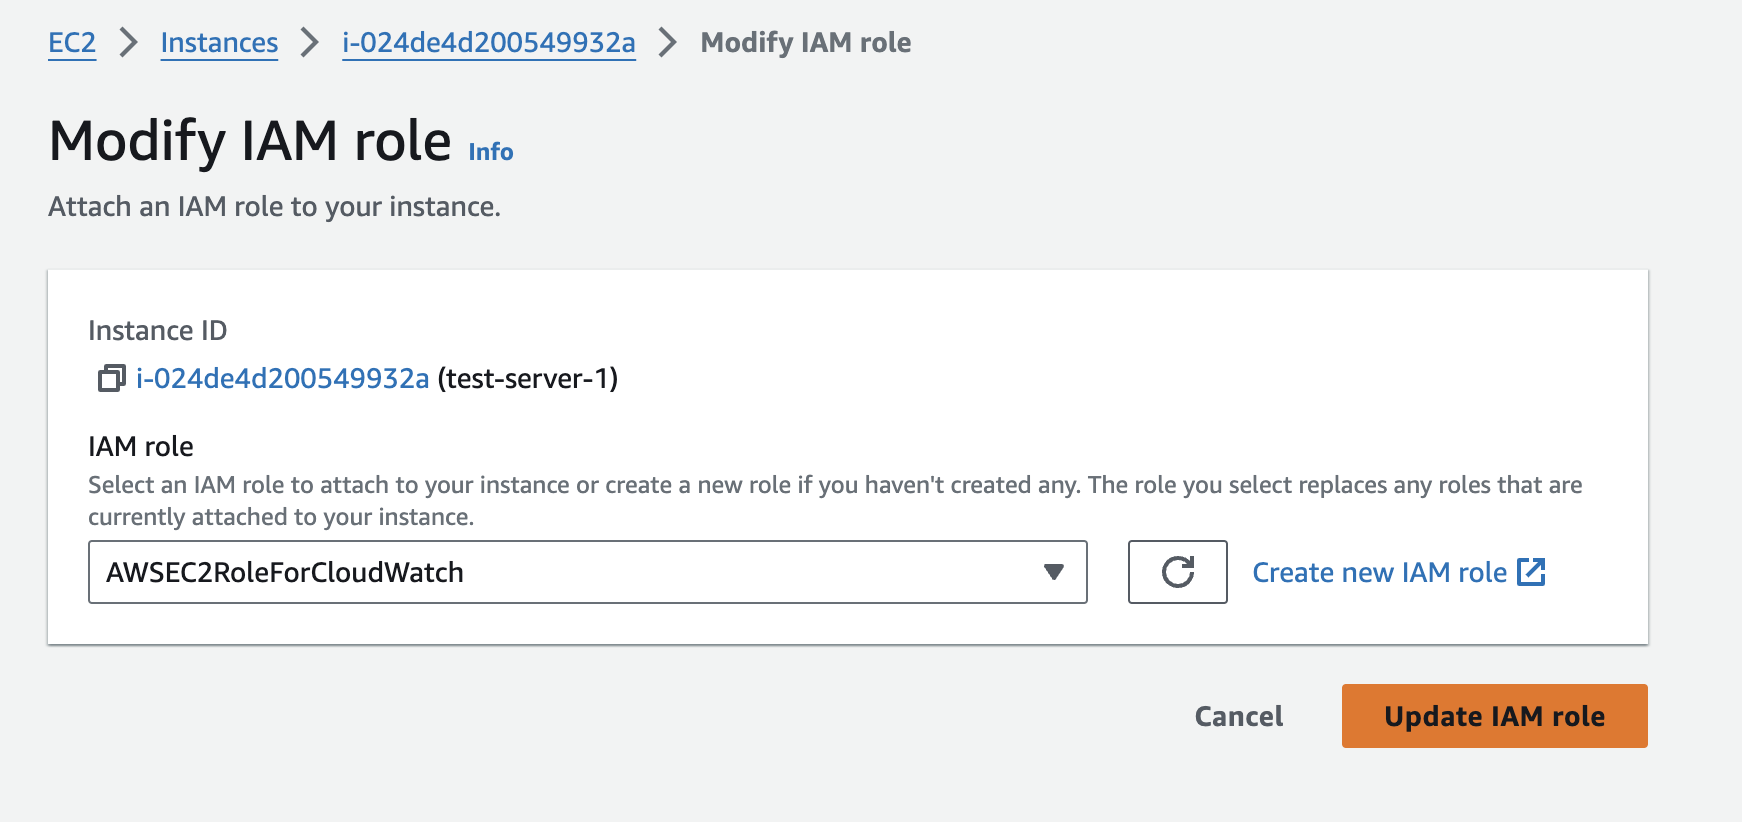
5. To attach the role to the instance:
EC2 -> instance -> chose your instance -> Actions ->Security -> Modify IAM role and hit "Update IAM role"
Installing and configuring the Agent
6. The package is amazon-cloudwatch-agent and can be installed as follows:
yum install amazon-cloudwatch-agent
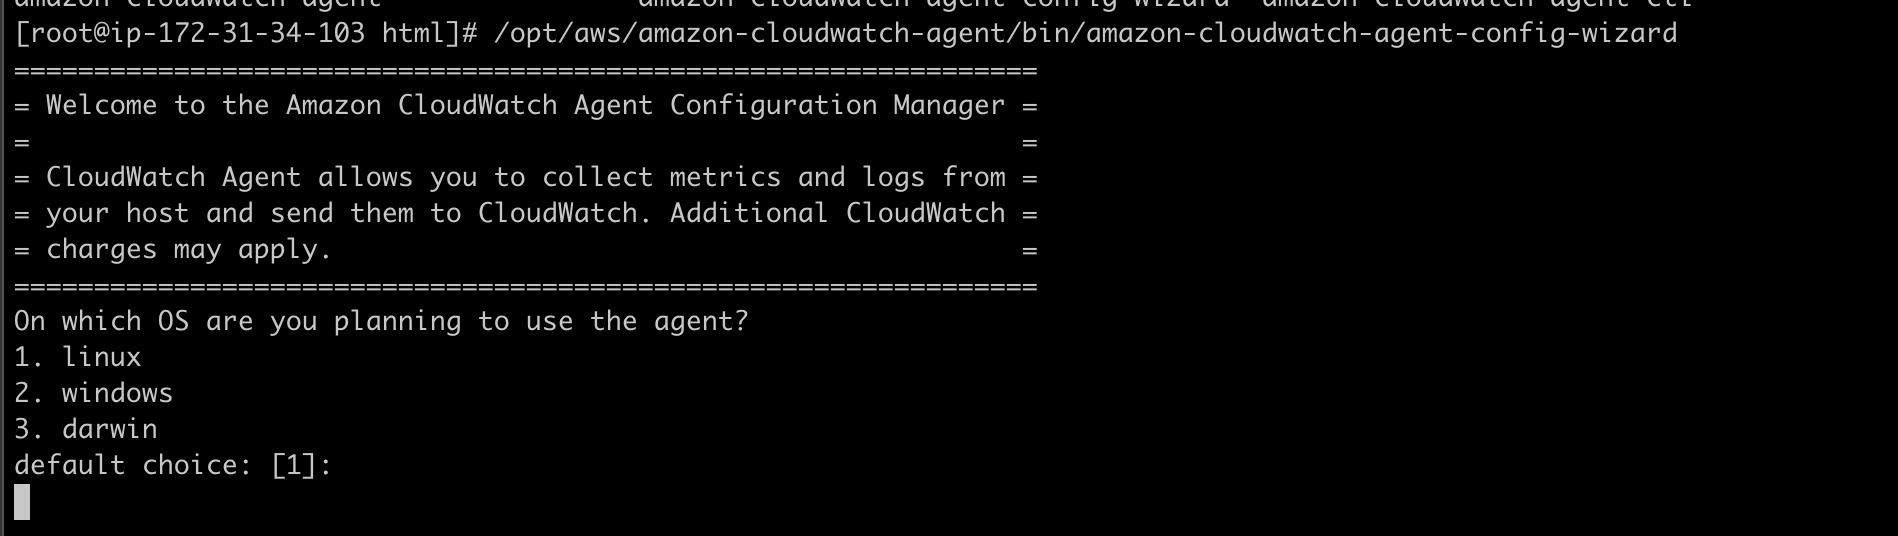
7. Next run the following command which will keep on prompting several options.
This prompt will ask to add the config.json in the parameter store. The reason why we keep it in the parameter store is because it can be retrieved by other instances at runtime. And to do so, we need the right permission for that. This can be fixed by
Please check the above content of the config.
The config file is also located at /opt/aws/amazon-cloudwatch-agent/bin/config.json.
Edit it manually if needed.
Do you want to store the config in the SSM parameter store?
1. yes
2. no
default choice: [1]:
1
8. As we can see, the current policy (CloudWatchServerAgentPolicy) knows only how to get SSM role
9. Next, so we would want to attach the CloudWatchAdminPolicy to that role that was attached to the EC2 instance:
IAM - > role ->AWSEC2RoleForCloudWatch -> Add Permissions - > chose CloudWatchAgentAdminPolicy
10. Full output of the wizard here
11.Go to Systems Manager -> Parameter Store to see if the config has been created there
The JSON created by the Wizard would be found in the parameter store called AmazonCloudWatch-Linux
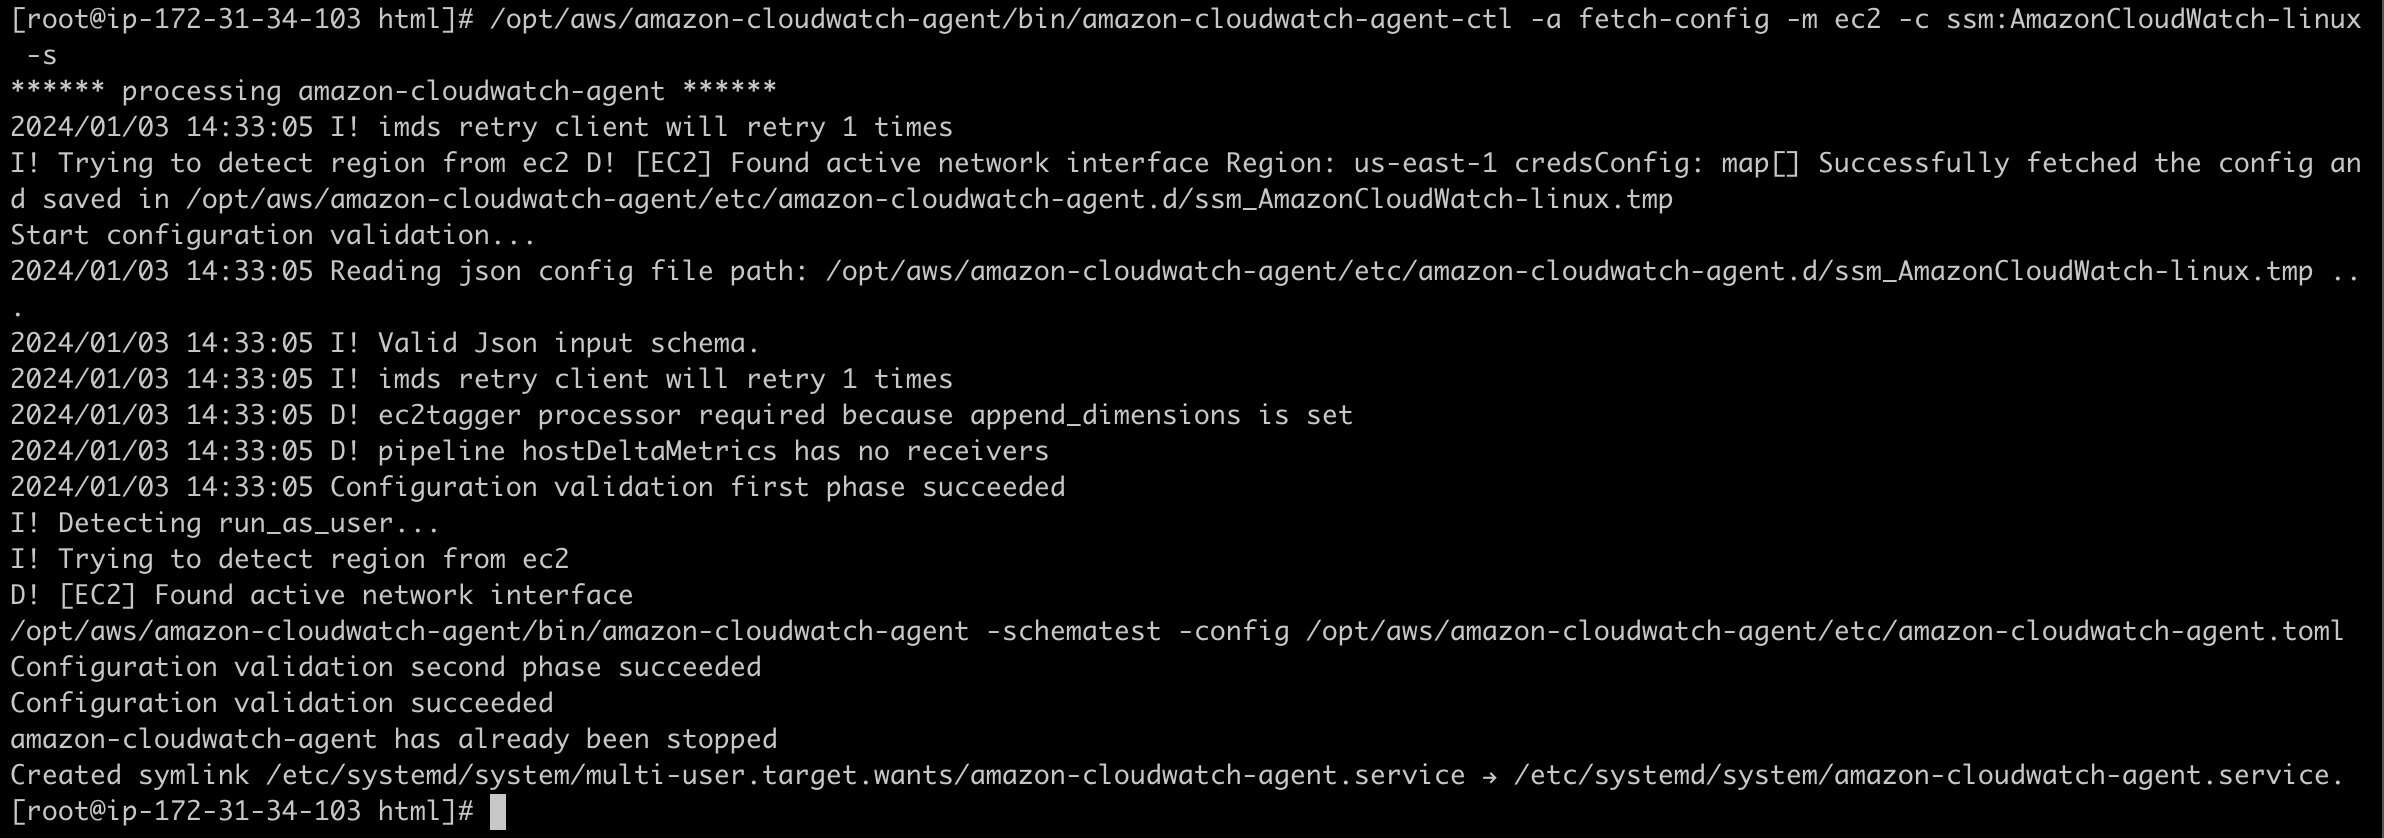
12. On the EC2 instance, we need to tell the instance to fetch from AWS the config from the Parameter store. Use the following command:
/opt/aws/amazon-cloudwatch-agent/bin/amazon-cloudwatch-agent-ctl -a fetch-config -m ec2 -c ssm:AmazonCloudWatch-linux -s
Cloudwatch Service
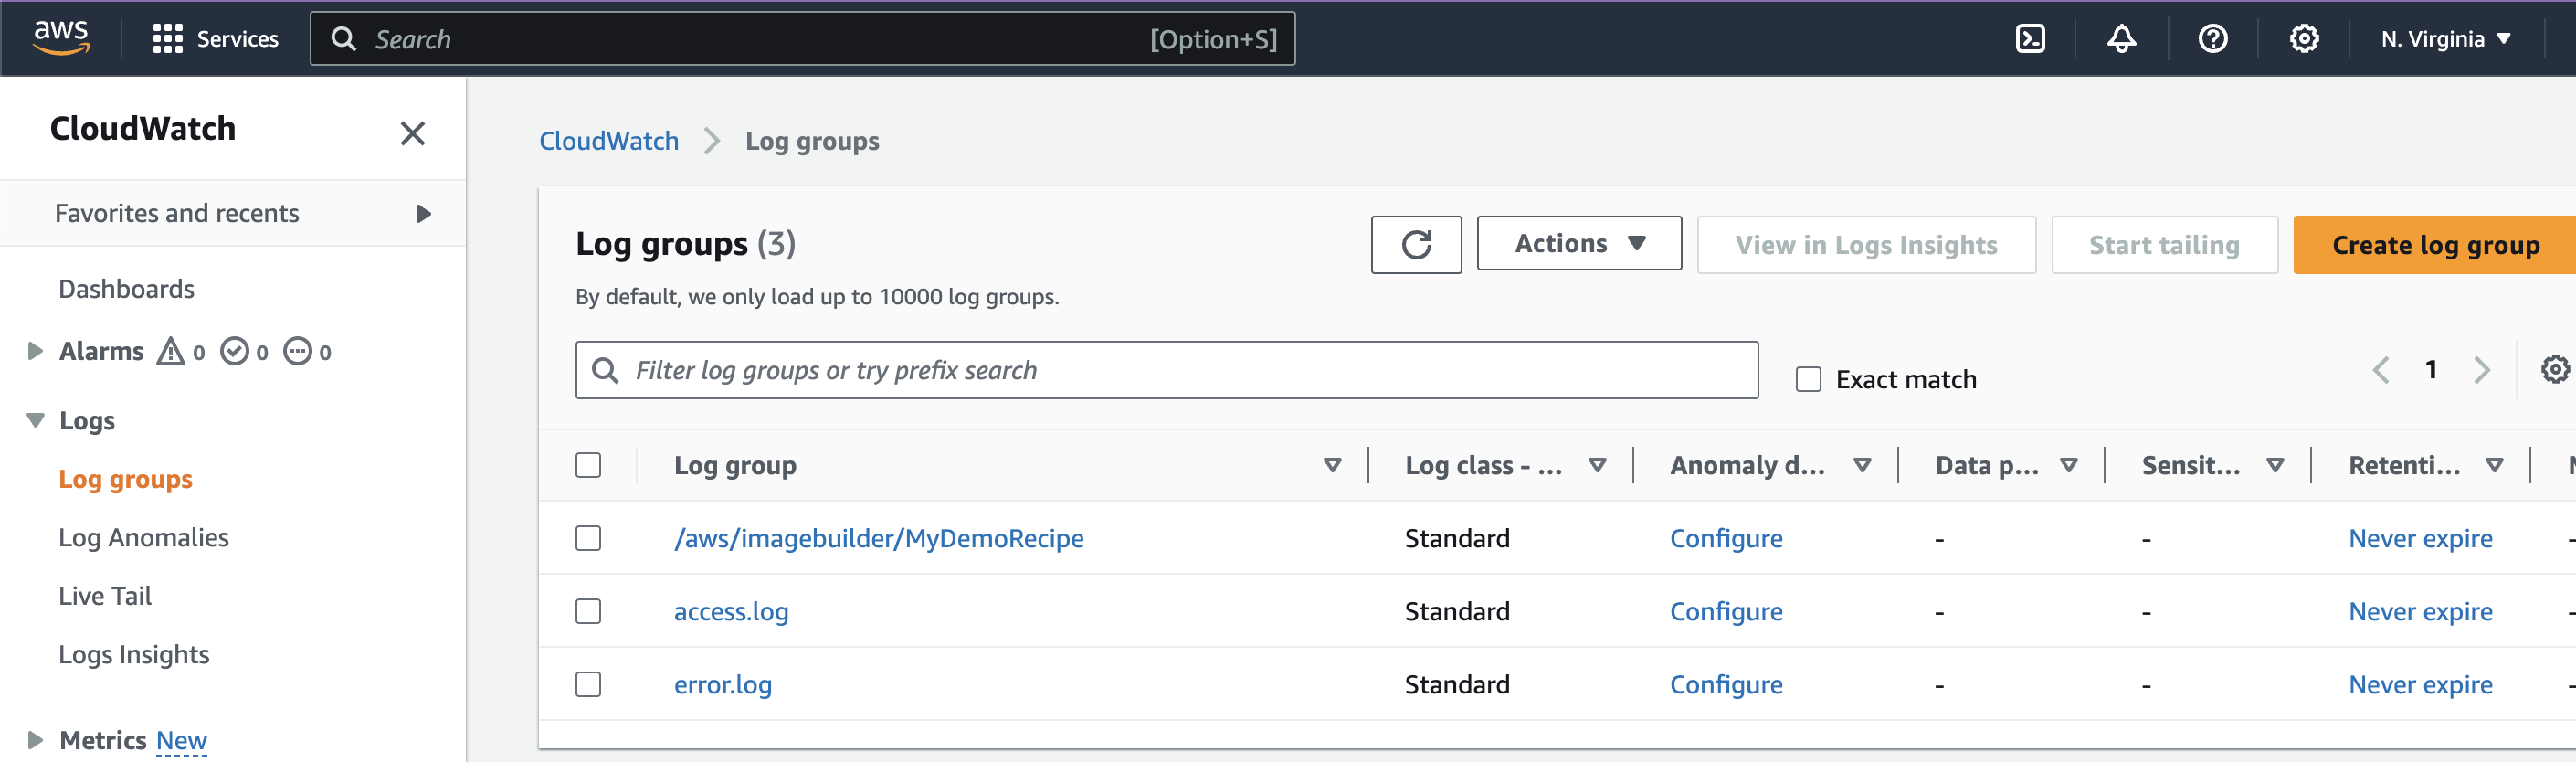
13. On the Cloudwatch -> Logs -> Log groups which does confirm the logs is present here.
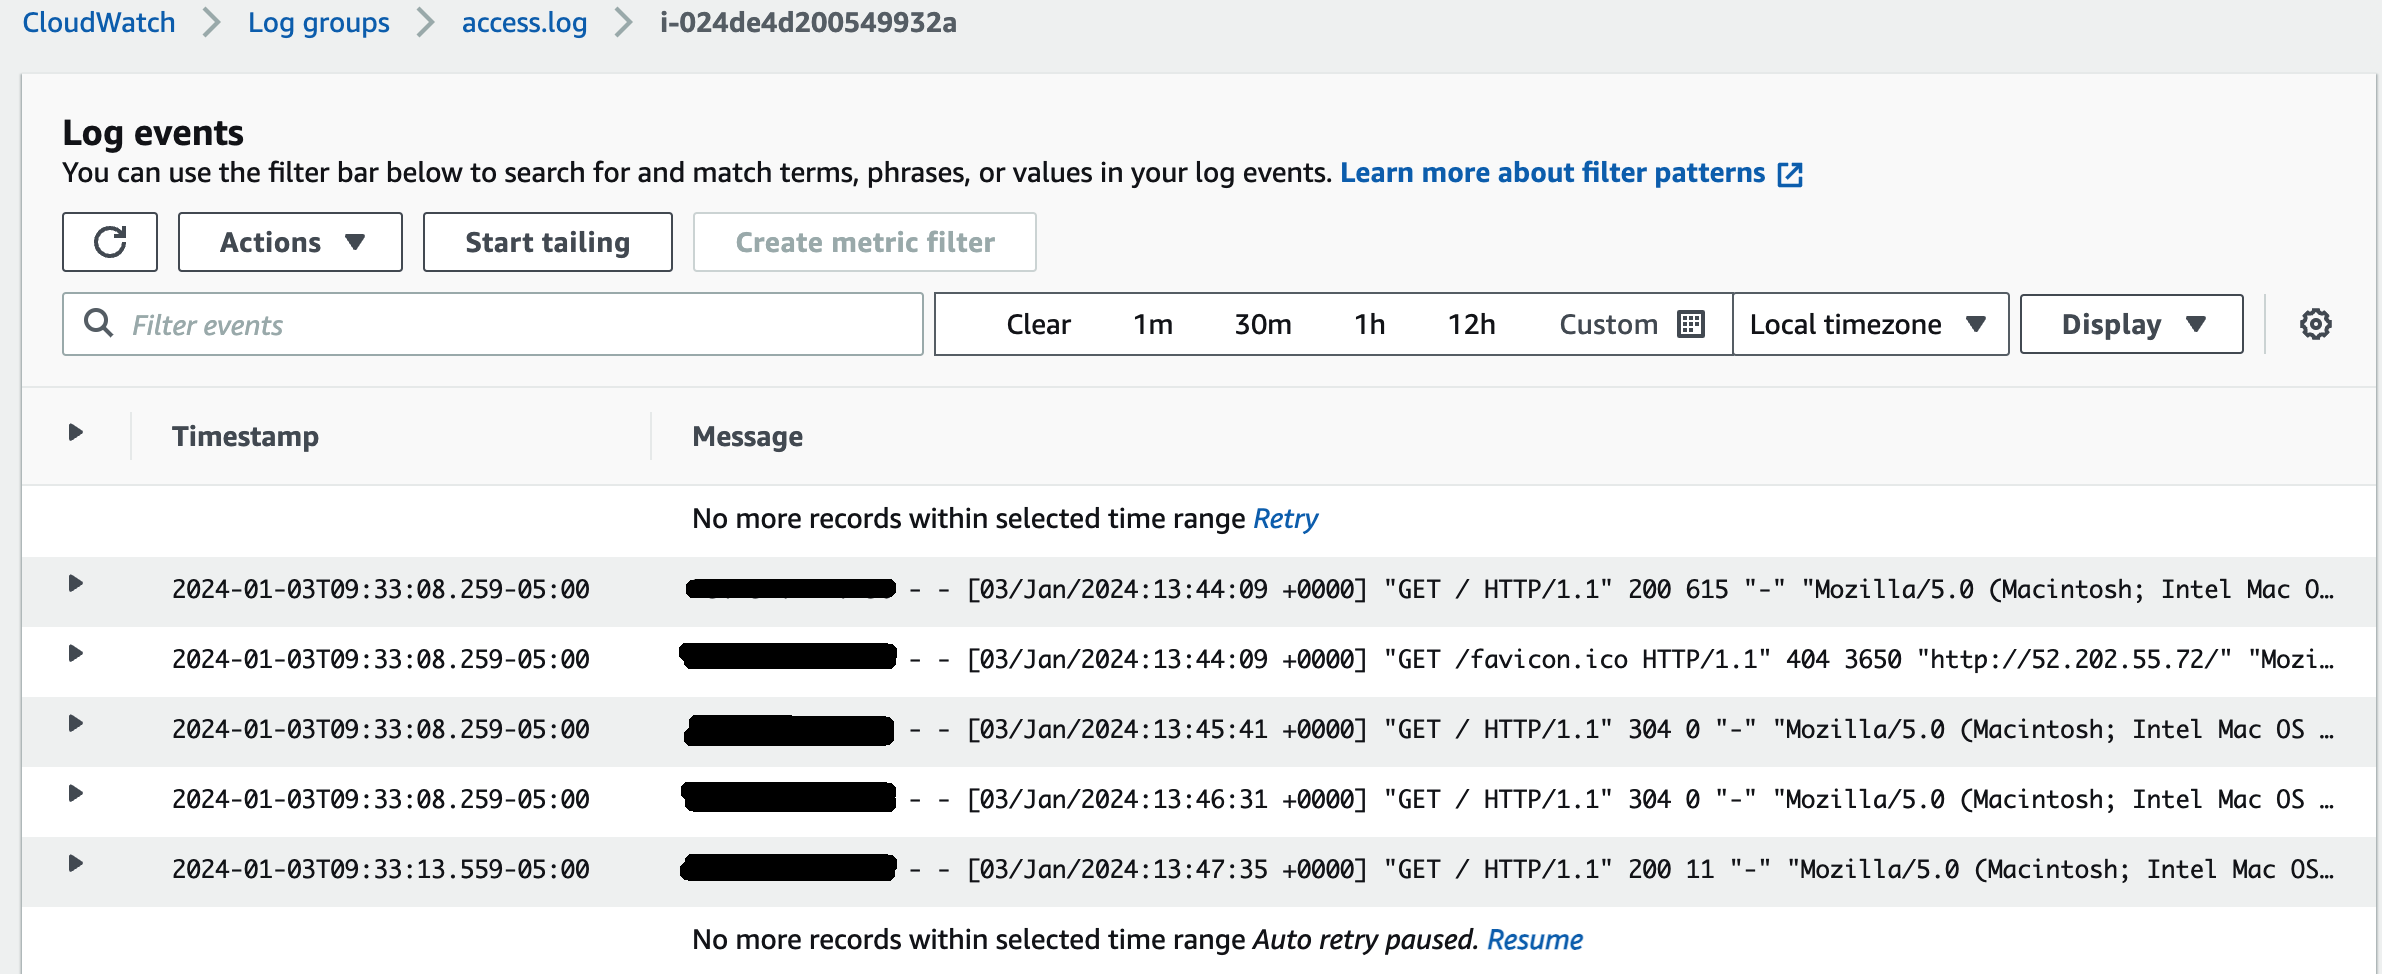
14. Under access.log -> Logs Stream -- should show the logs here.
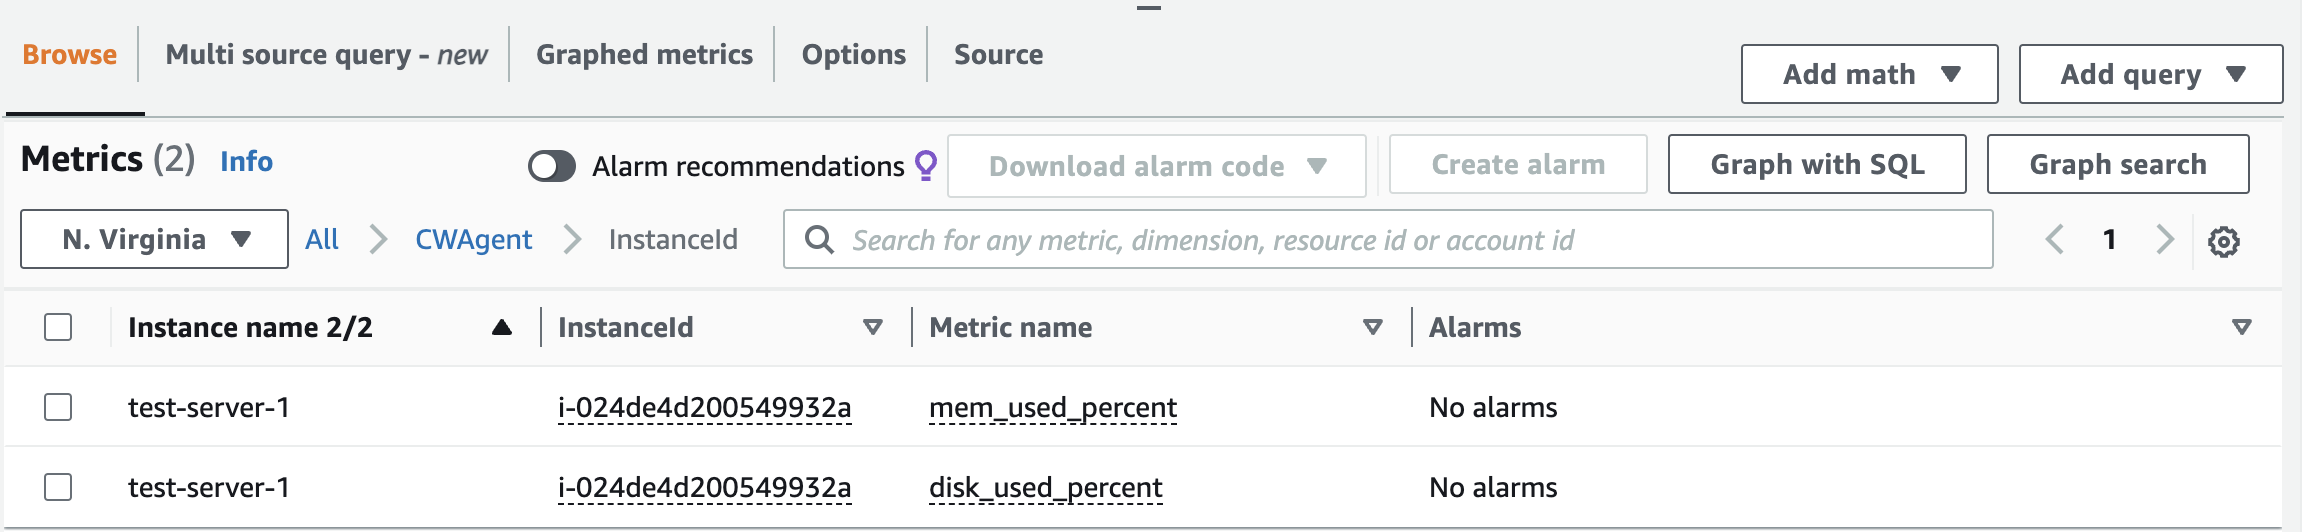
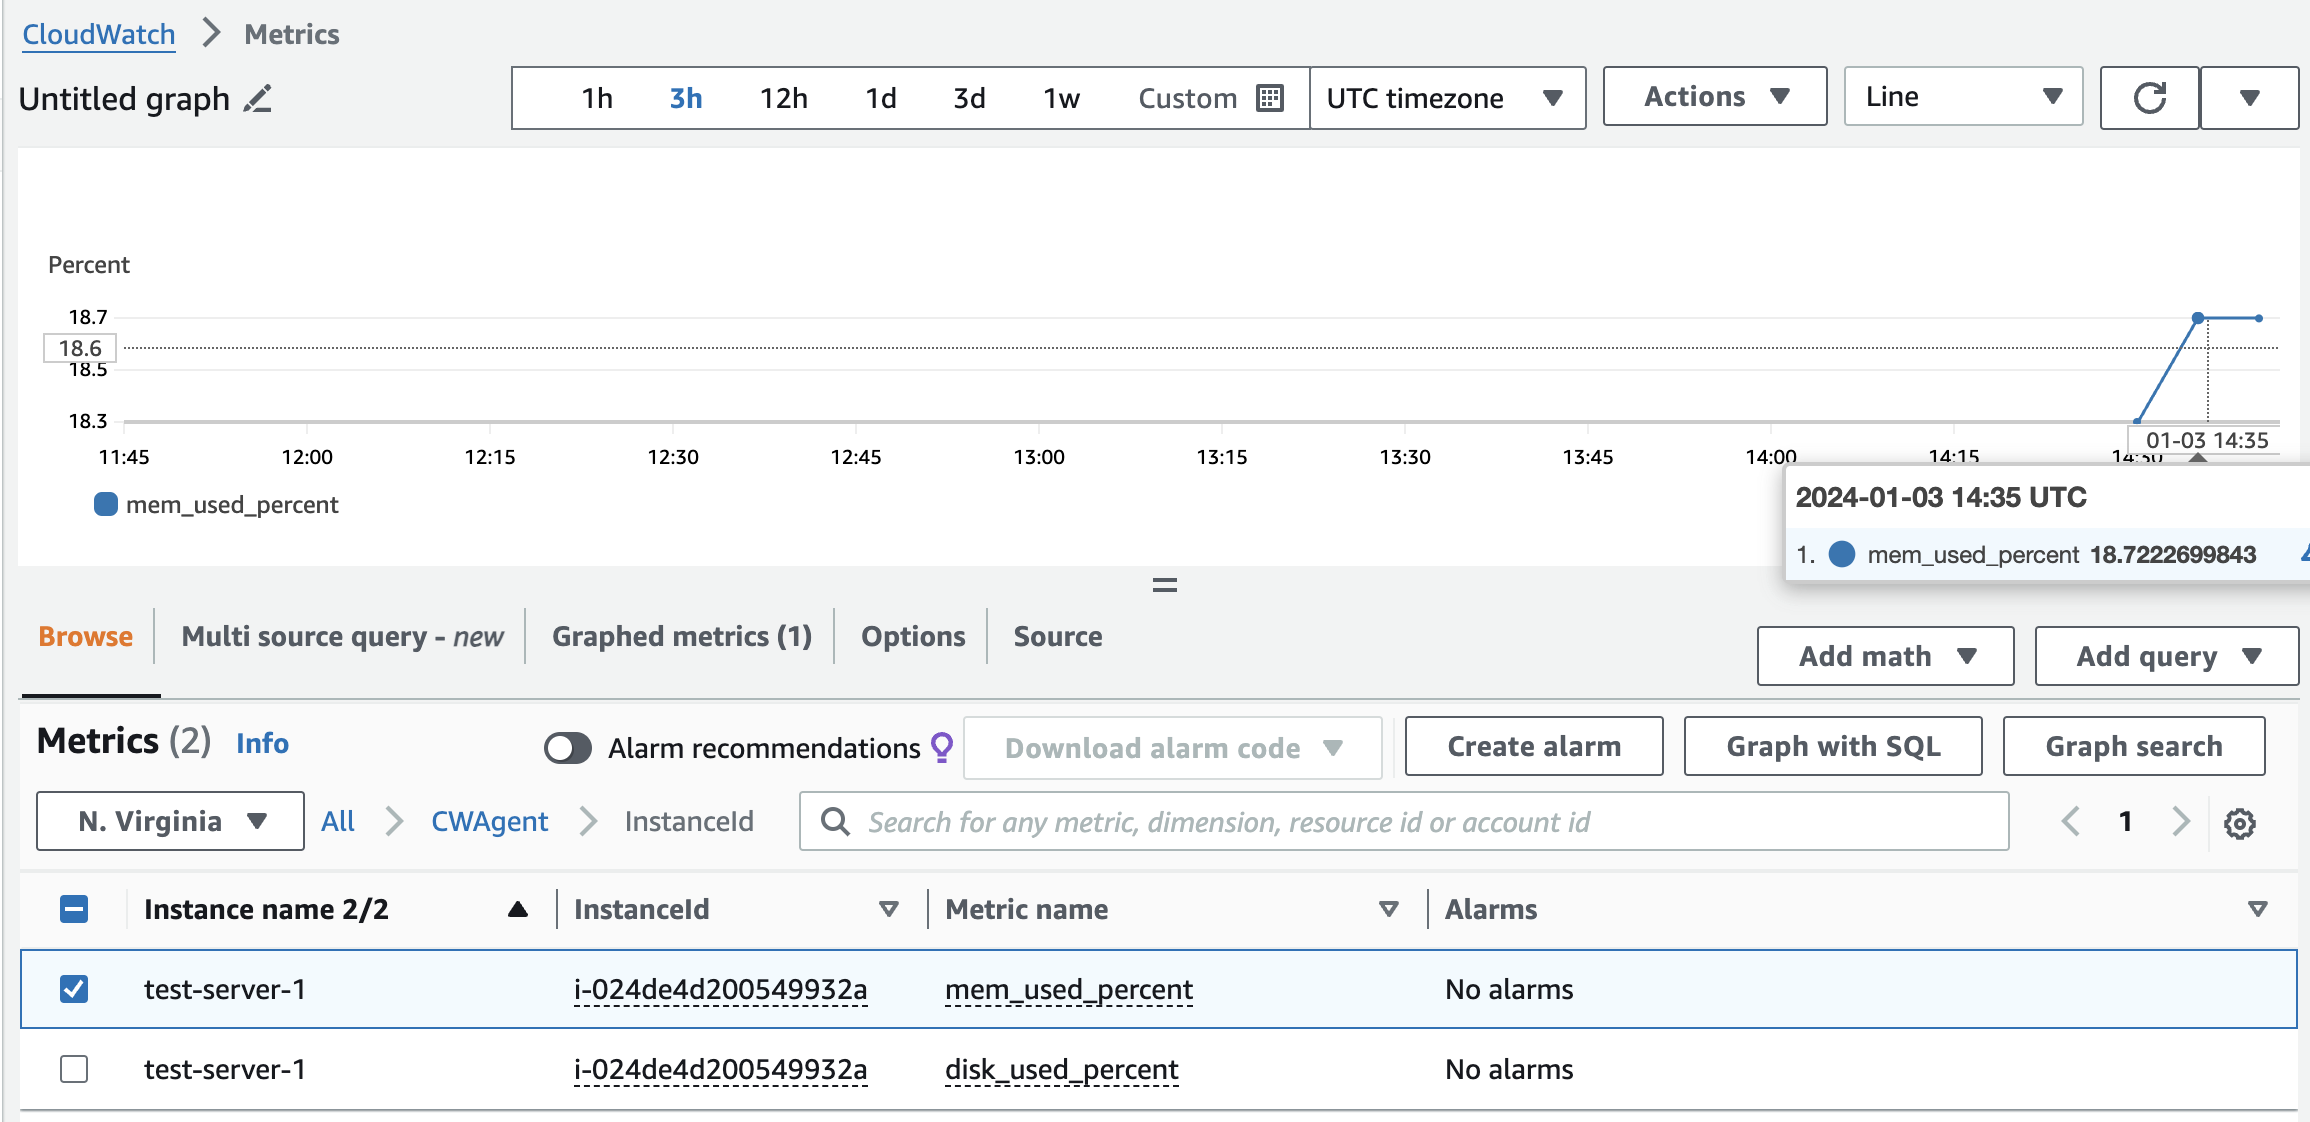
15. You can also check Cloudwatch -> Metrics -> All metrics -> CWAgent -> InstanceID
And you can find out the mem_used_percent which populate the graph on top