An Aficionado Journey in Opensource & Linux – And now It's a FinTech touch!
Basic steps to create an AMI
AWS and Cloud Computing
Published: 2024-01-12 06:36:16
An AMI stands for Amazon Machine Image. It is a pre-configured virtual machine image, which is used to create instances (virtual servers) in the Amazon Elastic Compute Cloud (EC2). An AMI contains the necessary information to launch an EC2 instance, including the operating system, application server, and any additional software.
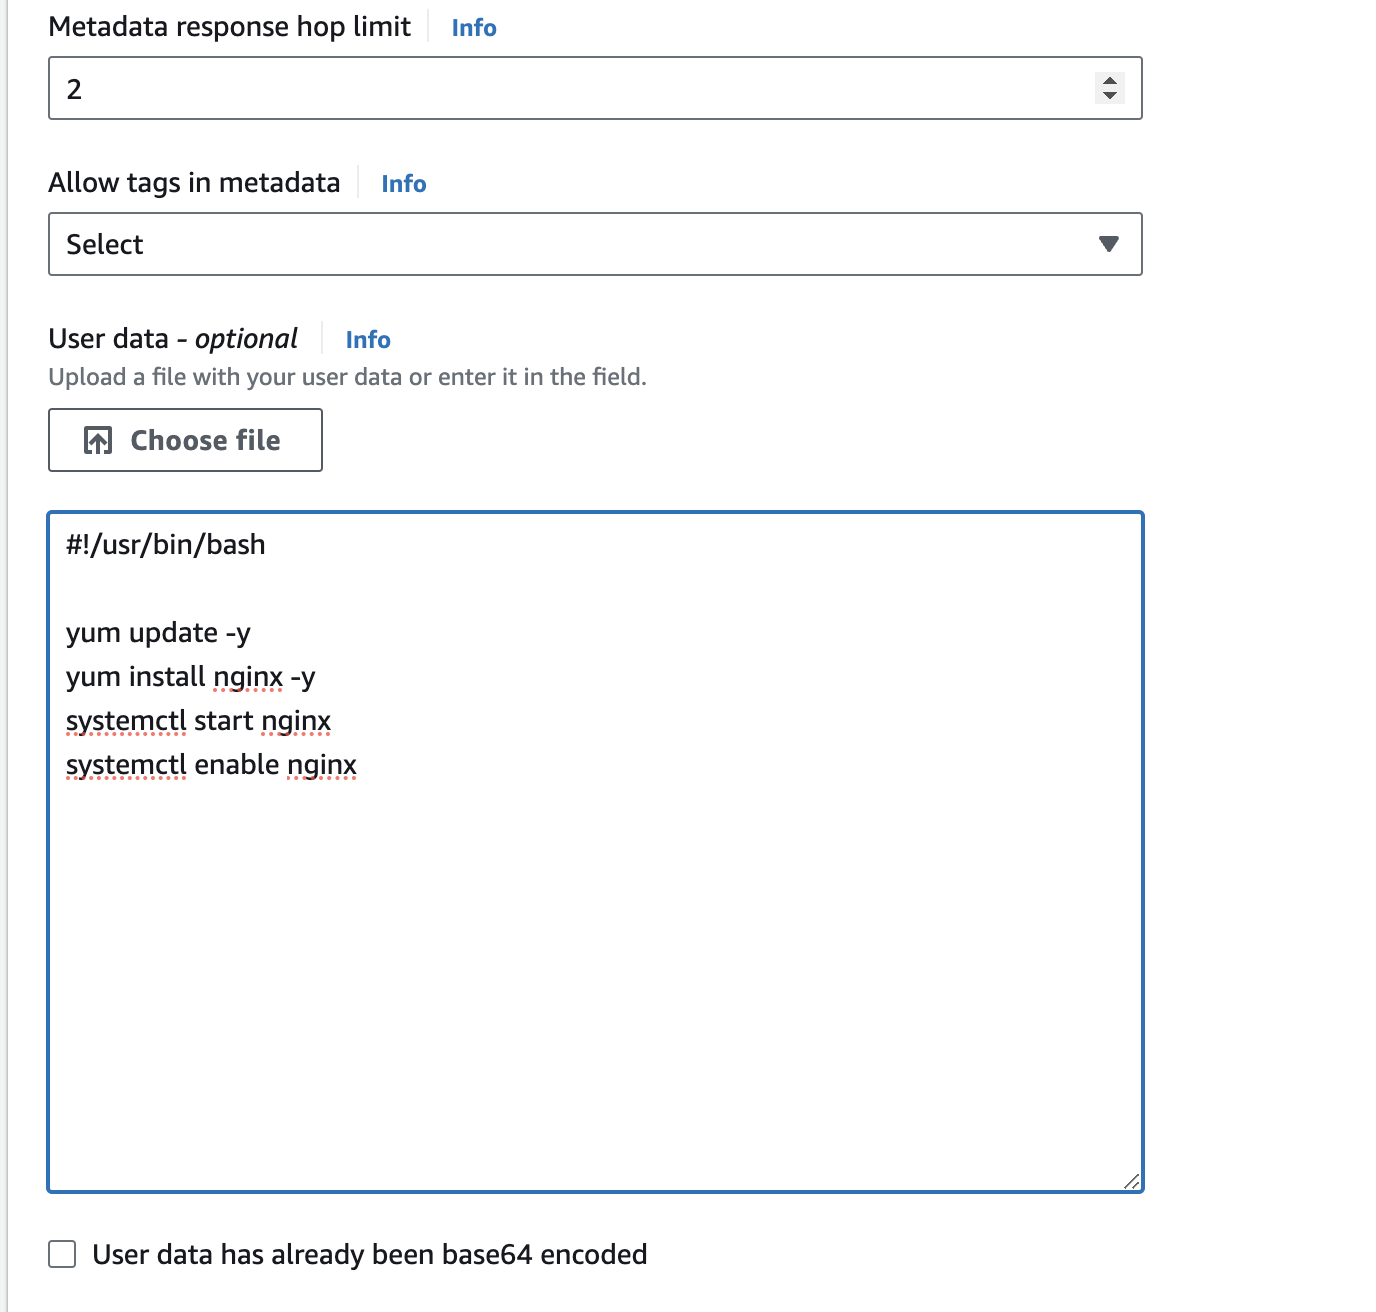
1. When you create an EC2 instance, under "Advanced details", go to "User data", you can put some basic commands there for AMI to be built in with those packages, for example, Nginx installation.
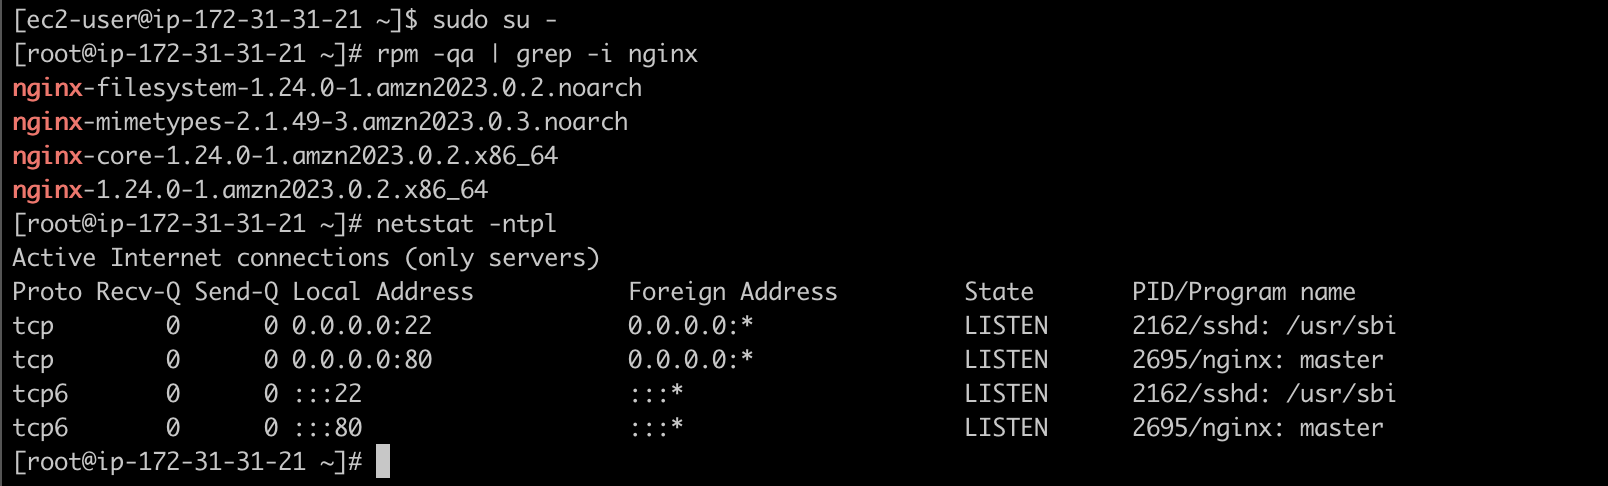
2. After the instance is launched, you should see nginx installed, enabled, and of course, listening on port 80. It might take some time though to fully execute the script.
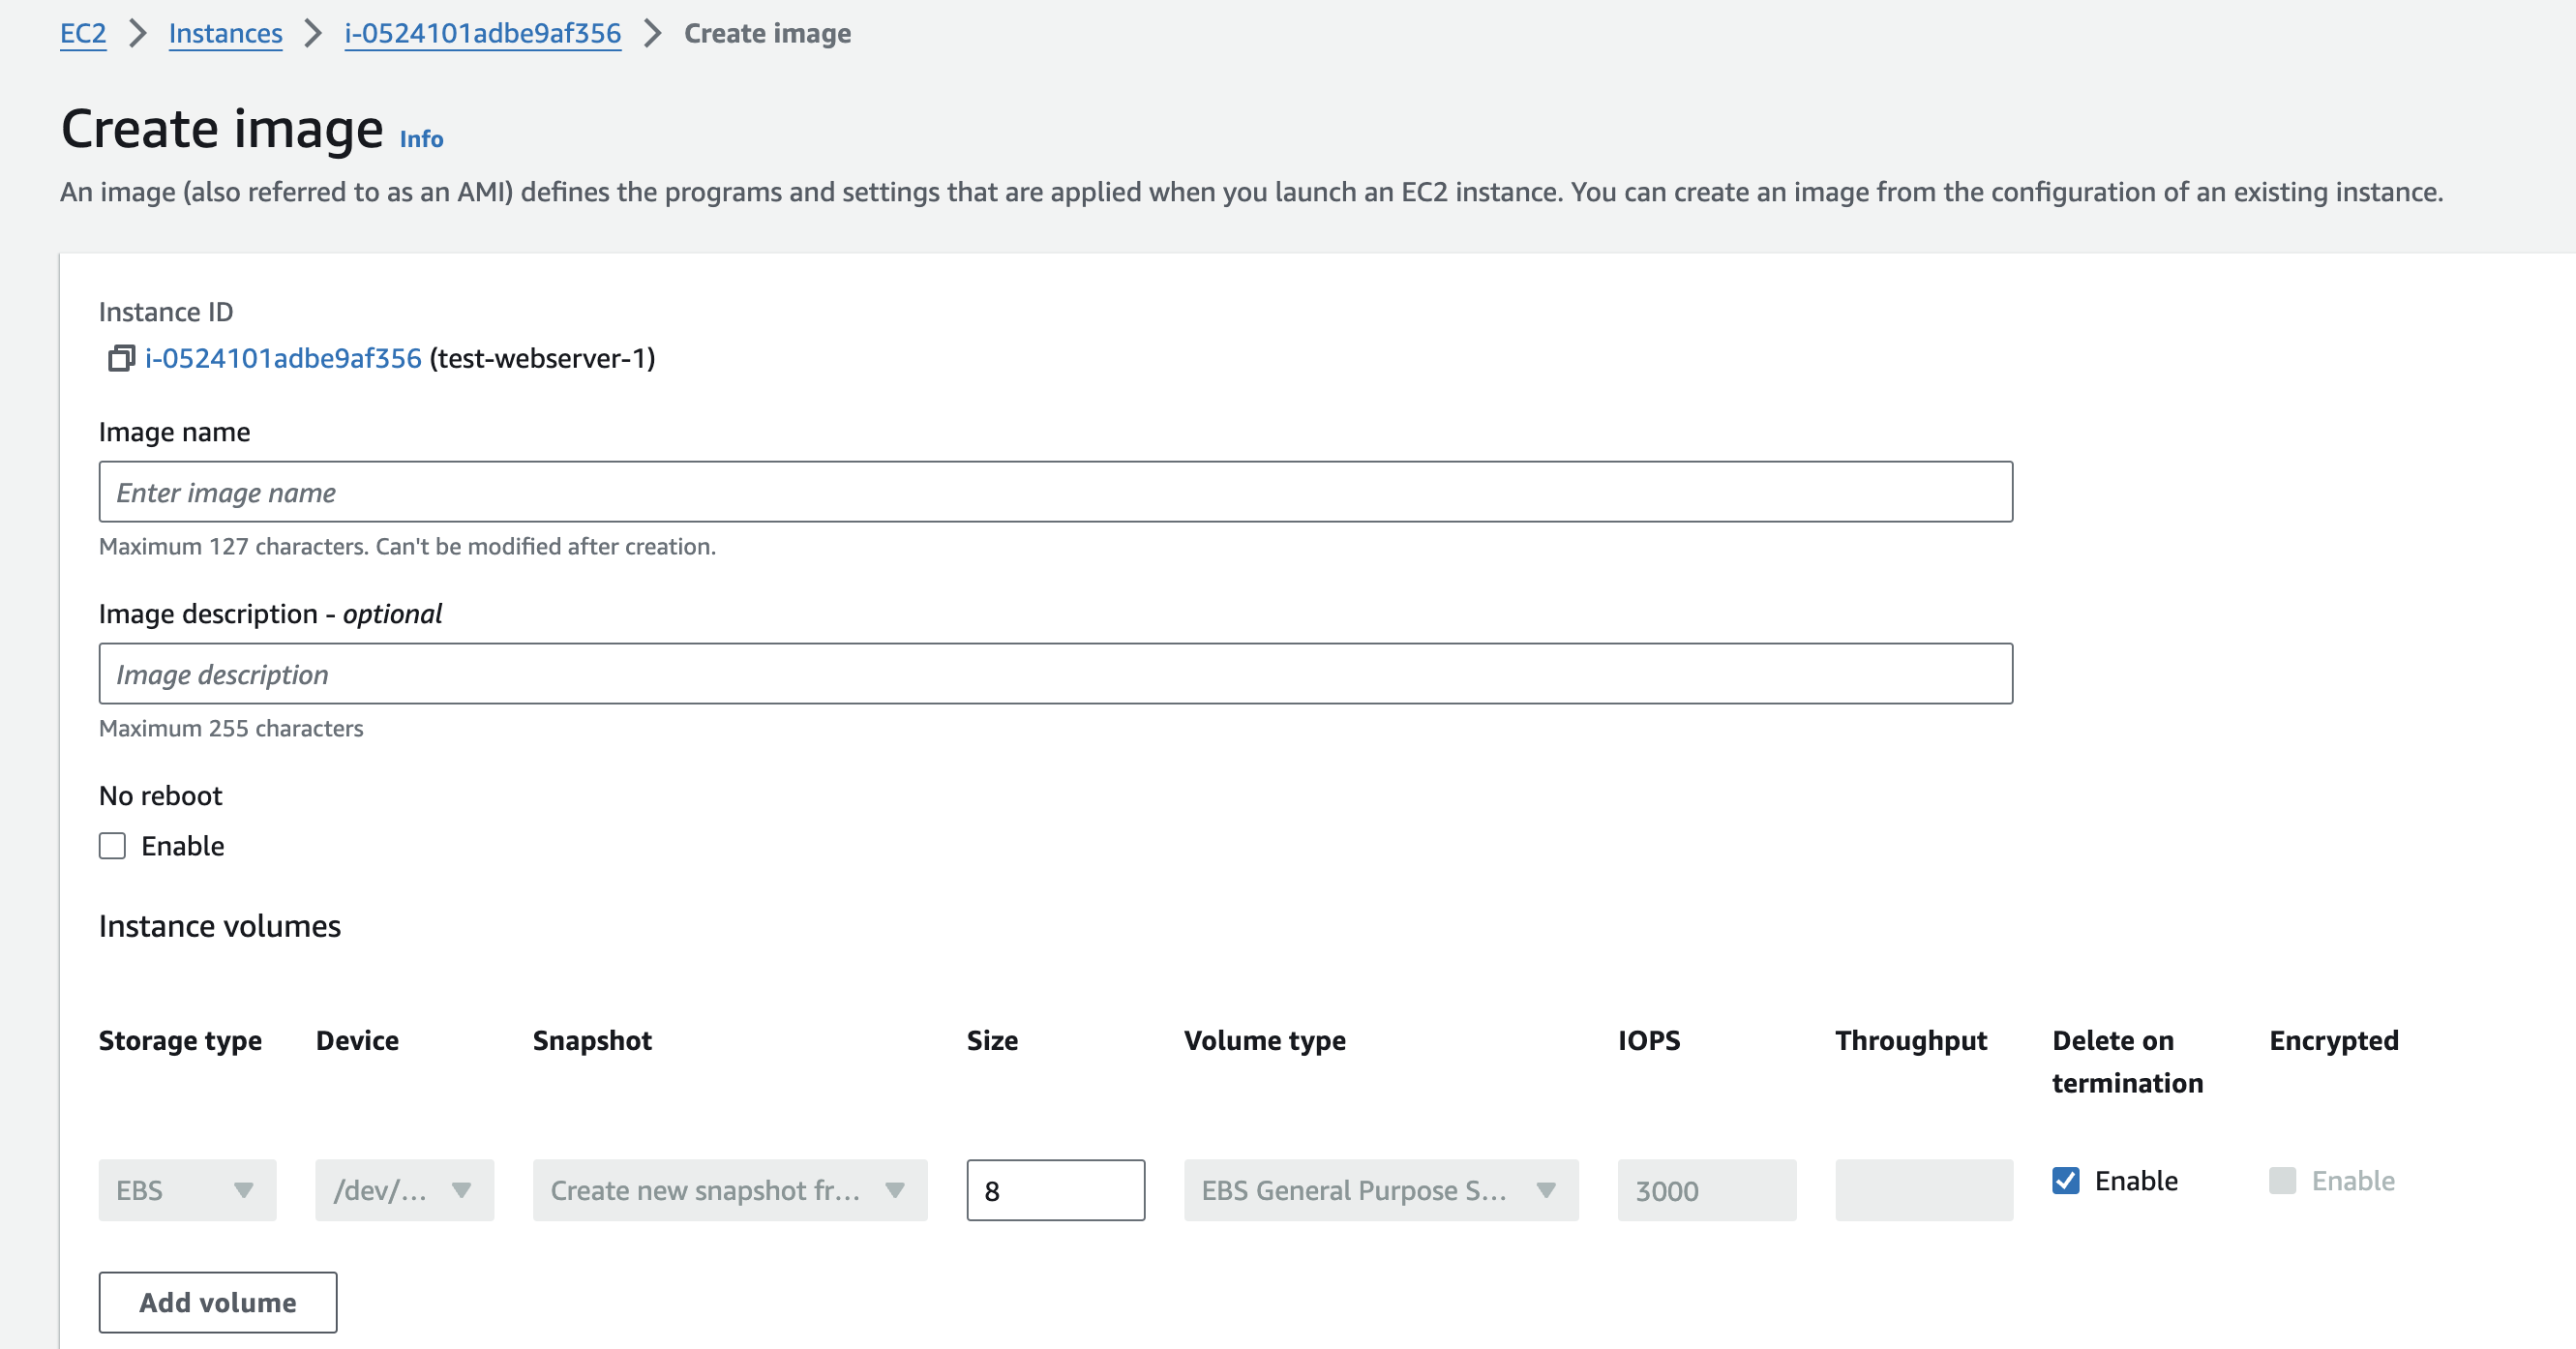
3. Now that the instance has been launched with the Nginx web server, I should be able to make an AMI out of it.
Right-click on the instance -> Image and Template -> Create Image
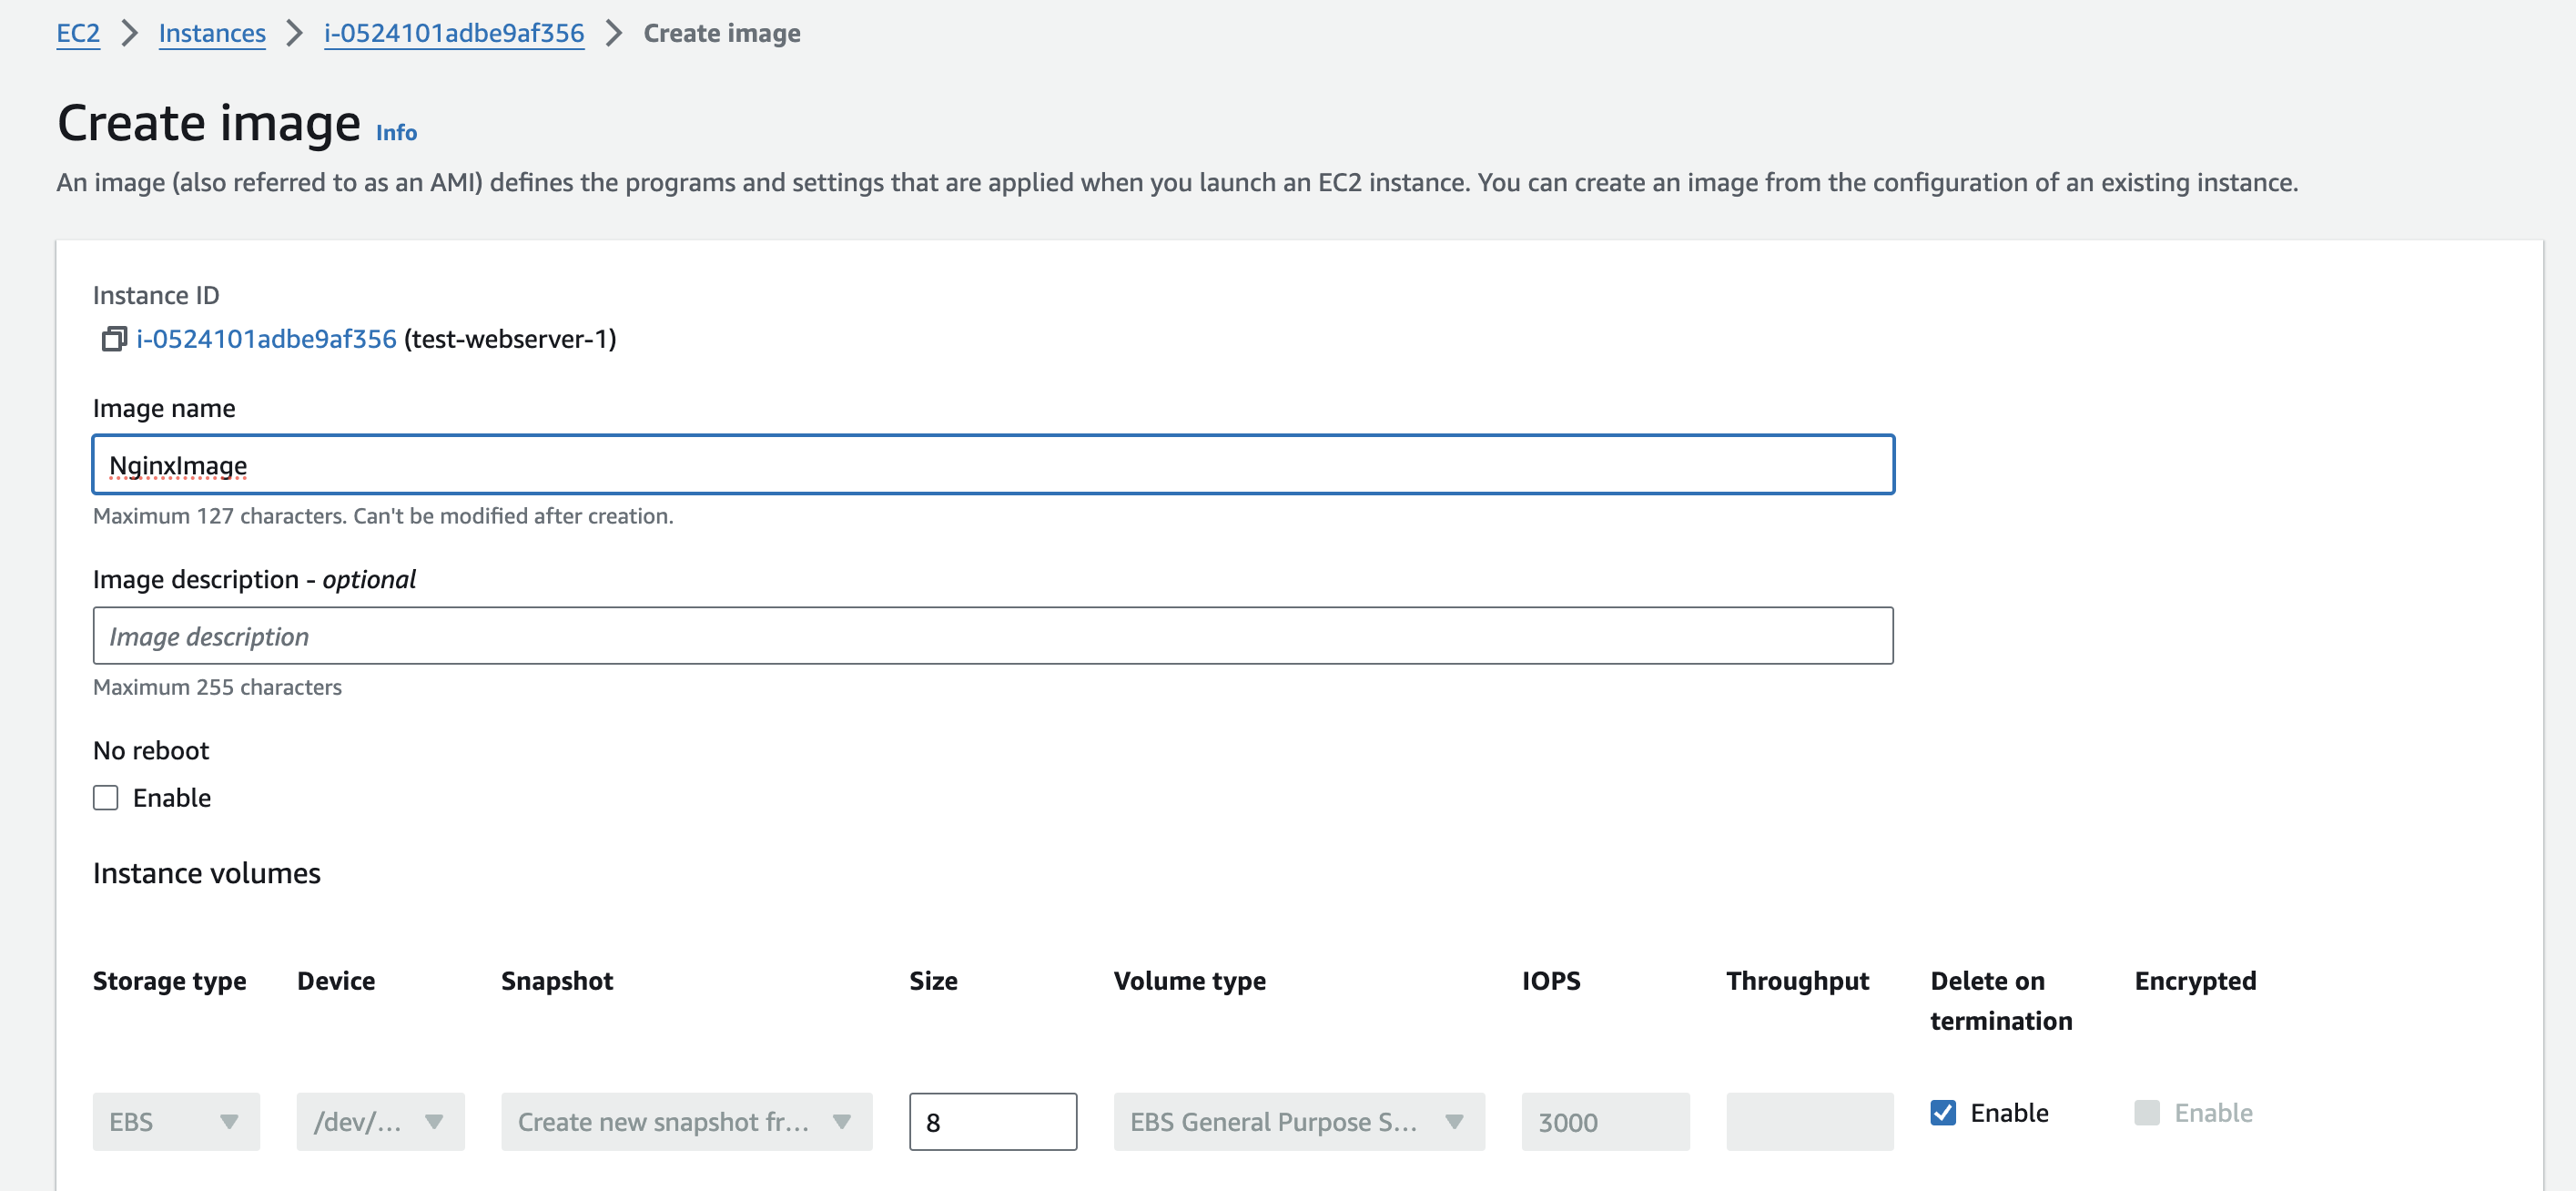
4. Give it a name then hit "Create Image"
5. From the console, under Images, go to AMI
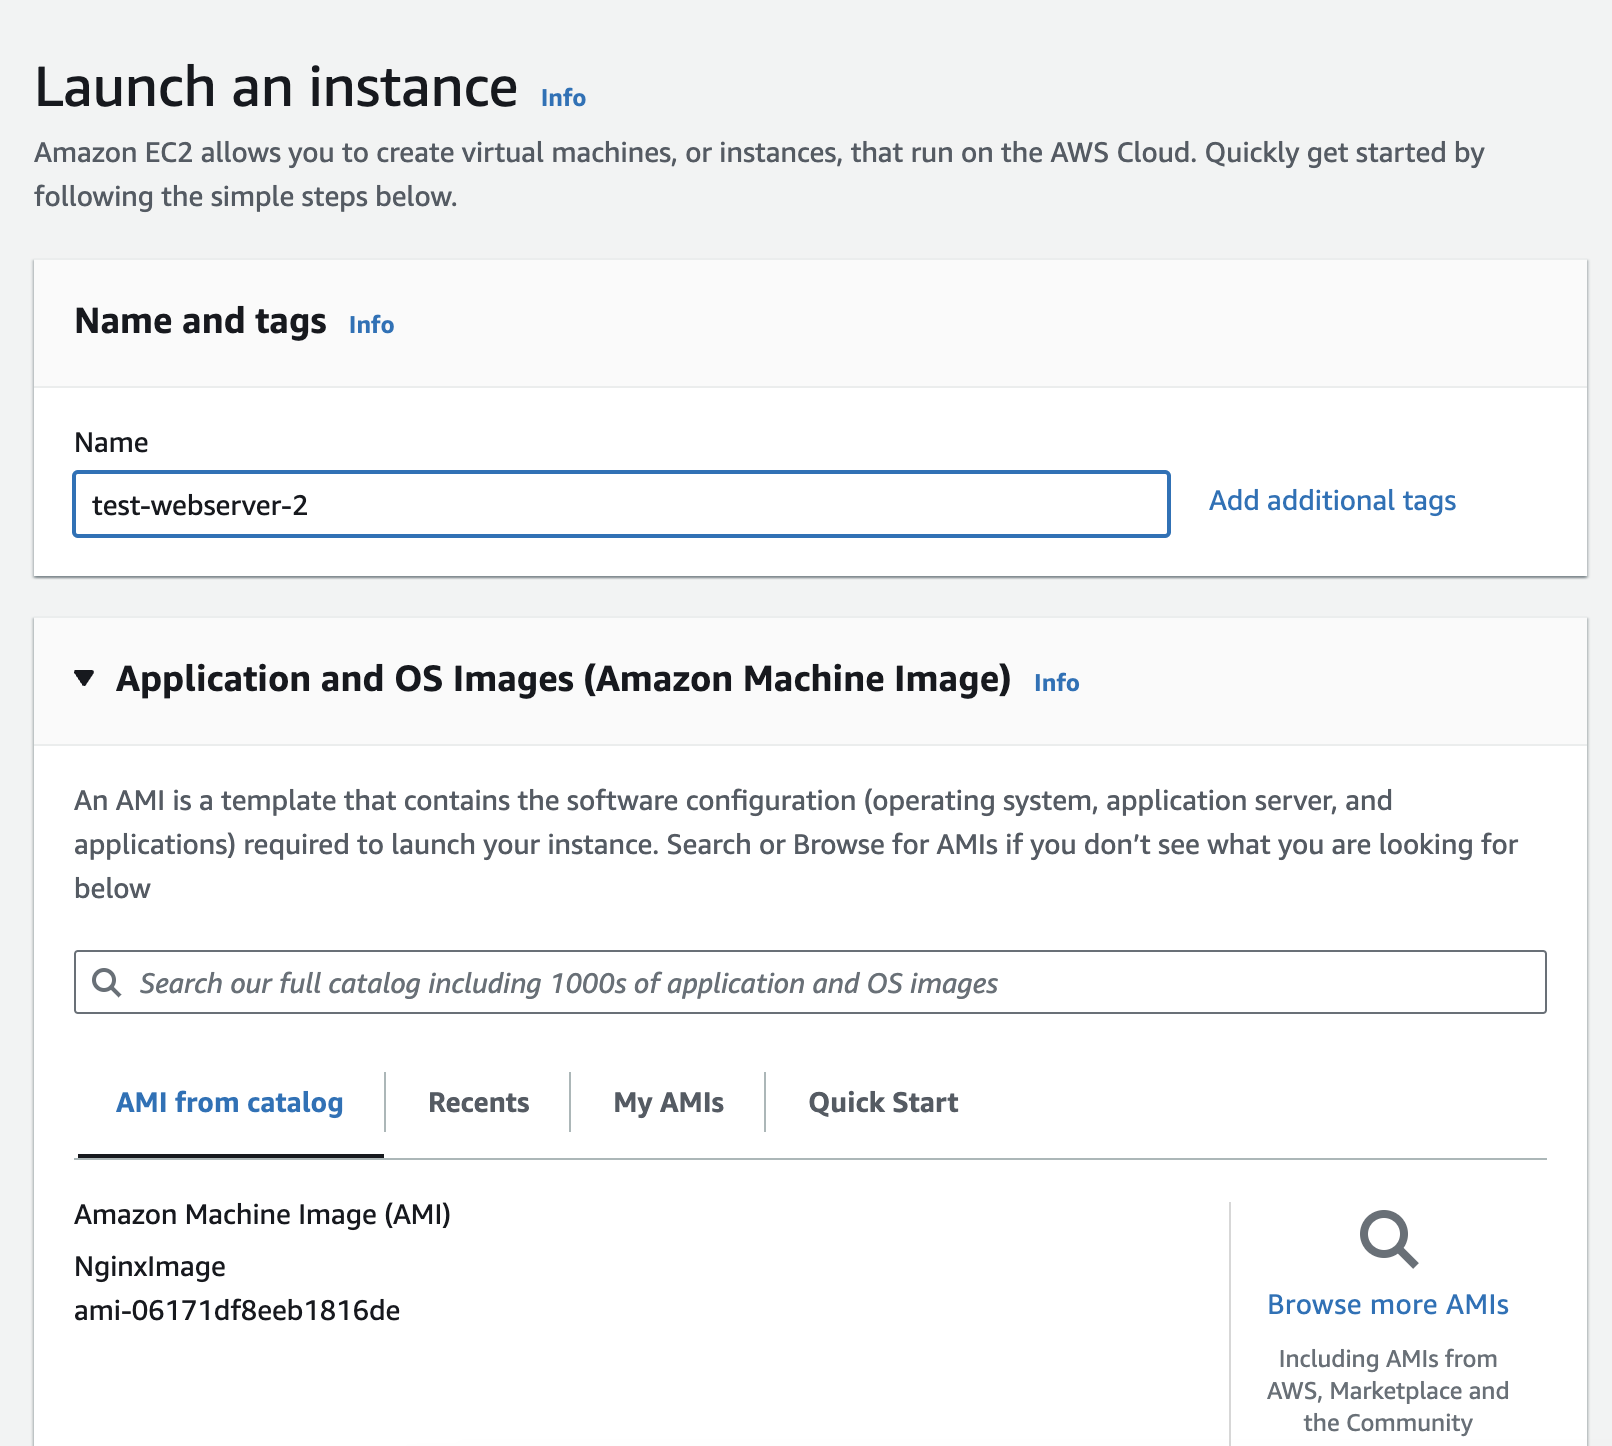
6. Once the AMI is in a ready state, I can now launch Instances from this image, say test-webserver-2
EC2 Console -> AMI -> chose AMI -> Launch Instance from AMI
7. All of the created AMIs can also be seen in "My AMIs".