An Aficionado Journey in Opensource & Linux – And now It's a FinTech touch!
Crash blog to start with Kubernetes - Installation and Configuration - Part1
AWS and Cloud Computing
Published: 2020-06-06 12:26:14
I seen many tutorial where the publishers tried to explain many thing in details about Kubernetes which is important, however, I believe at some point we need to make our own reference and instead of going back to "crash course" and focus more on "crash blogs". This blog post will focus about the installation of Kubernetes. Kubernetes is an open-source container-orchestration system for automating application deployment, scaling, and management. It was originally designed by Google, and is now maintained by the Cloud Native Computing Foundation. Before we get into the details of the installation of Kubernetes, its recommended to install Docker, and be very acquainted with it. It is the core prerequisites. This blog post is very straight forward concerning the installation using Virtual Box.
For the purpose of this blog, I have created 3 Centos7 minimal install ISO as virtual machines on VirtualBox. I also have their host names and IP Address information in the /etc/hosts files on each virtual machines. These are labs, I have disabled firewall and SELinux as well. All the labs have 2 CPUs which is important. Otherwise, it won't work.
192.168.254.64 master-node
192.168.254.65 worker-node1
192.168.254.66 worker-node2
On all the 3 nodes:
1. On all the three nodes, I updated the VMs, install some basics packages, install Docker dependencies, Docker and enable it. Days back, I posted an article on the basics of Docker. I also disable the Firewalld Daemon. You can get more information about Firewalld on this article 35 commands to understand Firewalld.
2. Again, on all the three nodes, disable swap and SELinux.
sudo sed -i '/ swap / s/^/#/' /etc/fstab
sudo sed -i s/^SELINUX=.*$/SELINUX=disabled/ /etc/selinux/config
swapoff -a
3. Reboot the three nodes
restart
4. On restart, on all the three nodes, install Kubelet, Kubeadm, and kubectl. First, we need the repository and then we can proceed with the installation and enabling the service on start.
5. On the master-node, set the hostname and add the corresponding IP to the /etc/sysconfig/network file.
sed -i -e "\$ahostname master-node" /etc/sysconfig/networkhostname master-node
Exit and login again, the prompt should change according to hostnames.
7. Now, on the master-mode, make it becomes the master by running the following. At the end of the command you will get information together with the command and the hash key how to make the worker-nodes to join the master-node.
kubeadm init
8. Remember, we also have to configure the admin.conf file depending which user is running kubernetes. In my case it is the root user. So launch the following commans on the master-node.
9. Now its time, to make the worker-node1 and worker-node2 to join the master-node: On both worker nodes, launch the following:
kubeadm join 192.168.254.64:6443 --token 039plt.y3clki50j97gbp6a \ > --discovery-token-ca-cert-hash sha256:74ecb7aa2f6260f41be9ab3f8b7f5418216021c2976db39665f94b44c47ed57f
10. On the master-node, you can detect if the workers has joined successfully with this commands:
kubectl get nodes
11. On the master node, we also need to install the abstraction layer that build the network between the workers and master.
This is going to create several containers within the environment.
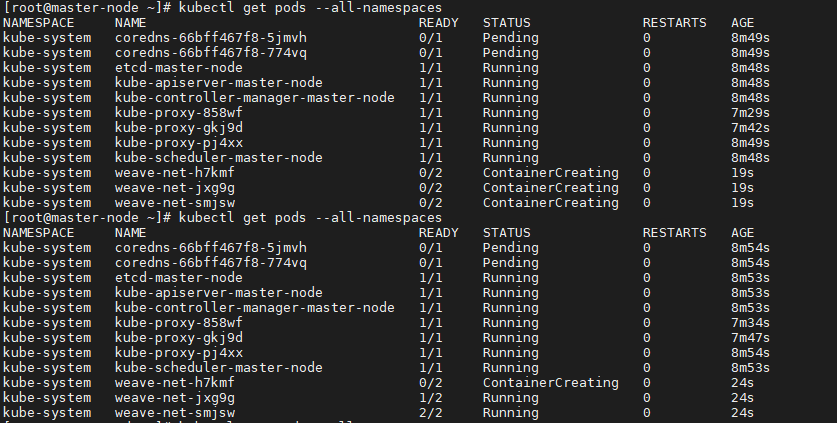
12. On the master-node, you can see all the pods here using the following commands:
kubectl get pods --all-namespaces
As you can see, I launch the commands two times, some were on creating mode whilst other are in pending or running states.
13. Again, on the master node, now you can see that all the worker-nodes are ready.
This article is pretty straight forward it just shows the installation. In the next article, I will get into the basics and try to make sense by means of diagram. Hopefully, it is useful. Enjoy :)