
Some days back, I was brewing up some plans to optimize my website source codes, HTTP headers, latency, and other security aspects. I had to carry out some analysis and research using some tools available on the internet. I should admit that, at first, it looked pretty simple, but it was not. For instance, I did not permit myself to directly modify the production environment. So, I had to migrate it to a pre-production environment. Page caching was yet another issue which could trick oneself after modifications.
Since my website is behind Cloudflare, which is already an advantage in terms of security, performance, reliability, and insight, it does not mean that the website cannot be hacked. According to sucuri.net, websites using Wordpress CMS are constantly being hacked. Of course, it depends on the mode of attack and the infection impact.
[caption id="attachment_1556" align="aligncenter" width="645"]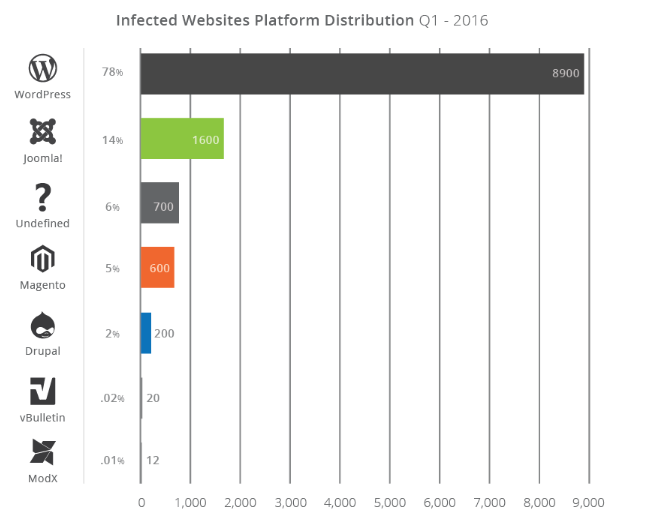
Migrating to TLS
Migrating a CMS which already has several articles posted can be an issue as the URLs are already recorded in the database as well as in the source code itself. Also, there were links on the website which were not pointed on HTTPS. After moving to the HTTPS version, errors such as "Mixed content" could be noticed when accessing the website. One of the interesting free features of Cloudflare is that everyone can have a free SSL certificate issued by Comodo. You will have to generate your certificate and your private key from Cloudflare and point it on your Virtual Host.
Some corrections on Wordpress source code needed to be added in the wp-config file as follows:
define('WP_HOME','https://tunnelix.com/');

define('WP_SITEURL','https://tunnelix.com/');
On top of that, there seemed to be lots of URLs on the database itself that needed corrections using the following commands:
update wp_options set option_value = replace(option_value, 'http://www.tunnelix.com', 'https://www.tunnelix.com') where option_name = 'siteurl';
update wp_posts set guid = replace(guid, 'http://www.tunnelix.com', 'https://www.tunnelix.com');

update wp_posts set post_content = replace(post_content, 'http://www.tunnelix.com', 'https://www.tunnelix.com');
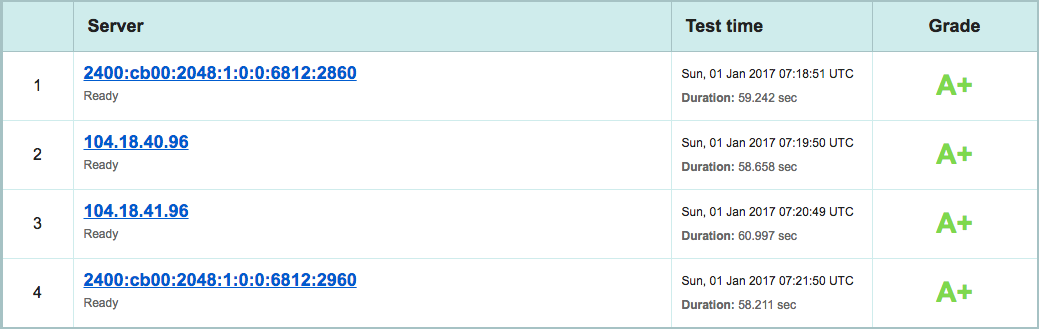
However, there are some tricks to identify those non-HTTPS URLs by making a dump of the database and do a "Grep" in it, followed by a "Sed" to eliminate those unwanted parameters. Once the "Mixed Content" errors have been identified, I launched a scan on the Qualys SSL Labs website. The result was an "A+". You can also use the Htbridge free SSL [in 2023 I noticed that htbridge is now immuniweb - link updated]server test which is pretty fascinating especially to verify PCI DSS Compliance, HIPAA compliance, NIST guidelines and industry best practice in general. If all those criteria have been met, then you would score an "A+" rather than an "A" or worse an "F".
Source code optimization and Page speed verification
This can be verified using the GTmetrix tool available for free online. I noticed that my rank was a "C". This was caused due to lack of minified HTML and CSS, and Image dimension. To handle the minify HTML errors, I enabled the plugin Minify HTML Markup on Wordpress itself which corrected these errors. To tweak the Image dimension I downloaded the tool Optipng from Epel repository:
optipng.x86_64 0.7.6-1.el6 @epel
For example, if you want to optimize a specific image, use the following command:
optipng -o2 Screen-Shot-2016-12-24-at-1.04.45-AM.png
Another verification was made on GTmetrix website and I noticed that the result was then an "A"
[caption id="attachment_1560" align="alignnone" width="977"]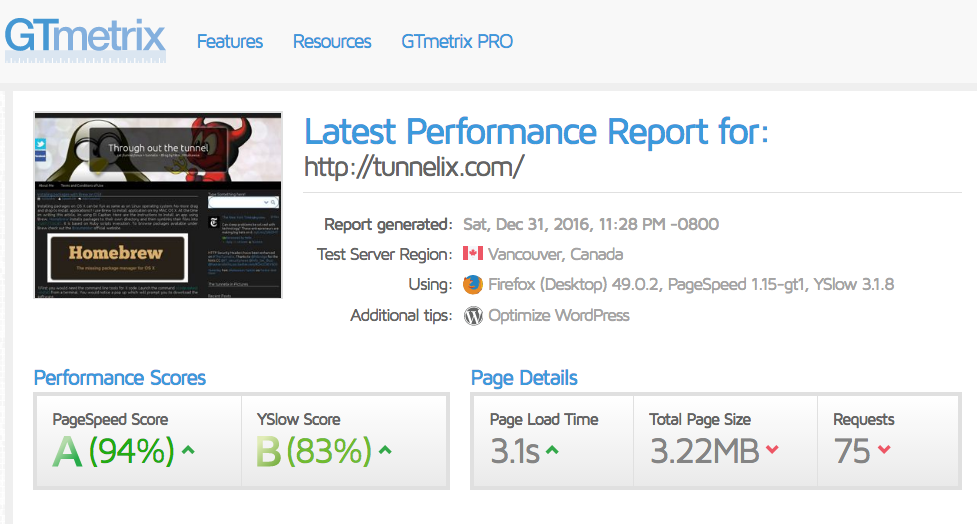
Tweaking the Web server HTTP headers
Htbridge [immuniweb rebranded] will surely give you an overview of the web server security and will accompany you step by step to get a better result.
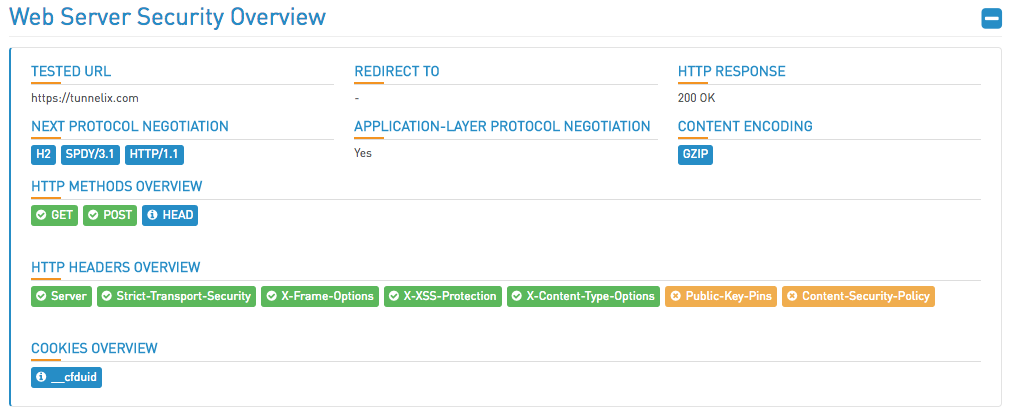
Of course, since the website is behind Cloudflare, it is limited to certain security tweaks such as Public-key-pins. The Public Key Pinning Extension for HTTP (HPKP) is a security feature that tells a web client to associate a specific cryptographic public key with a certain web server to decrease the risk of Man-in-the-Middle (MITM) attacks with forged certificates. I found an interesting article on https://raymii.org which explained how to activate the HPKP.
Once you are in possession of your certificate and Private key, you can create the public key and a token will be received to activate the HPKP extension. The following commands can be used to get the token and the public key.
# openssl x509 -noout -in certificate.pem -pubkey | openssl asn1parse -noout -inform pem -out public.key;

# openssl dgst -sha256 -binary public.key | openssl enc -base64
 4vr+koFuogsfghGjgvpsqQIIikg5KowHTIGNQ5Prspc=
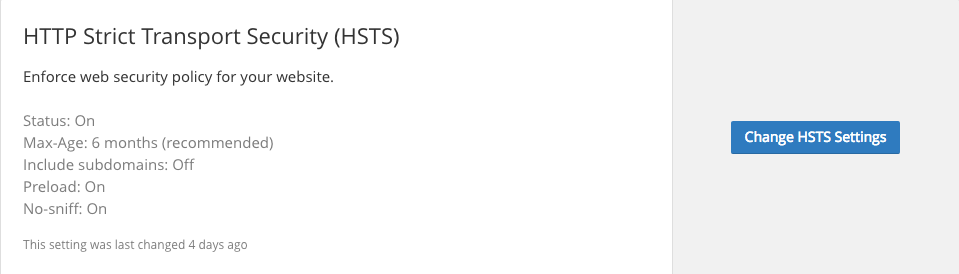
However, it looked that HPKP is not supported on Cloudflare. But, there are other issues such as HSTS. HTTP Strict Transport Security (HSTS, RFC 6797) is a web security policy technology designed to help secure HTTPS web servers against downgrade attacks. HSTS is a powerful technology which is not yet widely adopted. CloudFlare aims to change this. I enabled it as per recommendations by Cloudflare.
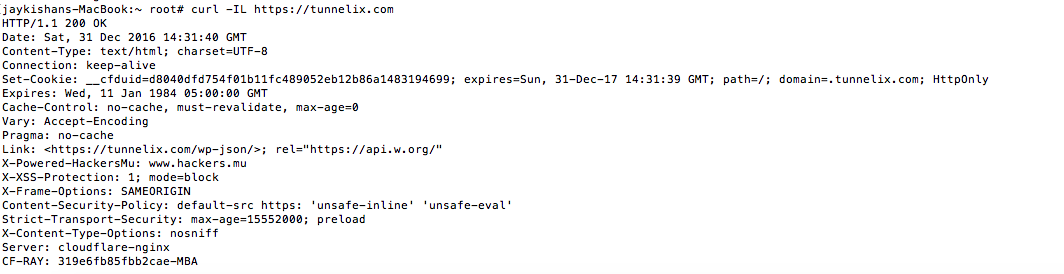
A curl on the URL https://tunnelix.com now prompts the following headers :
No system is perfectly secure, but I believe that these modifications are worth to adventure around. I should say I was really impressed by free tools such as the Qualys SSL test, HTbridge free SSL and Web security test and Gtmetrix in terms of page speed.
Hello, Tunnelers, this is my first article for the year 2017, I seize this opportunity to wish my readers a Happy New Year 2017 and wish you all lots of prosperity. - TheTunnelix