An Aficionado Journey in Opensource & Linux – And now It's a FinTech touch!
Setting up Active/Standby Redundancy MessageVPN with Solace PubSub+
Linux & BSD systems, Applications and Security
Published: 2020-12-28 15:47:07
In this article, I'm going to show the step by step how I set up an HA redundancy group using three Solace PubSub+ event brokers for direct messaging. In this configuration style, the backup node will remain on standby mode.
I imported two Solace PubSub+ OVA file on my VirtualBox hypervisor.
They were named as follows:
solace1 - 192.168.18.78
solace2 - 192.168.18.71
solace3 - 192.168.18.69
On solace1 /solace2 /solace3
1. Stop the service and set the hostname at OS level and reboot it. Note that the hostname for solace1/solace2/solace3 will differ:
[sysadmin@solace ~]$ solacectl service stop[sysadmin@solace ~]$ solacectl hostname configure solace1[sysadmin@solace ~]$ solacectl service start
2. Once rebooted, shutdown the hardware message spool:
enable configure hardware message-spool shutdownAll message spooling will be stopped.Do you want to continue (y/n)? y
5. Set a pre-shared key that should be between 44-344 characters:
configure
  redundancy
    authentication
       pre-shared-key key e5Fc7aVEhkF1QP2DN5hKe5Fc7aVEhkF1QP2DN5hKe5Fc7aVEhkF1QP2DN5hKe5Fc7aVEhkF1QP2DN5hK
end
On solace1 only:
6. Set the active-standby role to primary for the solace1 VMR
configure
  redundancy
    active-standby-role primary
      no shutdown
end
On solace2 only:
7. Set the active-standby role to backup for the solace2 VMR
configure
  redundancy
    active-standby-role backup
      no shutdown
end
On solace3 only:
8. Set the node on monitoring node
enable
  reload default-config monitoring-node
end
On solace1 and solace2 only:
9. Enable guaranteed messaging on the nodes by enabling hardware message spool.
enable configure hardware message-spool no shutdownend
10. Start the mate link service on both nodes.
configure
  service mate-link
     no shutdown
end
11. Enable encryption on both nodes.
configure redundancy mate-link sslend
12. Enable config sync on both VMR to synchronize configurations between primary and backup.
enable configure config-sync no shutdownend
On solace1/solace2: Verification and testing
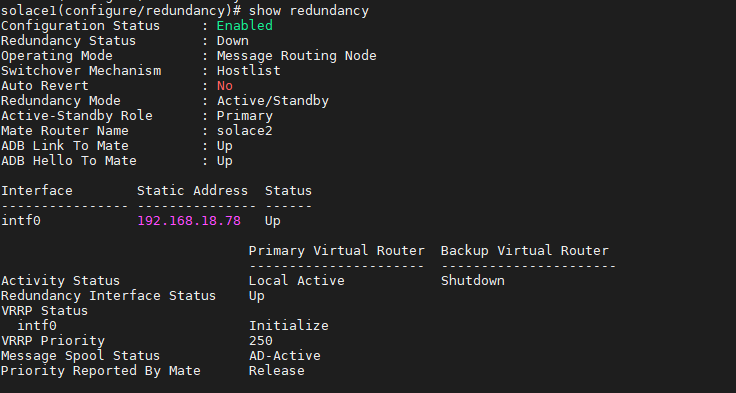
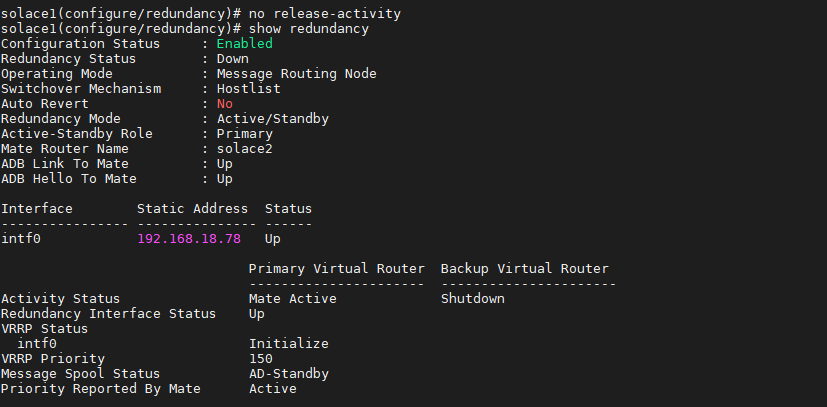
13. Do a show redundancy on both solace1/solace2. The following are important:
Configuration status should be enabled
ADB Link To Mate should be up
ADB Hello To Mate should be up
Message Spool Status should be AD-Active
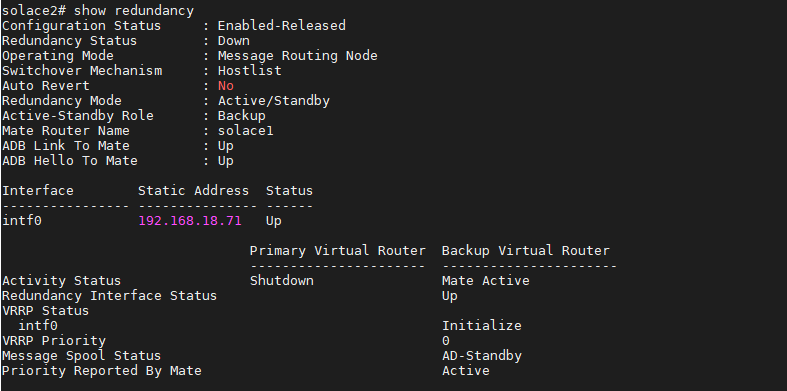
This is how it looks on the solace2 VMR.
Failover from solace1 to solace2
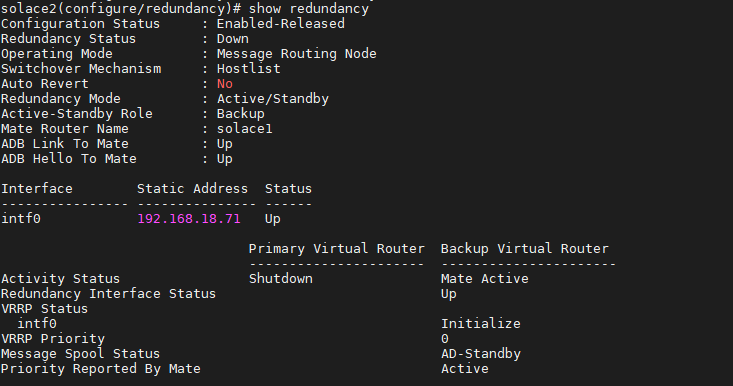
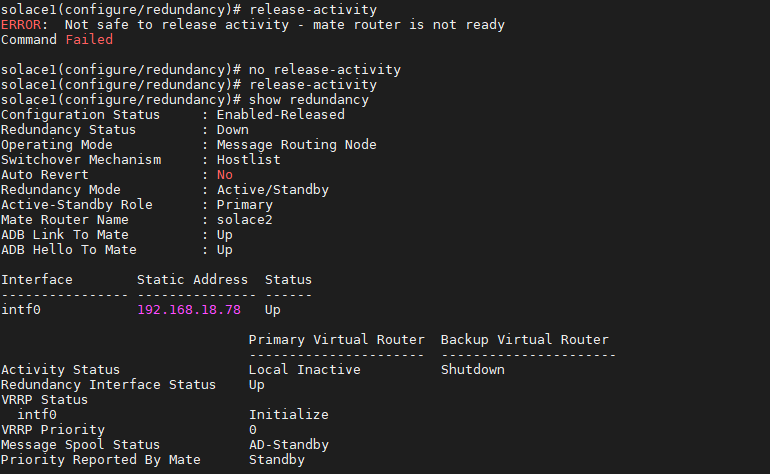
14. On the solace2, configuration status should show "Enabled". Only then, a it can fail over from solace1 to solace2
A "show redundancy" is now showing "Configuration Status" as "Enabled-Released" which means release activity will fail.
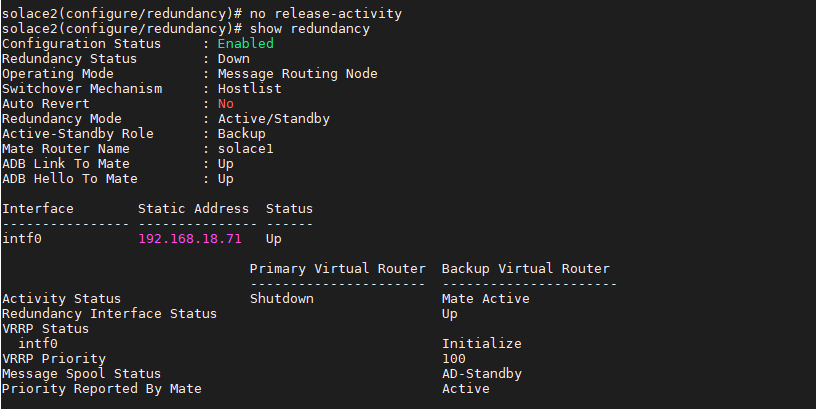
15. Now that a "no release-activity" is fired, it will changed to configuration status will changed to "Enabled".
On solace1, do a "release activity" and configuration status will now show "Enabled-Release".
Also note that all message vpn on solace1 will be displayed as down as they are up on the solace2.
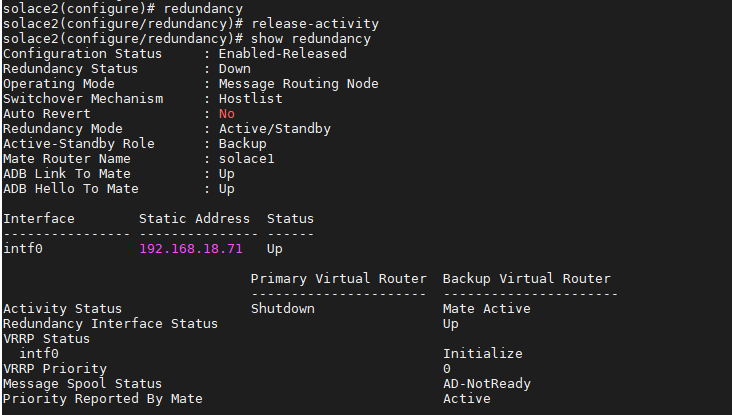
Failback from solace2 to solace1
16. Ensure that the state of "Configuration Status" is "Enabled" on the solace1 by doing a "no release-activity".
Now that solace1 is ready, do a release-activity on solace2
TIPS:
One of the prerequisites is to have the monitoring node. If this is not configured, when trying to shutdown at step 6, you may encounter the following error:
solace1(configure/redundancy)# no shutdownERROR: Incomplete redundancy group configurationCommand Failed