"Void is a general purpose operating system, based on the monolithic Linux® kernel. Its package system allows you to quickly install, update and remove software; software is provided in binary packages or can be built directly from sources with the help of the XBPS source packages collection. Currently, there are over 6000 optimized binary packages for the x86, x86_64, ARMv6, ARMv7 architectures; also there's the support to build (natively or cross compiling) from sources any package easily that is available in the XBPS source packages collection. " - Void Linux
In this article, we will see the procedure for installing Void Linux on a Virtual machine using Virtual Box. So you will need to download your ISO image from the following link.
1. I created a virtual machine using 1024 MB for Base Memory and 10Gb for Hard disk space. I have also enabled EFI which is under System and Motherboard category.
2. You can now boot your machine with the live ISO. A screen similar to this should be displayed to you.
3. Press enter by selecting the first option. You will be prompted to enter the username which is anon and password voidlinux which you will be used to get into the ISO.
4. Since I have added a 10Gb disk on the Virtual Box interface, an lsblk will show you the actual schema or all your disk of your machine.

5. To proceed with the installation, become root with command sudo -i and launch a void-installer
6. You now need to pass some parameters to the following parts before proceeding to the install part.

7. The keyboard, Network, Source, Hostname, Locale, Timezone and root password is self-explicit. I will not get into those details. Let's see the Partition part. After you have press enter in the Partition Section, you will see the disk that you have created on Virtual Box. Press OK twice and you will see the following section similar to this.

8. Now, on the bottom, there is the "new" button which you can use to create a 1GB partition. It should look like this.

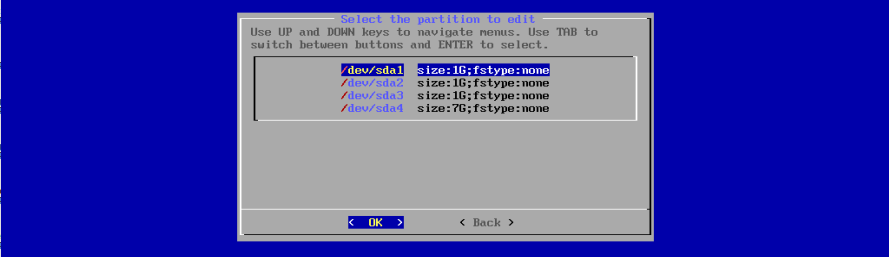
9. I have created 2 more 1GB partitions using the "Free space" partitions and kept the rest for the other parts of the system. The idea was to have three 1GB and one 7GB partition. It should look something like that.

10. Once those partitions are created go to the "Write" button at the bottom and press enter. Then type "yes" and quit. You would be then redirected initially to step 6

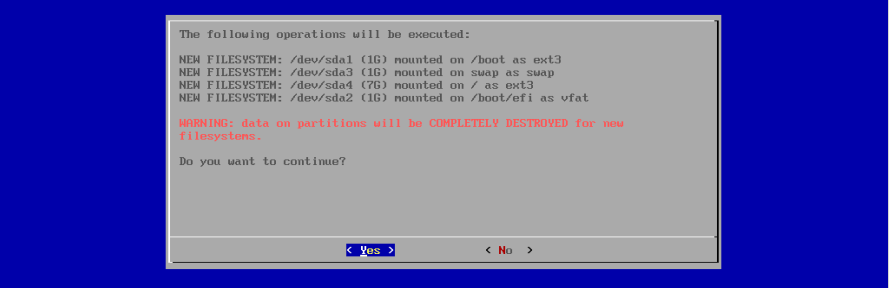
11. Now, go to the "Filesystems" section and we will now configure these partitions and mount points. The idea is to get each 1GB as /boot , /boot/efi and swap. The rest will be mounted on partition /
So, press ok for the partition chose here it is sda1
12. After pressing ok, you can choose ext3 as the filesystem and enter the path as explained in part 11 except that for the partition assigned to /boot/efi chose it as FAT32
I have noticed that after you have assigned the partitions for the /boot, /boot/efi/, swap and / the table does not change, but you need to follow the procedure as explained.
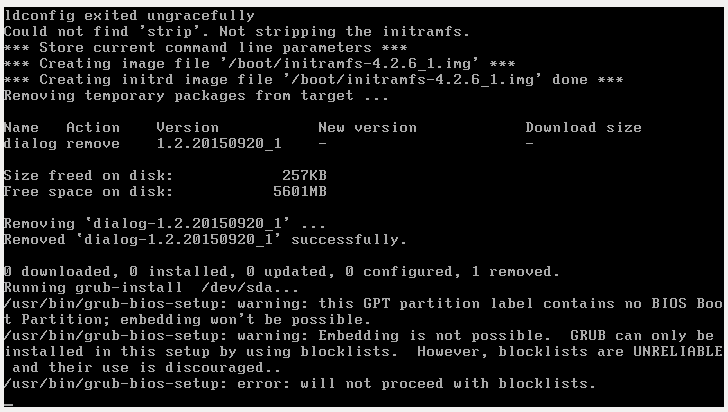
13. Go to the bootloader section, choose your disk and press ok. You will then be prompted for the following screen.
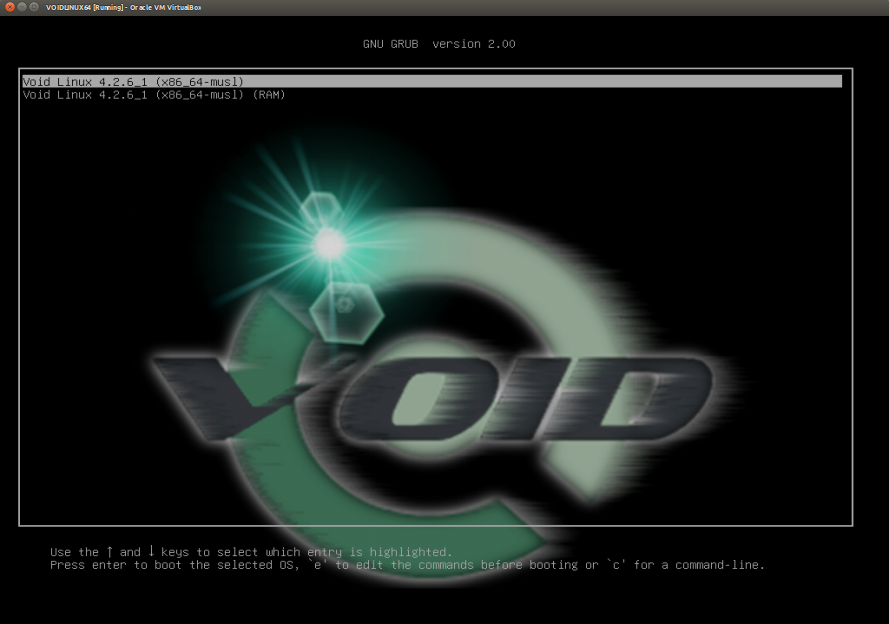
14. Press ok and wait some minutes. You will notice that your machine is now installed with Void Linux. Since you are on Virtual Box, I would recommend you to perform a snapshot of the machine after installation.
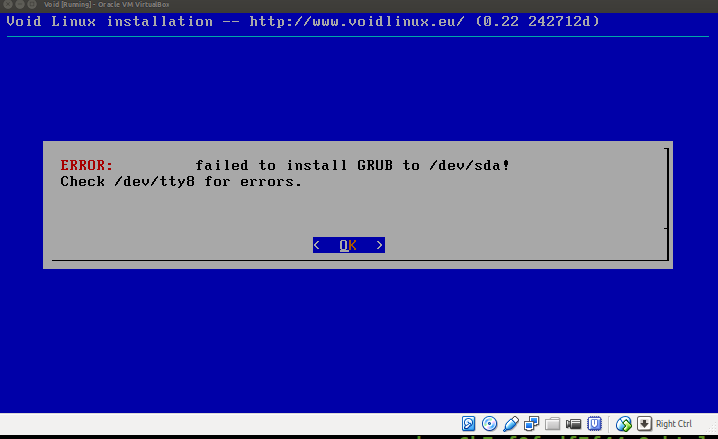
Some Errors that you may encounter:
- If you did not assign a FAT32 partition type to the /boot/EFI you might notice the following error. This error has been captured on TTY8
- If you did not even activate the EFI for special OS only on the Virtual Box, you may find this error.