
Jenkins is a free and open source web application for continuous build, integration, deployment and testing over a web server. Jenkins use lots of shells command and it has a shell interface over the web. On the other hand, we have Apache Tomcat which is an open source web server and servlet container developped by the Apache Software Foundation. Apache Tomcat is an Open Source Java web driven web application server. It provides support for Java web application such as JSP (Java Server Pages) Documents and WAR (Web Application Archive) files. It has also a self-contained HTTP server. It can also be configured by editing xml files. To run Tomcat, you will need Java. Some of the componets of Tomcat are Catalina (Sevlet container), Coyote(HTTP connector) and Jaspera(JSP engine). It is to be noted that different Tomcat Versions have different implementations.

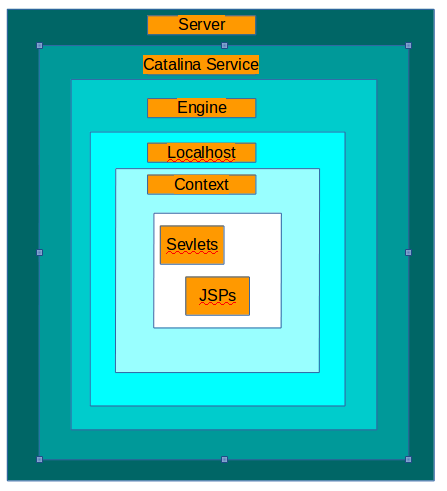
Some of the Tomcat components
Catalina is Tomcat's servlet container. It implements Sun Microsystems' specifications for servlets and JavaServer pages (JSP). In tomcat Realm elements represents a database of usernames, passwords, roles assigned to those users(Similar to Unix groups). Different implementations of Realm allow Catalina to be integrated into environments where such authentication information is already been created and maintaned. That information is used to implement Container Managed Security.
Coyote is Tomcat's HTTP connector component which supports HTTP 1.1 Protocol for the web server or application container. Coyote listens for incoming connections on a specific TCP port. Then, Coyote forwards the request to the Tomcat Engine. The Tomcat engine will then processes the request and send back a response to the requesting client. Coyote can execute JSP's and Servlets.
Jasper is Tomcat JSP Engine. Jasper parses JSP files to compile them into Java code as servlets. The compiled Java code can be handled by Catalina. At runtime, Jasper detects changes to JSP files and recompiles them.
Apache Tomcat layers
Some concept of Jenkins CI
Jenkins is an open source tool. Its a web application and can be run using any web/application server. Before getting into details of Jenkins, its important to understand the concept of Continuous Integration, Continuous Deployment and Continuous Delivery.
Continuous Integration - Is a software development practice where members of a team integrate their work frequently, usually each person integrates at least daily - leading to multiple integrations per day. Each integration is verified by an automated build (including test) to detect integration errors as quickly as possible. Many teams find that this approach leads to significantly reduced integration problems and allow a team to develop cohesive software more rapidly.
Continuous Deployment - The methodology of continuous putting of new features to live systems, so that can be used by other people (internal or external). Normally, this is done in an automated way, and build on the continuous integration part.
Continuous Delivery - Techniques such as automated testing, continuous integration and continuous deployment allow software to be developed to a high standard and easily packaged and deployed to test environments resulting in rapid, reliable and repeated push out enhancements and bug fixes to customers with minimal overhead.
In brief, Jenkins CI (Continuous Integration) is the leading open source continuous integration server built with Java that provides over 450 plugins to support building and testing virtually any project. Let's now get into the installation process.
Installing Java, Tomcat and Jenkins
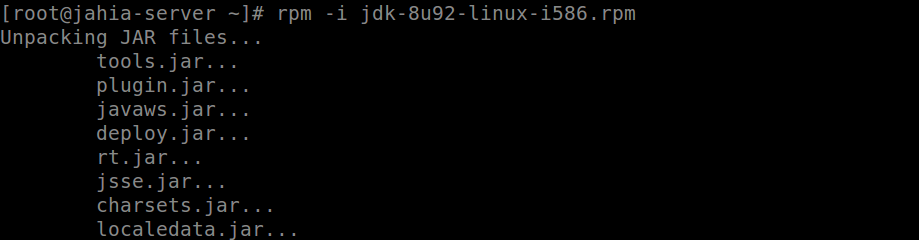
1.You will basically need Java Development Kit. At the time, i am writing this article jdk-8u92 is the latest one. This URL should help you to find the latest one http://www.oracle.com/technetwork/java/javase/downloads/jdk8-downloads-2133151.html Since, i am on CentOS 6 32-bit, i decided to install the RPM directly instead of compiling using this command.
wget --no-cookies --no-check-certificate --header "Cookie: gpw_e24=http%3A%2F%2Fwww.oracle.com%2F; oraclelicense=accept-securebackup-cookie" "http://download.oracle.com/otn-pub/java/jdk/8u92-b14/jdk-8u92-linux-i586.rpm"
2.Once the download is completed, install it using the command rpm -i jdk-8u92-linux-i586.rpm You should have something similar to this
3. By now you should be able to find the version information using javav -version for the compiler or simply java -version


4. By default the binary is located at /usr/bin and java is installed in /usr/java.

5. Before installing tomcat, we will create a group called Tomcat and a specific user (Tomcat) to access a specific directory.
sudo groupadd tomcat
sudo useradd -M -s /bin/nologin -g tomcat -d /opt/tomcat tomcat
6. I created a directory at /opt/tomcat
mkdir /opt/tomcat
7. Download the tomcat tar
cd /tmp && wget http://www-us.apache.org/dist/tomcat/tomcat-9/v9.0.0.M6/bin/apache-tomcat-9.0.0.M6.tar.gz
8. Extract it to the /opt/tomcat directory.
tar xf apache-tomcat-9.0.0.M6.tar.gz -C /opt/tomcat/ --strip-components=1
9. The following files should be present in /opt/tomcat

10. Now you can easily run Tomcat in the background using the command ./bin/startup.sh&

11. A netstat -ntpl will show you Java running on port 8009 and 8080

12. A simple curl shoud give you a http 200 response

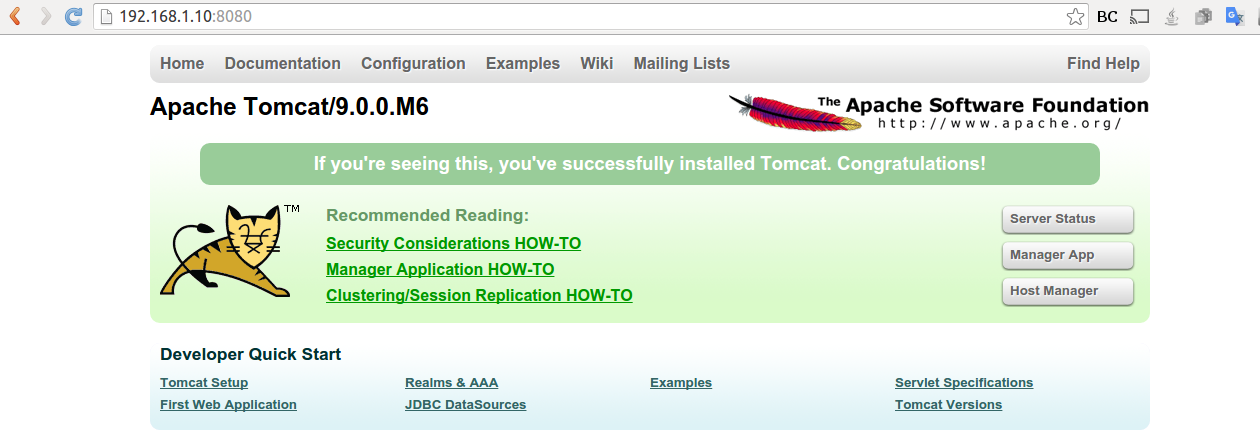
13. I am actually running Tomcat on a Virtual Box machine with IP 192.168.1.10. The Tomcat page should also appear on port 8080
14. Now that Tomcat is already running, lets deploy Jenkins on top of it. Jenkins is a 'war' file which you can download at the official website jenkins.io using the following command. In the webapps folder of your Tomcat, fire this command.
wget http://mirrors.jenkins-ci.org/war-stable/latest/jenkins.war
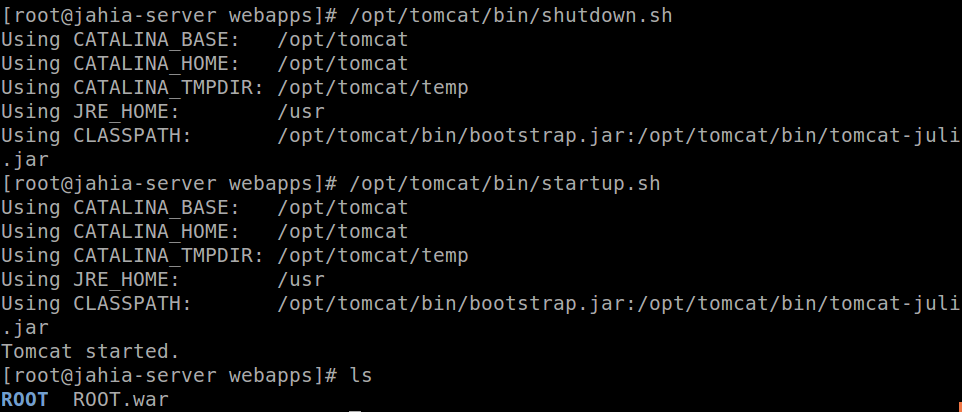
15. You can also clear or backup the webapps folder and deploy only the jenkins.war I have rename mine as ROOT.war. Then you will need to shutdown the tomcat server and start it anew. A folder called ROOT will be created where the jenkins files have been deployed.
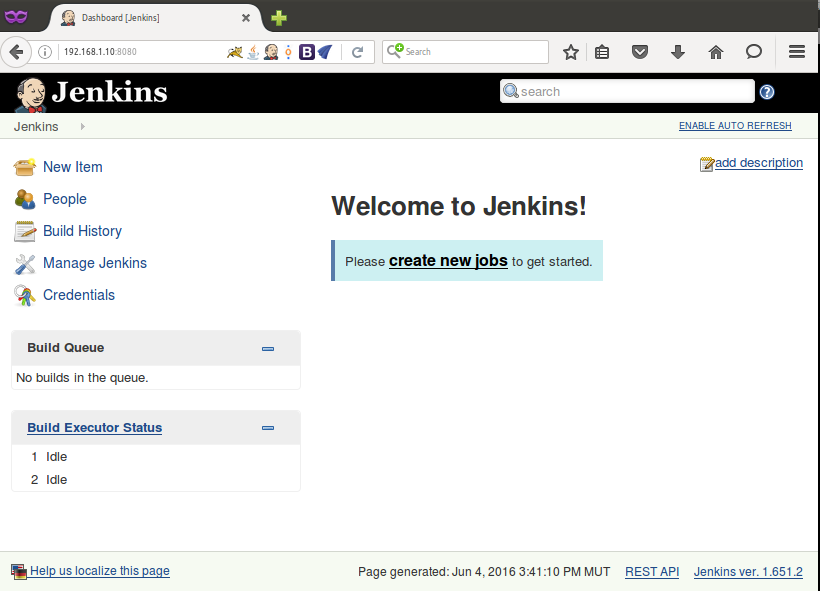
16. On the webpage port 8080, you can now accessed the Jenkins page and start playing around with it.
This post is dedicated to the basics installation. In some next post, i will into some details of Jenkins and Java applications analysis. Have fun :)
NOTE: I have updated this article after a hot conversation with Mr. Gaurav Verma on Facebook Linux group Thanks to him that some errors were corrected such as:
- The diagram which does not seem to be updated as there were still an outdated mechanism in my brain. It now fix my brain gap.
- Some years back, Tomcat was used for Java resources and apache was serving only static resources which is no longer the case.
- Another issue raised is that by default all ip addresses of the machine are binded to 0.0.0.0 [Any]. To connect on your machine localhost is not mandatory.