
The flexibility of Zerto Virtual Replication means that we have multiple options for data recovery depending on what's specifically needed in each use case. ZVR enables data mobility by adding offsite cloning to the toolkit. You have the ability to restore specific files and folders. Now if a critical folder is inadvertently erased, the clock can be rewind by saving time and money.
JLFR -Journal Level File Restore is a powerful feature that extends Zerto's protection features to allow recovery of individual files or folders. Restoring a file uses the same checkpoint system to facilitate point in time selection and recovery. Any files in the journal can be recovered with the journal sizing tool. JLFR requires NTFS or FAT and is thus Windows compatible only.
To restore a file, click on "Actions" and then on the "Restore File" button.
[caption id="attachment_1905" align="aligncenter" width="1195"]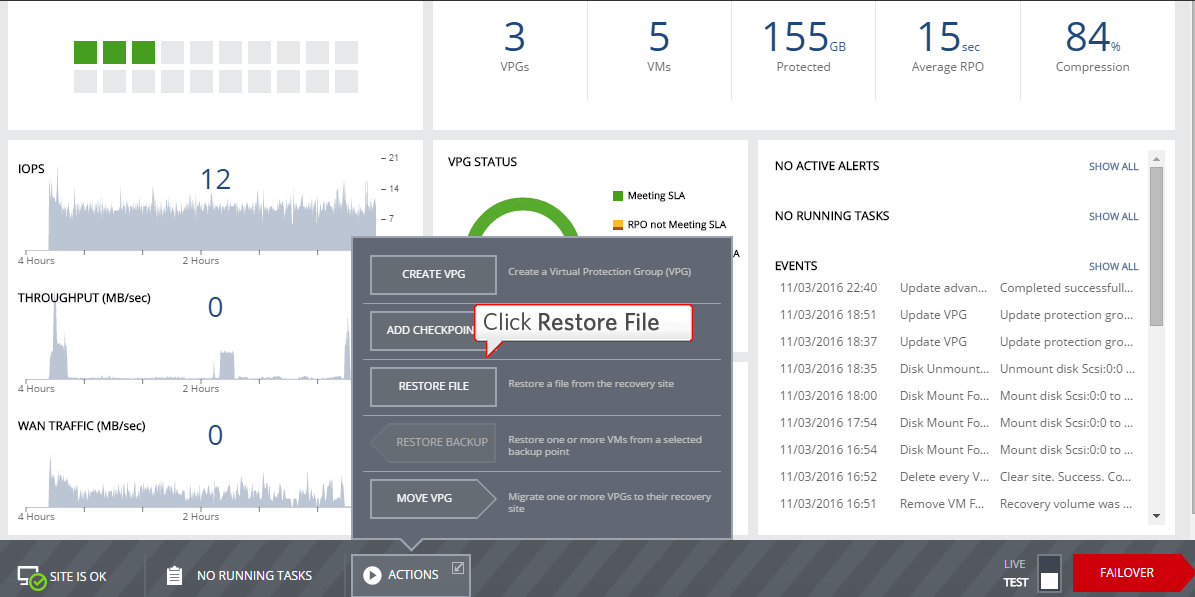
Select the ZFileServer and click on next
[caption id="attachment_1906" align="aligncenter" width="969"]
Files can be restored from the available checkpoints.
[caption id="attachment_1907" align="aligncenter" width="963"]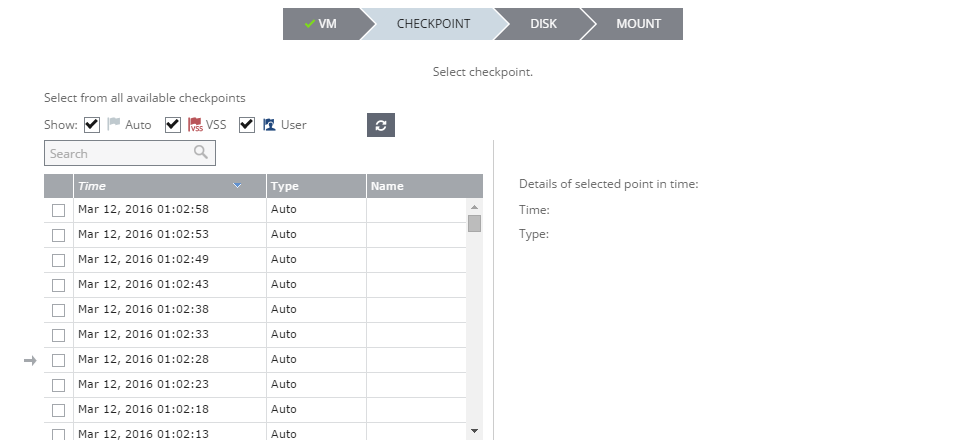
The disk need now to be mounted whether physical or virtual that stores the files or folders to recover. Only one disk at a time can be recovered.
[caption id="attachment_1908" align="aligncenter" width="968"]
After that, the mount process can start.
[caption id="attachment_1909" align="aligncenter" width="971"]
As usual, the running tasks will be shown running on the dashboard. There are few ways to start restoring files and folders from the mounted disk, including from the monitoring tab or the open folder icon on the right under the running tasks.
For example on the bottom, there is a tasks button.
[caption id="attachment_1910" align="aligncenter" width="1204"]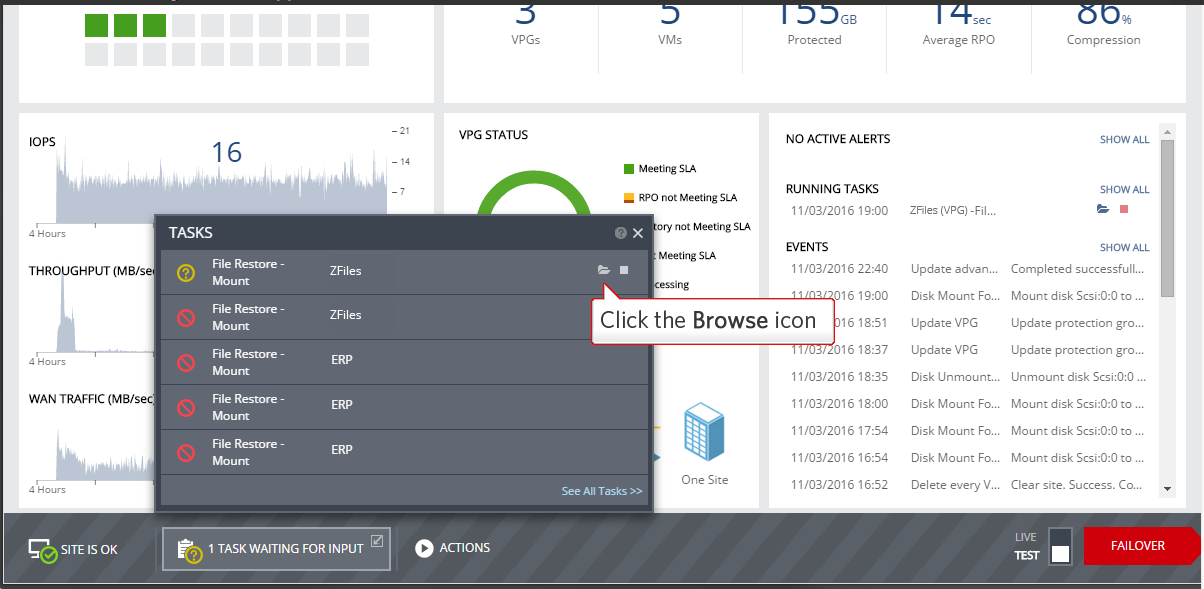
The browse button allows you to search for the files and restore it. Once finish click on the unmount button.
[caption id="attachment_1911" align="aligncenter" width="1203"]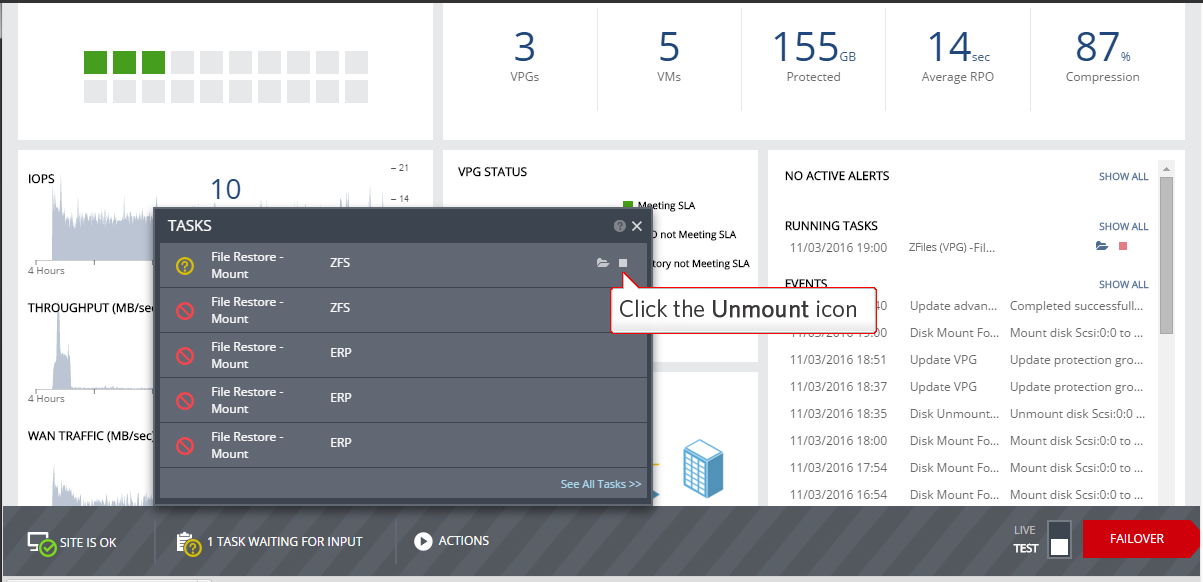
Another feature is cloning - Cloning will create a copy of the virtual machines saved to a specific point-in-time checkpoint.
By selecting the VPG name from the VPG tab which will open the VGS's name in another tab. Click on More then on offsite clone.
[caption id="attachment_1936" align="aligncenter" width="1198"]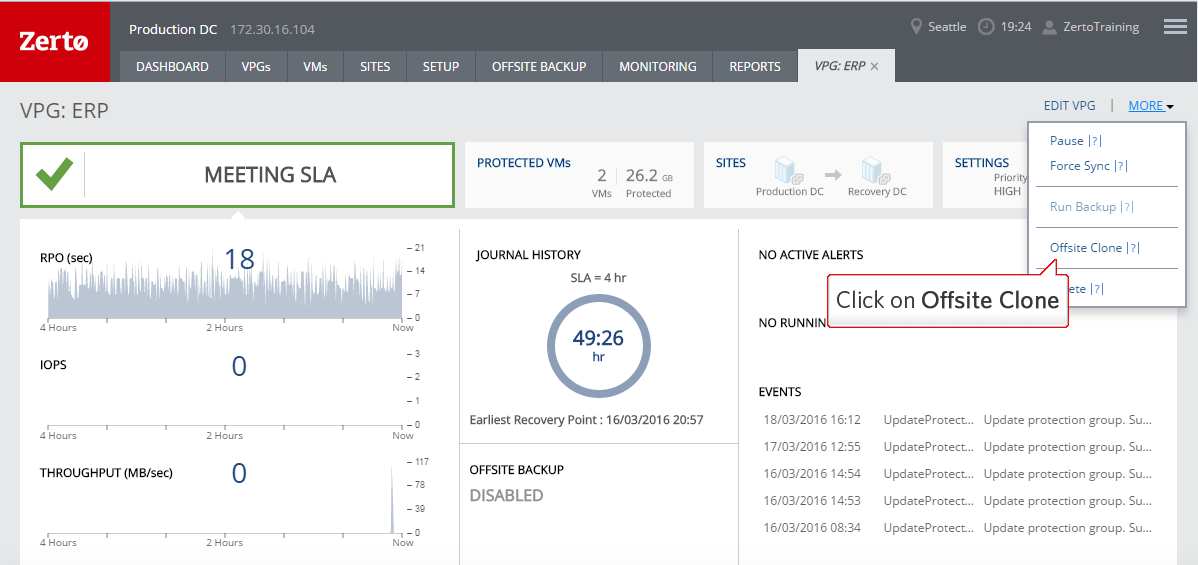
Once on the Offsite Clone tab, click on Select a checkpoint.
[caption id="attachment_1937" align="aligncenter" width="574"]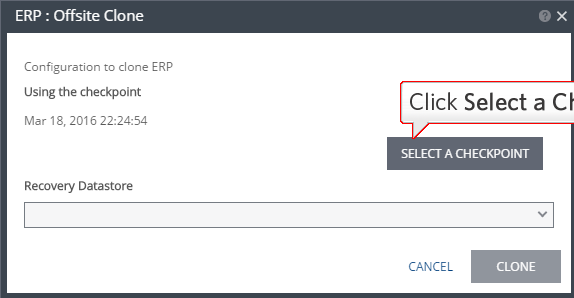
For example, by selecting the latest checkpoint and the name of the Datastore, we can start the cloning operation.
Another recovery option is the backup restore. This is done by clicking on Actions then on Restore Backup. Again from some options, few things need to be checked. By choosing the restore plan which is the name of the VRA, the restore point, VM settings and the Power On option.
[caption id="attachment_1938" align="aligncenter" width="1040"]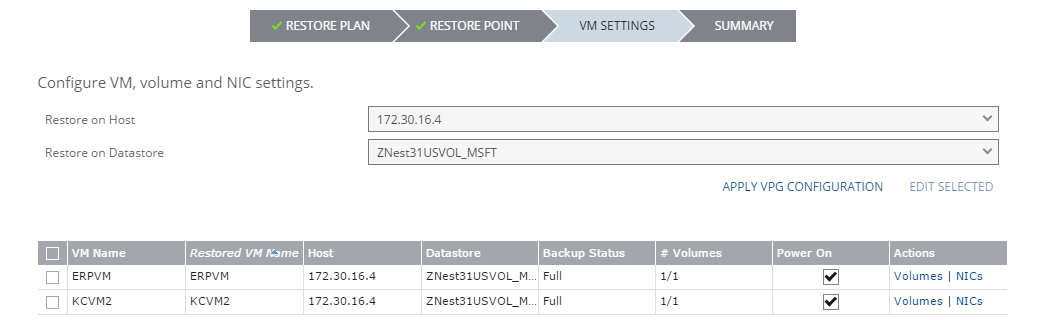
And finally the Restore Button
[caption id="attachment_1939" align="aligncenter" width="888"]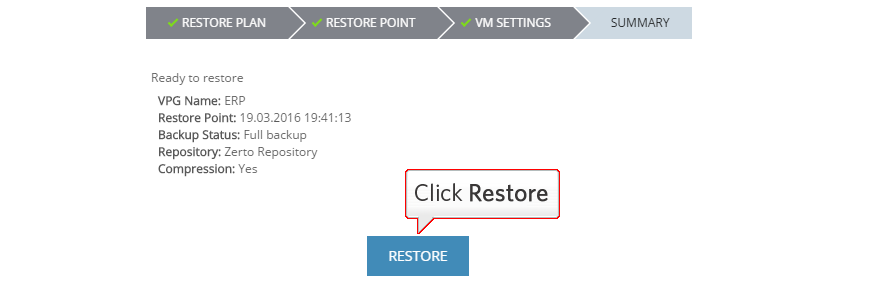
Restoring from backup allowed you to leverage scheduled and unscheduled backups that extend the protection offered by the journal. Cloning extends ZVR by giving you multiple copies of your machines as they looked at a very specific point in time. With the file restore feature, you can extend the functionality of ZVR across the full spectrum of disaster recovery options, ranging from recovery of an entire virtualized datacenter to recovery of just one single file.